This is the full developer documentation for Wallet SDK by Frak
# Wallet SDK by Frak
> Seamlessly integrate Web3 functionality into your applications with user-friendly wallet interactions, engagement tracking, and reward systems.
import IntegrationCards from "@/components/IntegrationCards.astro";
## Key Features
- Seamless on-chain user interactions
- Delegated sessions for gas-less transactions
- Customizable reward and referral systems
- React and vanilla JavaScript support
- Native Android and iOS SDKs
- Sign-In with Ethereum (SIWE) authentication
## Demos
- [JS SDK Integration](https://vanilla.frak-labs.com/): Very simple example with modals, interactions, and more.
## Community
- Twitter: [@frak_defi](https://twitter.com/frak_defi)
- Team: [@srod](https://twitter.com/srod), [@MViala](https://twitter.com/MViala), [@VirginieMaire](https://twitter.com/VirginieMaire), [@qnivelais](https://twitter.com/QNivelais)
- [Medium](https://medium.com/frak-defi)
- [GitHub](https://github.com/frak-id/wallet)
Join us in revolutionizing digital content engagement with Web3!
# Page not found
> That page does not exist, or it moved. The links below cover most of what people are looking for.
import { CardGrid, LinkCard } from '@astrojs/starlight/components';
If you followed a link from somewhere on this site, please
[open an issue](https://github.com/frak-id/wallet/issues/new) so we can fix it.
# Wallet SDK
> Seamless Web3 interactions for your applications
# Overview
Welcome to the Wallet SDK documentation!
The Wallet SDK provides developers with powerful tools to integrate seamless Web3 interactions into their applications, leveraging the user-friendly Frak Wallet.
## Frak Wallet
The Frak Wallet is a cutting-edge cryptocurrency wallet designed with a strong emphasis on user experience. Built using the latest technologies, including [Account Abstraction](https://eips.ethereum.org/EIPS/eip-4337) and [WebAuthn](https://w3c.github.io/webauthn/), the Frak Wallet simplifies the onboarding process and enhances Web3 interactions.
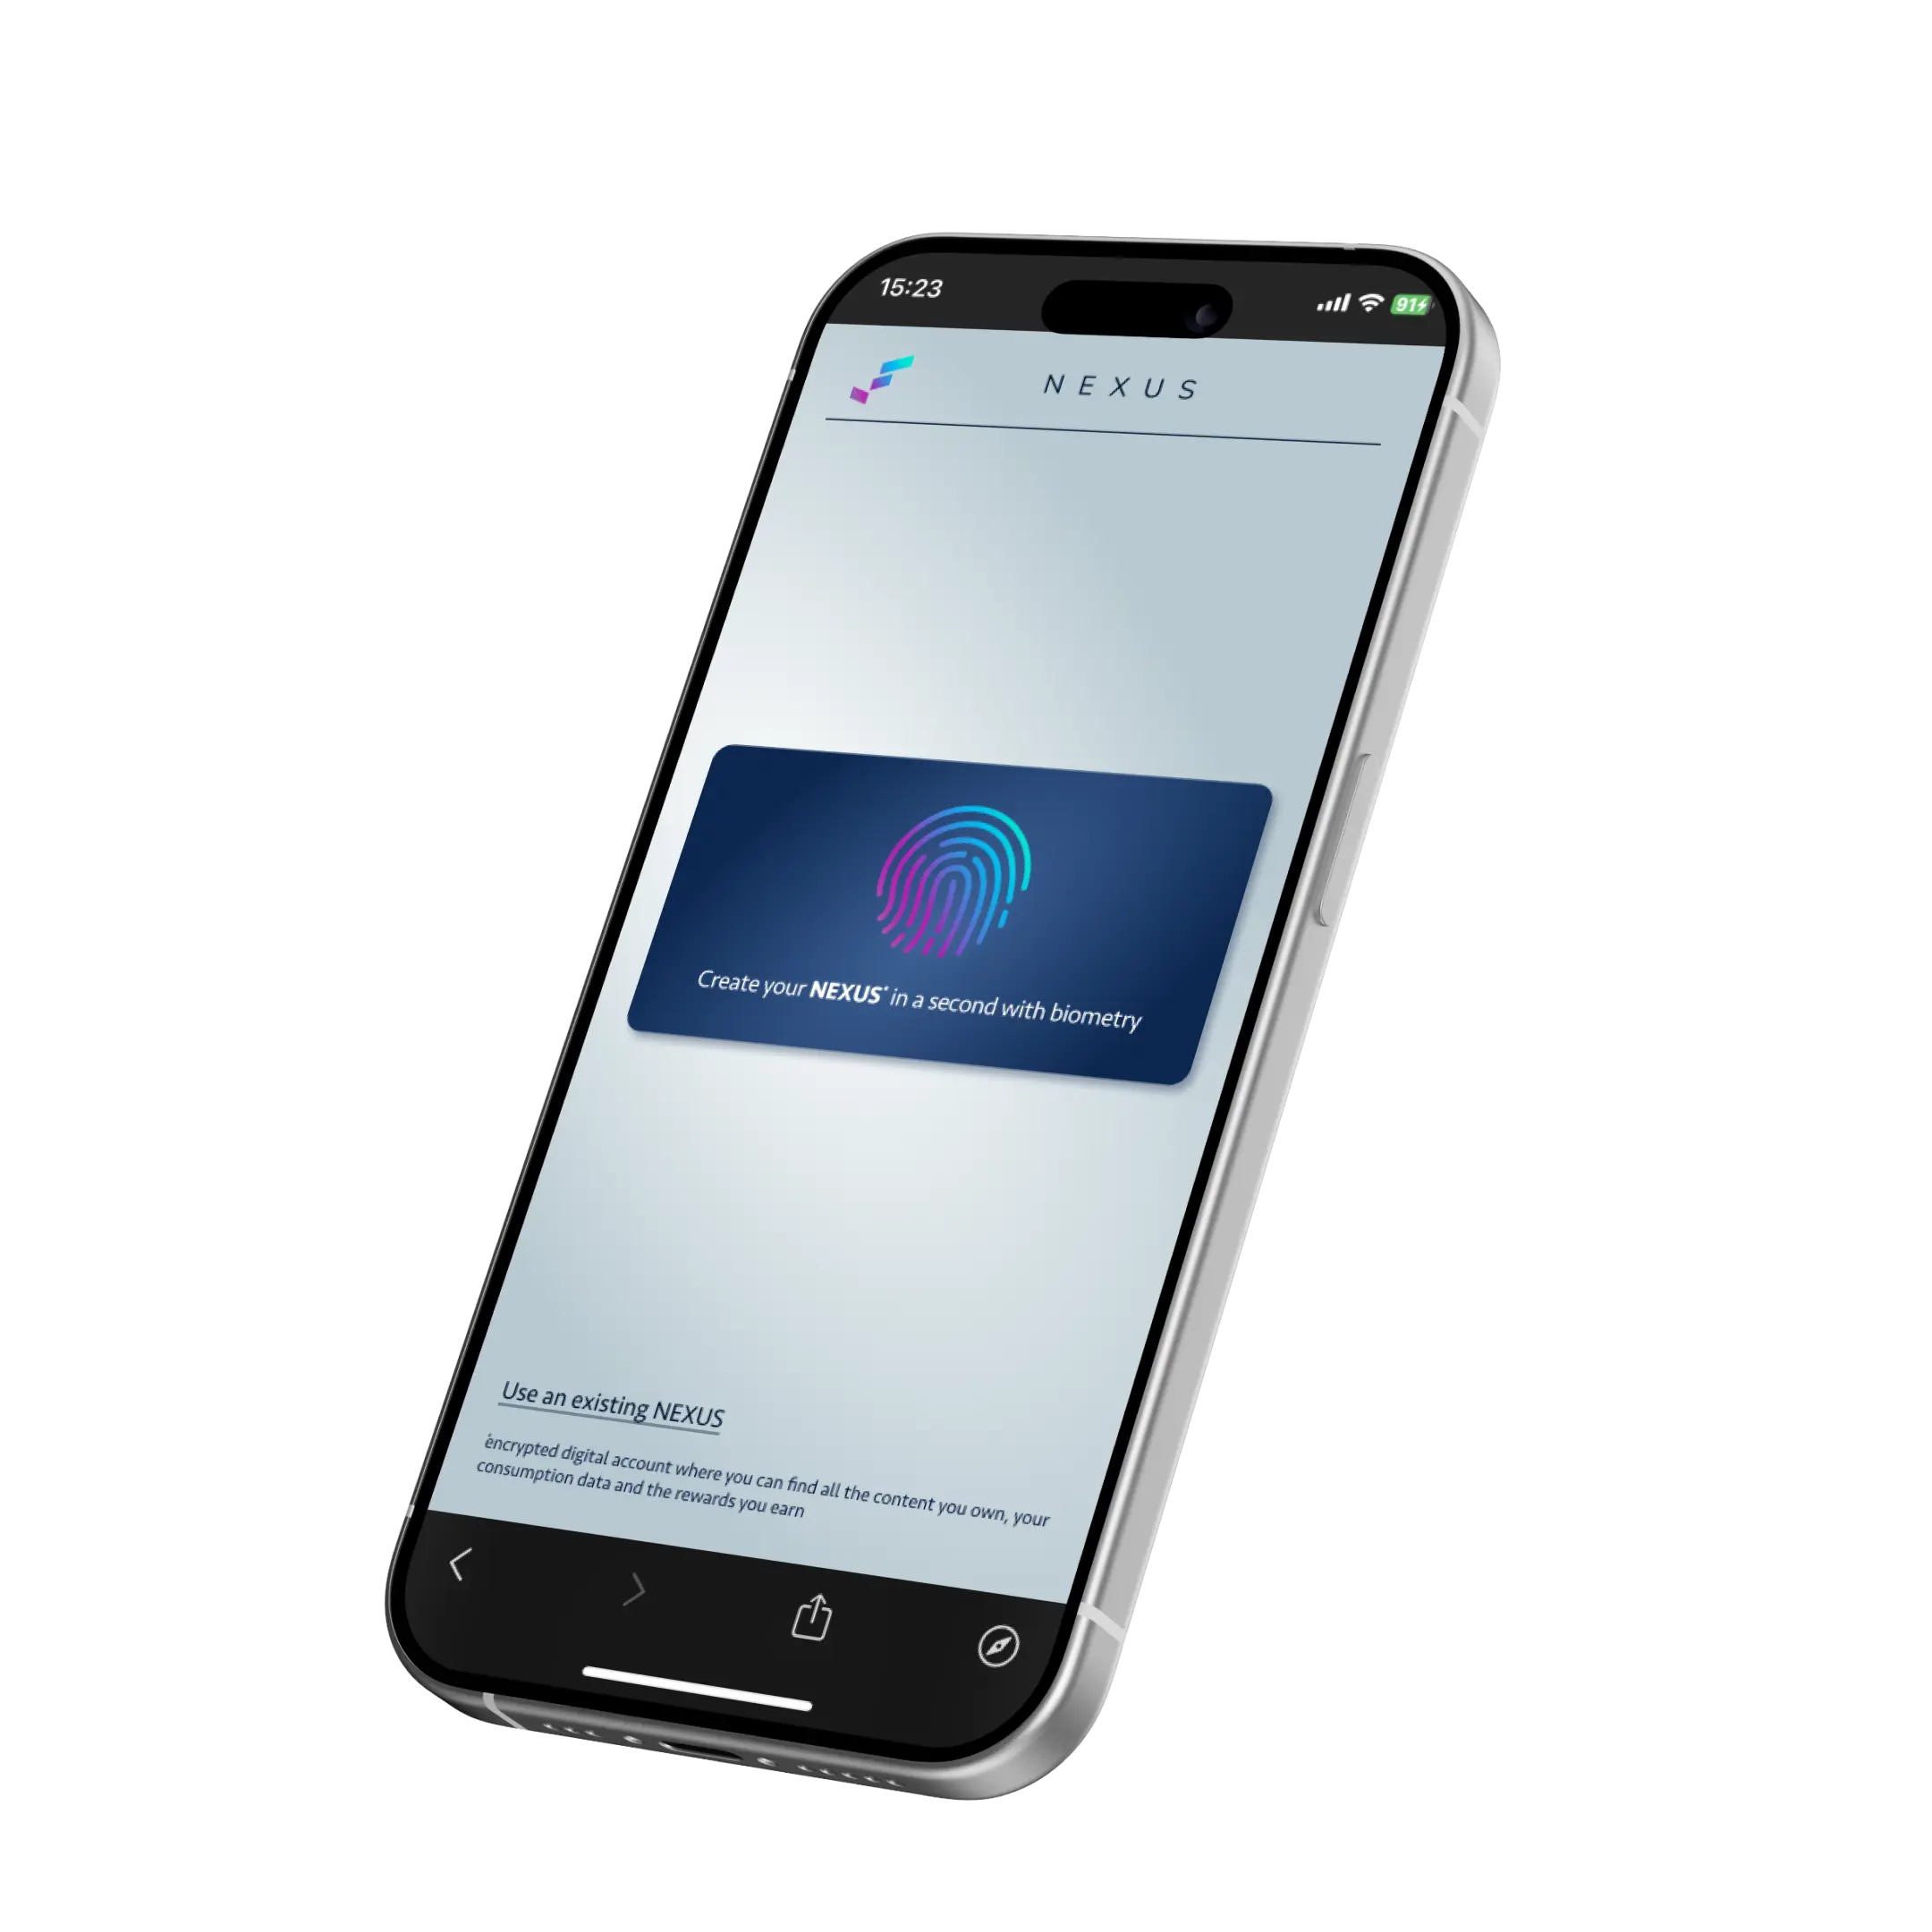
With the Frak Wallet, users can create an account using biometric authentication (fingerprint, facial recognition, etc.) and then seamlessly interact with decentralized applications (dApps). It eliminates the need for recovery phrases, pre-funded wallets for gas fees, and clunky browser extensions, providing a smooth and intuitive experience.
The Frak Wallet is fully compatible with the WalletConnect standard, ensuring compatibility with a wide range of dApps and Web3 services.
## Wallet SDK
The Wallet SDK is designed to streamline the integration of Web3 interactions into your applications, providing a comprehensive set of tools and features for various use cases.
### Key Features
1. **Seamless User Interactions**: Easily trigger on-chain events based on user actions within your application.
2. **Delegated User Sessions**: Implement gas-less transactions for your users, improving their experience.
3. **Reward Systems**: Set up and manage reward campaigns based on user interactions.
4. **Referral Tracking**: Implement and track referral-based campaigns with automatic reward distribution.
5. **Flexible Integration**: Works with React, vanilla JavaScript, and native [Android](/developers/integration/android/) and [iOS](/developers/integration/ios/) apps.
6. **Advanced Authentication**: Utilize Sign-In with Ethereum (SIWE) for secure, blockchain-based authentication.
### Use Cases
#### For Content Platforms
- **Engagement Tracking**: Record on-chain interactions when users engage with your content.
- **Reward Programs**: Automatically distribute rewards (tokens, NFTs, etc.) based on user engagement.
- **Referral Systems**: Implement blockchain-based referral programs, rewarding users for sharing your platform.
- **Community Building**: Use on-chain interactions to build a verifiable community around your content.
#### For dApp Developers
- **Smooth Onboarding**: Leverage Account Abstraction for a frictionless user onboarding experience.
- **Gasless Transactions**: Optionally cover gas fees for your users, reducing barriers to interaction.
- **Interaction Tracking**: Record user interactions on-chain for transparent and verifiable user activity.
- **Custom Reward Mechanisms**: Implement token or NFT-based rewards tied directly to in-app actions.
### Integration Benefits
By integrating the Wallet SDK, you can:
1. **Enhance User Experience**: Provide a seamless Web3 experience without the typical blockchain complexities.
2. **Increase Engagement**: Implement reward systems that encourage user participation and sharing.
3. **Build Trust**: Utilize blockchain technology for transparent and verifiable user interactions.
4. **Flexible Implementation**: Easily incorporate Wallet SDK into your existing Web3 setup, compatible with popular libraries like Wagmi.
5. **Future-Proof**: Stay ahead with the latest in blockchain technology, including Account Abstraction and WebAuthn.
The Wallet SDK empowers you to create decentralized, trustless, and user-friendly experiences while leveraging cutting-edge blockchain technologies. Whether you're building a content platform, a dApp, or any Web3-enabled application, the Wallet SDK provides the tools you need to implement robust, blockchain-based user interactions and reward systems.
# Track Purchase Endpoint
> API endpoint to register a purchase event for tracking
# Track Purchase Endpoint
## Summary
The track purchase endpoint registers a purchase event so the Frak backend can send `PurchaseCompleted` interactions automatically once the purchase is confirmed via webhook.
## Requirements
- At least one identity source: a Frak Wallet session (`x-wallet-sdk-auth`) **or** a client id (`x-frak-client-id`). Anonymous users are supported.
- A `merchantId` — resolved explicitly, from session storage, or via the merchant lookup API.
- Purchase details: `customerId`, `orderId`, and `token`.
## Endpoint
```http
POST /user/track/purchase
```
### Headers
- `Accept`: `application/json`
- `Content-Type`: `application/json`
- `x-wallet-sdk-auth` (optional): JWT token from the user SDK session. Obtain via [`watchWalletStatus`](/developers/references/core-sdk/actions/functions/watchwalletstatus/) (`status.interactionToken`).
- `x-frak-client-id` (optional): Unique client identifier for anonymous user tracking. At least one of `x-wallet-sdk-auth` or `x-frak-client-id` must be present.
### Request Body
The request body should be a JSON object with the following properties:
- `customerId` (`string | number`): The ID of the customer making the purchase. Should match the value sent during purchase validation.
- `orderId` (`string | number`): The ID of the order being placed. Should match the value sent during purchase validation.
- `token` (`string`): A unique token related to the purchase.
- `merchantId` (`string`): The merchant identifier. Resolved from the explicit parameter, `frak-merchant-id` in session storage, or the merchant lookup API.
#### Example Request Body
```json
{
"customerId": "123456",
"orderId": "987654",
"token": "unique-token-value",
"merchantId": "your-merchant-id"
}
```
## Usage Example
Using the SDK (recommended):
```js
import { trackPurchaseStatus } from "@frak-labs/core-sdk/actions";
await trackPurchaseStatus({
customerId: checkout.order.customer.id,
orderId: checkout.order.id,
token: checkout.token,
merchantId: "your-merchant-id",
});
```
Direct `fetch` call:
```js
const interactionToken = window.sessionStorage.getItem("frak-wallet-interaction-token");
const clientId = localStorage.getItem("frak-client-id");
const headers = {
'Accept': 'application/json',
'Content-Type': 'application/json',
};
if (interactionToken) headers['x-wallet-sdk-auth'] = interactionToken;
if (clientId) headers['x-frak-client-id'] = clientId;
const payload = {
customerId: checkout.order.customer.id,
orderId: checkout.order.id,
token: checkout.token,
merchantId: "your-merchant-id",
};
fetch('https://backend.frak.id/user/track/purchase', {
method: 'POST',
headers,
body: JSON.stringify(payload),
});
```
## Response
The endpoint responds with an acknowledgment of whether the purchase registration was successful.
## Related SDK Method
- [`trackPurchaseStatus`](/developers/references/core-sdk/actions/functions/trackpurchasestatus/) — wrapper around this endpoint with automatic merchant id resolution and identity header management.
## Notes
- `merchantId` is required. The SDK resolves it automatically from: explicit param → `frak-merchant-id` in session storage → backend lookup.
- At least one identity header (`x-wallet-sdk-auth` or `x-frak-client-id`) must be present. The SDK skips the request if neither is available.
- Ensure `customerId`, `orderId`, and `token` values match between the client and the purchase validation webhooks.
# Purchase Webhooks
> API webhooks to track and validate purchase events
import { Tabs, TabItem } from "@astrojs/starlight/components";
# Purchase Webhooks
## Summary
The purchase webhooks allow your application to validate purchase events and automatically trigger the `PurchaseCompleted` interaction, which could potentially lead to user rewards based on active campaigns. The webhooks also update the on-chain purchase oracle for your merchant, allowing you to know whether a purchase has been finalized. All purchase data is anonymized, and the oracle is updated with a Merkle tree root where each leaf contains a hashed `purchaseId`, `userId`, and the purchase finality status.
## Available Webhooks
We provide three types of webhooks to handle purchase tracking:
1. **Shopify Webhook**
2. **WooCommerce Webhook**
3. **Custom Webhook**
### Shopify Webhook
The Shopify webhook should be set up to trigger on order updates, allowing the backend to validate purchases and update the oracle. It is provisioned automatically by the official Frak Shopify app during onboarding — see the [Shopify Integration Guide](/guides/shopify) for details.
### WooCommerce Webhook
Similar to the Shopify webhook, the WooCommerce webhook is provisioned automatically by the Frak WordPress plugin once the webhook secret is pasted in. Follow the [WordPress integration guide](/guides/platforms/wordpress/details/#order-tracking-with-woocommerce) to properly set it up.
### Custom Webhook
The Custom webhook is designed for applications that use a custom eCommerce solution or need more flexibility. This webhook requires specific headers and a payload to register the purchase event.
#### Endpoint
The specific endpoint URL for each webhook type is visible in the business dashboard under the `Purchase Tracker` section of your merchant.
#### Headers
- **`x-hmac-sha256`**: A HMAC SHA-256 digest of the entire request body. The HMAC is computed using the secret available in your business dashboard.
- **`x-test`**: Indicates if the webhook call is for a test order. This is useful for development environments.
#### Request Body
The body of the Custom webhook should be a JSON object that follows the `CustomWebhookDto` type:
```ts
type CustomWebhookDto = Readonly<{
/**
* Id of the order on your side (external order id)
*/
id: string;
/**
* Id of the customer on your side (external customer id)
*/
customerId: string;
/**
* Status of the order
*/
status: "pending" | "confirmed" | "cancelled" | "refunded";
/**
* Custom token for this order
* - Should be the same one as the one exposed to the end user and submitted through the `listenForPurchase` API method
*/
token: string;
/**
* Currency code (ISO 4217)
* - Optional, could be empty
* - Recommended for the UX in the members space
*/
currency?: string;
/**
* The total price of the order, in the currency provided
* - Optional, could be empty
* - Recommended for the UX in the members space
*/
totalPrice?: string;
/**
* All the items in the order
* - Optional
* - Will be used in the wallet members space, to display additional data to the end user, e.g. which product they referee bought the most
*/
items?: {
/**
* The product id on your side
*/
productId: string;
/**
* The quantity of the product in the order
*/
quantity: number;
/**
* The price of the product
*/
price: string;
/**
* An internal name for the product, used in url slug
*/
name: string;
/**
* The displayable title of the product
*/
title: string;
/**
* The SKU of the product, if you have one
* - Optional
* - Used for SKU-based campaign product-scope matching
*/
sku?: string;
/**
* A potential image URL for the product
*/
image?: string;
}[];
}>;
```
:::tip[Product-scoped campaigns]
Provide `sku` on each item whenever you can. It is the identifier used to match a purchase against product-scoped campaigns, so items sent without a SKU cannot be matched by SKU-based campaign rules.
:::
### Example
Here is a few custom webhook calls in different languages:
```ts
import crypto from 'crypto';
type Purchase = {
id: string;
customerId: string;
status: "pending" | "confirmed" | "cancelled" | "refunded";
token: string;
currency?: string;
totalPrice?: string;
items?: {
productId: string;
quantity: number;
price: string;
name: string;
title: string;
sku?: string;
image?: string;
}[];
}
async function sendPurchaseWebhook(
purchase: Purchase
): Promise {
const body = JSON.stringify(purchase);
const hmac = await crypto
.createHmac('sha256', process.env.FRAK_PURCHASE_WEBHOOK_SECRET)
.update(body)
.digest('hex');
await fetch(process.env.FRAK_PURCHASE_WEBHOOK, {
method: 'POST',
headers: {
'Content-Type': 'application/json',
'x-hmac-sha256': hmac,
'x-test': process.env.NODE_ENV === 'production' ? 'false' : 'true'
},
body
});
}
// Usage example
const purchase = {
id: 'order_123',
customerId: 'cust_456',
status: 'confirmed',
token: 'purchase_token_789',
currency: 'USD',
totalPrice: '99.99',
items: [{
productId: 'prod_001',
quantity: 1,
price: '99.99',
name: 'premium-subscription',
title: 'Premium Subscription',
sku: 'SKU-PREMIUM-001'
}]
};
sendPurchaseWebhook(purchase)
.then(response => console.log('Webhook sent successfully:', response))
.catch(error => console.error('Error sending webhook:', error));
```
```php
function sendPurchaseWebhook(array $purchase): void {
$webhookUrl = 'your_webhook_url_from_dashboard';
$secretKey = 'your_secret_key_from_dashboard';
$isTest = true; // Set to false in production
$body = json_encode($purchase);
$hmac = hash_hmac('sha256', $body, $secretKey);
$ch = curl_init($webhookUrl);
curl_setopt_array($ch, [
CURLOPT_POST => true,
CURLOPT_POSTFIELDS => $body,
CURLOPT_RETURNTRANSFER => false,
CURLOPT_HTTPHEADER => [
'Content-Type: application/json',
'x-hmac-sha256: ' . $hmac,
'x-test: ' . ($isTest ? 'true' : 'false')
]
]);
curl_exec($ch);
curl_close($ch);
}
// Usage example
$purchase = [
'id' => 'order_123',
'customerId' => 'cust_456',
'status' => 'confirmed',
'token' => 'purchase_token_789',
'currency' => 'USD',
'totalPrice' => '99.99',
'items' => [
[
'productId' => 'prod_001',
'quantity' => 1,
'price' => '99.99',
'name' => 'premium-subscription',
'title' => 'Premium Subscription',
'sku' => 'SKU-PREMIUM-001'
]
]
];
sendPurchaseWebhook($purchase);
```
## HMAC Signature
Each webhook request should include a valid HMAC signature of the entire body payload, ensuring the request's integrity and authenticity. The secret used to generate this HMAC signature is available in your business dashboard.
## Response
All webhook types expect a JSON response indicating whether the request was successfully processed.
## Notes
- Ensure that the `id`, `customerId`, `status`, and `token` fields are consistent between the client and the server to ensure successful tracking.
- The webhooks automatically update the on-chain purchase oracle, which anonymously tracks the purchase finality status.
- You can find the specific webhook URL for your merchant in the business dashboard, under the `Purchase Tracker` section of your merchant.
# Getting Started with Frak Components
> Learn how to set up and start using Frak Components in your project
# Getting Started with Frak Components
This guide will walk you through the process of setting up and using Frak Components in your project.
You can find examples of Frak Components at [https://showcase.frak.id/](https://showcase.frak.id/).
## Prerequisites
Before you begin, ensure you have:
- A modern web browser
- Basic knowledge of HTML and JavaScript
## 1. Register Your Merchant
:::note
Merchant registration is a crucial step that enables key functionalities of Frak Components.
:::
Before using Frak Components, you need a merchant account on the Frak Business Platform:
1. Visit [https://business.frak.id/](https://business.frak.id/)
2. Sign up or log in to your account — your main storefront domain is registered automatically at sign-up.
3. (Optional) If your site lives on a subdomain different from the registered main domain, add it under **Allowed Domains** on the dashboard.
For a detailed walkthrough, see our [Business Registration Guide](/guides/dashboard/register/).
## 2. Setup the Frak Components
Once your merchant is set up, install Frak Components in your project.
Add the following script tag to your HTML file. `sdk.frak.id` is Frak's first-party CDN pointer;
see the [CDN / Browser integration guide](/developers/integration/cdn/) for the full setup with
preconnect hints and a jsDelivr fallback:
```html
```
## 3. Basic Configuration
After setup, you need to add a `config` object by assigning a global variable `FrakSetup`.
You can generate a config object using the [Frak SDK Builder](https://showcase.frak.id/configuration).
```html
```
More information about the [FrakSetup](/developers/components/frak-setup) object.
## 4. Add Components
Now you can start adding Frak Components to your project. Here's an example of how to add a share button:
```html
```
That's it! You've successfully set up and started using Frak Components in your project.
## Next Steps
Now that you're set up, you can explore components and customize them to fit your project requirements:
- [Share Button](/developers/components/share-button)
- [Banner](/developers/components/banner)
- [Post-Purchase](/developers/components/post-purchase)
- [Open In App](/developers/components/open-in-app)
- [FrakSetup Configuration](/developers/components/frak-setup)
You can also explore our [Wallet SDK](/developers) documentation for more advanced features and customization options.
# Banner Component
> Display referral and in-app browser banners on your website
# Banner
## Summary
The `` component displays contextual banners on your website. It automatically detects the user's context and shows one of two variants:
- **Referral banner** — Promotes sharing and rewards to eligible users.
- **In-app browser banner** — Prompts users browsing in an in-app browser (Instagram, TikTok, etc.) to open the page in their default browser for a better experience. This variant is opt-in: enable it with the `allowInappRedirect` attribute.
## Requirements
- An initialized `FrakSetup` configuration object
More information about the [FrakSetup](/developers/components/frak-setup) object.
## Parameters
| Attribute | Type | Description |
|-----------|------|-------------|
| `placement` | `string` | Placement ID for [backend-driven configuration](/developers/concepts/placements). |
| `classname` | `string` | CSS class names applied to the root element. |
| `interaction` | `string` | Filter rewards by interaction type (e.g. `"purchase"`, `"referral"`). When omitted, the best reward across all types is shown. |
| `referralTitle` | `string` | Override the referral banner title. |
| `referralDescription` | `string` | Override the referral banner description. |
| `referralCta` | `string` | Override the referral banner CTA button text. |
| `inappTitle` | `string` | Override the in-app browser banner title. |
| `inappDescription` | `string` | Override the in-app browser banner description. |
| `inappCta` | `string` | Override the in-app browser banner CTA button text. |
| `imageUrl` | `string` | Override the image shown on the left of the referral banner. Falls back to the built-in gift icon when omitted. |
| `preview` | `string` | When set, forces the banner to render in preview mode (e.g. in Shopify theme editor). |
| `previewMode` | `"referral"` \| `"inapp"` | Which variant to preview. Only used when `preview` is set. Defaults to `"referral"`. |
| `allowInappRedirect` | `boolean` \| `"true"` \| `"false"` | Allow the banner to switch to in-app browser mode and prompt users to open the system browser. Opt-in, defaults to `false`. |
## Usage Examples
### Basic Banner
```html
```
### With Custom Referral Text
```html
```
### With In-App Browser Text
```html
```
### With Placement
```html
```
Banner text and styling are resolved from the [placement configuration](/developers/concepts/placements) set in the business dashboard.
### With Custom Class
```html
```
### Preview Mode (Theme Editors)
When building a theme editor integration (e.g. Shopify), use `preview` to render static content without requiring an active SDK connection:
```html
```
## CSS
Target the component using the `frak-banner` selector:
```css
frak-banner .override {
background-color: #f5f5f5;
border-radius: 8px;
}
```
Component-specific CSS can also be configured via [placements](/developers/concepts/placements) in the business dashboard.
# FrakSetup object
> Learn how to configure the Frak Setup object in your project
# `FrakSetup` object
The `FrakSetup` object is used to configure the Frak Components library in your project. It allows you to set up metadata and other configuration options for your application.
It is required to initialize the Frak Components library and should be passed as a global variable in your project.
You can generate a config object using the [Frak SDK Builder](https://showcase.frak.id/configuration).
## `config` object
The `config` object is used to configure the Frak Components library. It allows you to set up metadata about your application, such as the name and CSS styles.
```ts twoslash title="TypeScript"
// @noErrors
// [!include ~/snippets/types/FrakWalletSdkConfig.ts]
window.FrakSetup = {
config: FrakWalletSdkConfig;
}
```
### Example
```js twoslash title="JavaScript"
window.FrakSetup = {
config: {
metadata: {
name: "My Awesome dApp",
merchantId: "550e8400-e29b-41d4-a716-446655440000",
lang: "fr",
currency: "eur"
},
customizations: {
css: "https://my-app.com/frak-styles.css",
},
domain: "my-app.com"
},
};
```
For more detailed `config` options, see our [FrakWalletSdkConfig](/developers/references/core-sdk/index/type-aliases/frakwalletsdkconfig/).
## `modalWalletConfig` object
:::caution[Deprecated in components 1.2.0]
`modalWalletConfig` configured the embedded wallet drawer, a surface removed in components 1.2.0. The object is
still read, but narrowed to one property: `metadata.position`, which anchors ``
to one side. Everything else is ignored.
:::
```js twoslash title="JavaScript"
window.FrakSetup = {
config: {
metadata: {
name: "My Awesome dApp",
},
},
modalWalletConfig: { // [!code focus]
metadata: { position: "right" }, // [!code focus]
}, // [!code focus]
};
```
It is kept because integrations in the wild — notably the Magento module — still inject it to pick
the button side. New integrations should set the position through the
[placement configuration](/developers/concepts/placements) instead.
# Open In App Component
> Redirect users from in-app browsers to the system browser
# Open In App
## Summary
The `` component renders a button that redirects users from in-app browsers (Instagram, TikTok, Facebook, etc.) to the device's default browser. This ensures a better user experience for features like WebAuthn authentication that don't work well in WebViews.
:::note
This component only renders on mobile devices. On desktop, it returns nothing.
:::
## Requirements
- An initialized `FrakSetup` configuration object
More information about the [FrakSetup](/developers/components/frak-setup) object.
## Parameters
| Attribute | Type | Default | Description |
|-----------|------|---------|-------------|
| `text` | `string` | `"Open in App"` | Text to display on the button. |
| `placement` | `string` | — | Placement ID for [backend-driven configuration](/developers/concepts/placements). |
| `classname` | `string` | — | CSS class names applied to the root element. |
## Usage Examples
### Basic Button
```html
```
### With Custom Text
```html
```
### With Placement
```html
```
### With Custom Class
```html
```
## CSS
Target the component using the `frak-open-in-app` selector:
```css
frak-open-in-app .override {
background-color: #1a1a1a;
color: #fff;
border-radius: 8px;
}
```
Component-specific CSS can also be configured via [placements](/developers/concepts/placements) in the business dashboard.
# Post-Purchase Component
> Display a sharing prompt after a purchase to drive referrals
# Post-Purchase
## Summary
The `` component is designed for checkout confirmation pages. It displays a sharing prompt to buyers, encouraging them to share the product with friends. The component adapts its message based on whether the user is a **referrer** (existing advocate) or a **referee** (was referred by someone).
## Requirements
- An initialized `FrakSetup` configuration object
- Purchase tracking data (customer ID, order ID, and token) for attribution
More information about the [FrakSetup](/developers/components/frak-setup) object.
## Parameters
| Attribute | Type | Description |
|-----------|------|-------------|
| `customerId` | `string` | Merchant customer ID for purchase tracking. All three tracking props (`customerId`, `orderId`, `token`) must be present for tracking to fire. |
| `orderId` | `string` | Merchant order ID for purchase tracking. |
| `token` | `string` | Checkout token for purchase tracking. |
| `sharingUrl` | `string` | Base URL to share. Falls back to the merchant domain when omitted. |
| `merchantId` | `string` | Override the merchant ID resolved from SDK config. |
| `placement` | `string` | Placement ID for [backend-driven configuration](/developers/concepts/placements). |
| `classname` | `string` | CSS class names applied to the root element. |
| `variant` | `"referrer"` \| `"referee"` | Force a display variant instead of relying on backend evaluation. |
| `badgeText` | `string` | Label for the badge pill above the message. Hidden when omitted. |
| `referrerText` | `string` | Override the message shown to referrers. Use `{REWARD}` as placeholder. |
| `refereeText` | `string` | Override the message shown to referees. Use `{REWARD}` as placeholder. |
| `ctaText` | `string` | Override the CTA button text. Use `{REWARD}` as placeholder. |
| `imageUrl` | `string` | Override the image shown on the left of the card. Falls back to the built-in gift icon when omitted. |
| `products` | `string` | JSON-stringified array of product cards forwarded to the sharing page when the CTA is clicked (set the JS `products` property for a real array). |
| `preview` | `string` | Render in preview mode (e.g. Shopify/WordPress theme editor): bypasses the client-ready gate and no-ops the click handler. |
| `previewVariant` | `"referrer"` \| `"referee"` | Which variant to show when `preview` is set. Defaults to `"referrer"`. |
## Usage Examples
### Basic Post-Purchase
```html
```
### With Custom Text
```html
```
### With Placement
```html
```
Text and styling are resolved from the [placement configuration](/developers/concepts/placements) set in the business dashboard.
### With Custom Sharing URL
```html
```
### Force a Variant
```html
```
## Purchase Tracking
The component supports automatic purchase tracking when all three tracking attributes are provided:
- `customerId` — Your internal customer identifier
- `orderId` — The order/transaction identifier
- `token` — A checkout token for verification
:::tip
All three attributes must be present for purchase tracking to fire. If any is missing, the component still renders the sharing prompt but doesn't track the purchase.
:::
## CSS
Target the component using the `frak-post-purchase` selector:
```css
frak-post-purchase .override {
background-color: #f0fdf4;
border-radius: 12px;
padding: 24px;
}
```
Component-specific CSS can also be configured via [placements](/developers/concepts/placements) in the business dashboard.
# Share Button Component
> Learn how to use the Share Button component in your web project
# Share Button
## Summary
The `` component opens a modal in the Frak Wallet interface with configurable steps, allowing for complex user interactions such as login, opening session and share.
## Requirements
- An initialized `FrakSetup` configuration object
More information about the [FrakSetup](/developers/components/frak-setup) object.
### Parameters
| Attribute | Type | Default | Description |
|-----------|------|---------|-------------|
| `text` | `string` | `"Share and earn!"` | Text to display on the button. Include the `{REWARD}` placeholder to opt into the live reward flow (the SDK substitutes the estimated reward amount). |
| `classname` | `string` | — | CSS class names applied to the button. |
| `placement` | `string` | — | Placement ID for [backend-driven configuration](/developers/concepts/placements). |
| `clickAction` | `string` | `"sharing-page"` | Kept for backwards compatibility; every click opens the sharing page. Legacy values (`"embedded-wallet"`, `"share-modal"`) are accepted and routed there, and the resolved value is reported on the `share_button_clicked` event. |
| `noRewardText` | `string` | — | Fallback text used when `text` contains `{REWARD}` but no reward is available. |
| `targetInteraction` | `string` | — | Target interaction type used to calculate the displayed reward. |
| `preview` | `string` | — | Render in preview mode (e.g. Shopify/WordPress theme editor): the button stays visually enabled and the click handler is a no-op. |
## Usage Examples
### Basic Share Button
```html
```
### With Custom Text
```html
```
### With Custom Class
```html
```
### With Reward Display
Include the `{REWARD}` placeholder in `text` to display the live estimated reward. Provide `noRewardText` as a fallback for when no reward is available.
```html
```
### With Click Action
Every click opens the sharing page. `clickAction` no longer selects a surface — the embedded wallet and the share modal were both retired in components 1.2.0 — but it stays accepted so a stored merchant config keeps working:
```html
```
### With Placement
```html
```
Button text, click action, and styling are resolved from the [placement configuration](/developers/concepts/placements) set in the business dashboard. HTML attributes override placement settings.
## CSS
CSS can be used to style the button.
Some default styles are applied to the button, but they can be overridden with custom CSS.
Target the component using the `frak-button-share .override` selector.
```css
frak-button-share .override {
background-color: #000;
color: #fff;
}
```
Component-specific CSS can also be configured via [placements](/developers/concepts/placements) in the business dashboard.
# Core Concepts of Wallet SDK
> Understanding the fundamental concepts and components of the Wallet SDK
# Core Concepts
The Wallet SDK provides a powerful set of tools for integrating Web3 functionality into your applications. To effectively use the SDK, it's important to understand its core concepts. This section will introduce you to the key ideas behind the Wallet SDK.
## Key Concepts
1. [Configuration](/developers/concepts/configuration)
Learn how to set up and customize the Wallet SDK for your specific needs.
2. [Interactions](/developers/concepts/interactions)
Explore the concept of user interactions and how they form the basis of the Wallet SDK's functionality.
3. [Backend-Driven Configuration](/developers/concepts/backend-configuration)
Learn how the SDK automatically resolves merchant configuration from the Frak backend.
4. [Placements](/developers/concepts/placements)
Understand how to use placements to customize SDK behavior per page or section of your website.
## Understanding the Flow
The Wallet SDK operates on a simple yet powerful flow:
1. **Configuration**: You set up the SDK with your specific parameters.
2. **Delegated Session**: A session is created, allowing for gasless transactions.
3. **User Interactions**: As users interact with your application, you track these interactions using the SDK.
4. **On-chain Recording**: These interactions are recorded on the blockchain, providing a transparent and verifiable record.
5. **Rewards and Campaigns**: Based on these interactions, you can trigger rewards or manage campaigns.
## Key Features
- **Seamless Integration**: The SDK is designed to work smoothly with both React and vanilla JavaScript applications.
- **Interaction Tracking**: Easily record user engagements and actions on the blockchain.
- **Reward Systems**: Implement token or NFT-based reward programs tied to user interactions.
- **Gasless Transactions**: Cover gas fees for your users, reducing barriers to interaction.
- **Referral Programs**: Set up and manage blockchain-based referral systems.
By understanding these core concepts, you'll be well-equipped to leverage the full power of the Wallet SDK in your applications. Dive into each concept to learn more about how they work and how to implement them in your projects.
:::note
For specific implementation details, please refer to the [Getting started](/guides) guides.
:::
# Backend-Driven Configuration
> Learn how the SDK dynamically resolves configuration from the Frak backend
# Backend-Driven Configuration
The Frak SDK supports dynamic configuration resolved from the backend. When your application initializes, the SDK fetches your merchant configuration from the Frak backend based on your domain. This means you can manage branding, translations, component settings, and [placements](/developers/concepts/placements) directly from the [business dashboard](/guides/dashboard) without redeploying your application.
## How It Works
1. **SDK Initialization** — When the SDK starts, it calls the Frak backend's resolve endpoint with your domain.
2. **Merchant Resolution** — The backend identifies your merchant account and returns the associated configuration.
3. **Config Merging** — The resolved backend config is merged with your local SDK config. Backend values take priority over local values.
4. **Reactive Updates** — Components automatically re-render when the backend configuration is resolved.
```
Your Website Frak Backend
| |
| GET /resolve?domain=... |
|------------------------------>|
| |
| { merchantId, sdkConfig } |
|<------------------------------|
| |
| Components update reactively |
| |
```
## Configuration Priority
The SDK merges configuration from multiple sources. When the same setting exists at multiple levels, the highest-priority source wins:
1. **Backend config** (highest priority) — Set in the business dashboard
2. **SDK static config** — Passed in your `FrakWalletSdkConfig` object
3. **Defaults** — Built-in SDK defaults
This means you can set sensible defaults in your code and override them from the dashboard without touching your codebase.
## Resolved Configuration
The backend returns the following fields when available:
| Field | Description |
|-------|-------------|
| `name` | Your application display name |
| `logoUrl` | Logo URL displayed in modals and components |
| `homepageLink` | Link to your homepage (used in some components) |
| `currency` | Display currency (`"eur"`, `"usd"`, `"gbp"`) |
| `lang` | Language override (`"en"`, `"fr"`) |
| `hidden` | When `true`, all SDK components are hidden |
| `css` | Global CSS applied to modals and components |
| `translations` | Global translation overrides |
| `placements` | Named placement configurations (see [Placements](/developers/concepts/placements)) |
| `components` | Global component defaults |
## Controlling Loading Behavior
By default, the SDK waits for the backend configuration to be resolved before rendering components. This ensures components display the correct branding and settings from the start.
You can control this behavior with the `waitForBackendConfig` option:
```ts twoslash
// @noErrors
import type { FrakWalletSdkConfig } from '@frak-labs/core-sdk';
const config: FrakWalletSdkConfig = {
metadata: {
name: "My App",
},
// When true (default): components show a loading spinner until backend config is resolved
// When false: components render immediately with local config / HTML attributes
waitForBackendConfig: true,
};
```
:::tip
Keep `waitForBackendConfig: true` (the default) if you rely on backend-managed settings like translations, custom CSS, or placements. Set it to `false` if you provide all configuration locally and want instant rendering.
:::
## Caching
The SDK caches the resolved configuration in `localStorage` with a 30-second TTL using a stale-while-revalidate strategy:
- **Fresh cache** (< 30 seconds): The cached config is used immediately, no network request.
- **Stale cache** (> 30 seconds): The cached config is used immediately for fast rendering, while a background fetch updates the cache.
- **No cache**: A network request is made and components wait for the response (or render immediately if `waitForBackendConfig` is `false`).
The cache is scoped per domain and language, so different subdomains or language settings maintain separate caches.
## Managing Backend Configuration
Backend-driven configuration is managed from the **business dashboard**. Navigate to your merchant's settings to configure:
- **Branding** — Name, logo, homepage link
- **Display** — Language, currency, visibility toggle
- **Styling** — Custom CSS for modals and components
- **Translations** — Override default text for any SDK component
- **Placements** — Create named configurations for different sections of your site (see [Placements](/developers/concepts/placements))
Changes made in the dashboard take effect on your website within 30 seconds (the cache TTL), without requiring any code changes or redeployment.
# Wallet SDK Configuration
> Learn how to configure the Wallet SDK for your application
import { Tabs, TabItem } from "@astrojs/starlight/components";
# Configuration
Proper configuration is crucial for the Wallet SDK to function correctly in your application. This guide will walk you through the configuration options and how to set them up.
## Configuration Object
The Wallet SDK uses a configuration object to set up its behavior. Here's the structure of the `FrakWalletSdkConfig` object:
```ts twoslash
// [!include ~/snippets/types/FrakWalletSdkConfig.ts]
```
```js
/**
* @typedef {Object} FrakWalletSdkConfig
* @property {string|Object} [env] - The environment to run against ("prod", "dev", or { wallet, backend })
* @property {Object} metadata - Metadata about your application
* @property {string} [metadata.name] - The name of your application
* @property {string} [metadata.merchantId] - Your merchant ID (UUID) from the Frak dashboard
* @property {string} [metadata.lang] - The default language ("en" | "fr")
* @property {string} [metadata.currency] - The default currency ("eur" | "usd" | "gbp")
* @property {string} [metadata.logoUrl] - Logo URL displayed in modals and components
* @property {string} [metadata.homepageLink] - Link to your homepage
* @property {Object} [customizations] - Customization options
* @property {string} [customizations.css] - URL to a CSS file for styling
* @property {Object} [customizations.i18n] - Translation overrides for SDK components
* @property {string} [domain] - The domain of your application
* @property {boolean} [waitForBackendConfig] - Wait for backend config before rendering (default: true)
* @property {Object} [attribution] - Default attribution params (UTM / via / ref) appended to outbound sharing URLs
* @property {string[]} [preload] - UI views to preload in the listener iframe ("modal" | "sharing", default: ["sharing"])
*/
```
Let's break down each property:
### `env` (optional)
The environment the SDK talks to. It states both the wallet and the backend origin, so nothing is guessed from a single URL:
- `"prod"` (default): `https://wallet.frak.id` and `https://backend.frak.id`
- `"dev"`: `https://wallet-dev.frak.id` and `https://backend.gcp-dev.frak.id`
- `{ wallet, backend }`: an explicit pair, for local development or any host the presets do not know
```ts
{ env: "dev" }
{ env: { wallet: "https://localhost:3000", backend: "https://localhost:3030" } }
```
An unknown stage name, or an object missing either origin, logs an error and falls back to production. Trailing slashes are stripped.
:::caution
`env` is page-level, not per client or per provider: the last integration to set one wins, and doing so logs a warning. Omitting it leaves the published value untouched.
:::
:::note
`env` replaces `walletUrl`, which was removed in core-sdk 1.4.0. It used to take a single wallet URL and match it against known hosts by substring to guess the backend, so an origin the SDK did not recognise silently paired a custom wallet with the production backend. Integrations that never set `walletUrl` need no change.
:::
`setEnvironment(env)` and `getEnvironment()` are exported for the rare case of resolving the pair
outside a client — reading the backend origin before the SDK boots, for instance. Setting `env` on
your config is the normal path; calling `setEnvironment` is the same page-level write, with the same
last-one-wins warning.
### `metadata`
This object contains metadata about your application:
- `name` (optional): The name of your application. Displayed in modals and SSO pages.
- `merchantId` (optional): Your merchant ID from the Frak dashboard (UUID format). Used for referral tracking and analytics. If not provided, it will be auto-fetched from the backend using your domain.
- `lang` (optional): The display language (`"en"` or `"fr"`). Defaults to the browser language.
- `currency` (optional): The display currency (`"eur"`, `"usd"`, or `"gbp"`). Defaults to `"eur"`.
- `logoUrl` (optional): Logo URL displayed in modals and a few components.
- `homepageLink` (optional): Link to your homepage, used in SSO pages and some components.
### `customizations`
This object contains customization options for the displayed Frak elements:
- `css` (optional): A URL to a CSS file (must end with `.css`) that styles the Frak Wallet interface when displayed in your application.
- `i18n` (optional): An object containing text overrides for SDK components. Can be a single-language config or a multi-language config keyed by language code.
:::caution
URL-based i18n configuration has been removed. Only inline objects are supported.
:::
### `domain` (optional)
The domain of your application. This is used to identify your application in the Frak ecosystem.
:::tip
This property is optional. If not provided, it will be automatically retrieved during initialization.
:::
### `waitForBackendConfig` (optional)
Controls whether components wait for the [backend-driven configuration](/developers/concepts/backend-configuration) to be resolved before rendering.
- `true` (default): Components show a loading spinner until backend config is resolved.
- `false`: Components render immediately with local config and HTML attributes.
### `attribution` (optional)
Default attribution parameters (`utmSource`, `utmMedium`, `utmCampaign`, `utmTerm`, `via`, `ref`) appended to outbound sharing URLs. Per-call `displaySharingPage` overrides take precedence, then backend config, then this SDK-level default. `utmContent` is intentionally excluded, as it is per-content rather than a merchant-wide default.
### `preload` (optional)
UI views to preload inside the listener iframe for a snappier first display. Accepts an array of `"modal"` and/or `"sharing"`.
:::tip
Defaults to `["sharing"]`.
:::
## Example Configuration
Here's an example of a complete configuration object:
```ts twoslash
// @noErrors
import type { FrakWalletSdkConfig } from '@frak-labs/core-sdk';
const frakConfig: FrakWalletSdkConfig = {
env: "prod",
metadata: {
name: "My Awesome dApp",
lang: "en",
currency: "usd",
logoUrl: "https://my-app.com/logo.png",
homepageLink: "https://my-app.com",
},
customizations: {
css: "https://my-app.com/frak-styles.css",
i18n: {
en: {
"sdk.modal.title": "Welcome!",
},
fr: {
"sdk.modal.title": "Bienvenue !",
"sharing.title": "Partage ce produit!",
}
}
},
domain: "my-app.com",
};
```
## Using the Configuration
How you use this configuration depends on whether you're using React or vanilla JavaScript:
### React
In a React application, use the `FrakConfigProvider` to provide this configuration to your app:
```tsx twoslash
// @noErrors
import { FrakConfigProvider, FrakIFrameClientProvider } from '@frak-labs/react-sdk';
const frakConfig = {
metadata: {
name: "My Awesome dApp",
},
};
function App() {
return (
{/* Your app components */}
);
}
```
### Vanilla JavaScript
In a vanilla JavaScript application, pass this configuration when creating a Frak client:
```ts twoslash
// @noErrors
import { createIFrameFrakClient, createIframe } from '@frak-labs/core-sdk';
const frakConfig = {
metadata: {
name: "My Awesome dApp",
},
};
const iframe = createIframe({ config: frakConfig });
const client = await createIFrameFrakClient({ config: frakConfig, iframe });
```
## Best Practices
1. **Environment-based Configuration**: Consider using different configurations for development and production environments. This allows you to use the development Frak Wallet during testing.
2. **Secure CSS**: If you're providing a custom CSS file, ensure it's served over HTTPS to prevent security issues.
3. **Domain Consistency**: If you provide a `domain`, make sure it matches the actual domain where your application is hosted. Mismatches can lead to authentication issues.
4. **Iframe Creation**: Always use the `createIframe` helper function provided by the SDK to create the iframe. This ensures proper setup and compatibility.
:::caution
Remember to handle any potential errors when creating the iframe or initializing the client.
:::
By properly configuring the Wallet SDK, you ensure that it can communicate effectively with the Frak Wallet and provide a seamless experience for your users.
## Next Steps
- [Backend-Driven Configuration](/developers/concepts/backend-configuration) — Learn how the SDK dynamically resolves settings from the Frak backend.
- [Placements](/developers/concepts/placements) — Customize component behavior for different sections of your website.
- [Tracking User Interactions](/developers/concepts/interactions) — Learn about interaction tracking.
# Understanding Interactions
> Learn how to leverage interactions in the Wallet SDK for tracking user engagement, implementing reward systems, and enhancing your application's functionality.
# Interactions
Interactions are the cornerstone of user engagement tracking in the Wallet SDK. They allow developers to record events based on user actions within their applications, enabling features like reward systems and engagement analytics.
## How Interactions Work
1. **Automatic Tracking**: The SDK tracks user arrivals, referrals, and sharing events through a simple fire-and-forget API.
2. **Merchant Resolution**: The SDK automatically resolves your merchant identity from your domain — no need to pass product or merchant IDs manually.
3. **Offline Support**: If a user isn't logged in, interactions are stored locally in the browser and sent once a session is established, ensuring privacy and data integrity.
4. **Transparent Process**: The entire interaction recording process is seamless and invisible to the user.
## Interaction Types
The SDK supports three interaction types:
- **`arrival`** — Track when a user lands on your site, with optional referral attribution.
- **`sharing`** — Track when a user shares your content via the sharing modal.
- **`custom`** — Track any custom event specific to your application.
## Sending Interactions
Use the [`sendInteraction`](/developers/references/core-sdk/actions/functions/sendinteraction/) action to record events:
```ts twoslash
// @noErrors
import { sendInteraction } from '@frak-labs/core-sdk/actions';
// Track a user arrival with referral attribution
await sendInteraction(client, {
type: "arrival",
referrerWallet: "0x1234...abcd",
});
// Track a sharing event
await sendInteraction(client, { type: "sharing" });
// Send a custom interaction
await sendInteraction(client, {
type: "custom",
customType: "newsletter_signup",
data: { email: "user@example.com" },
});
```
`sendInteraction` is fire-and-forget: errors are caught and logged, not thrown.
## Referral Interactions
For referral tracking, the SDK provides a dedicated helper that handles the full referral flow automatically:
```ts twoslash
// @noErrors
import { referralInteraction } from '@frak-labs/core-sdk/actions';
const result = await referralInteraction(client, {
options: {
alwaysAppendUrl: true,
merchantId: "550e8400-e29b-41d4-a716-446655440000",
},
});
```
See [`referralInteraction`](/developers/references/core-sdk/actions/functions/referralinteraction/) for details.
## Benefits of Interactions
- **Engagement Tracking**: Monitor user activity on your platform.
- **Reward Systems**: Implement campaigns that distribute rewards based on user interactions.
- **Privacy-Preserving**: Interactions are only sent when a user has an active session.
- **Flexible Integration**: Use built-in types or define custom interactions for your specific use case.
## Best Practices
- Use the `referralInteraction` helper for referral flows instead of manually composing arrival interactions.
- Set default UTM / attribution params via the SDK [`attribution` config](/developers/concepts/configuration/#attribution-optional) to improve marketing attribution on shared links.
- Use `idempotencyKey` on custom interactions to prevent duplicate event recording.
For detailed parameter information, refer to the [`SendInteractionParamsType`](/developers/references/core-sdk/index/type-aliases/sendinteractionparamstype/) reference.
# Placements
> Use placements to customize SDK components for different sections of your website
# Placements
Placements let you define named configurations that customize how SDK components behave on different sections of your website. Instead of using the same global settings everywhere, you can create placements like `"homepage"`, `"product-page"`, or `"checkout"` — each with its own text, styling, and behavior.
## How Placements Work
1. **Create placements** in the [business dashboard](/guides/dashboard) under your merchant's customization settings.
2. **Assign a placement** to any SDK component using the `placement` attribute or prop.
3. **The component resolves** its configuration from the [backend-driven config](/developers/concepts/backend-configuration), applying placement-specific overrides on top of global defaults.
```
Global Config (dashboard defaults)
└── Placement: "homepage"
│ └── buttonShare: { text: "Share this!", clickAction: "sharing-page" }
│ └── banner: { referralTitle: "Join our community" }
└── Placement: "checkout"
└── postPurchase: { ctaText: "Share and earn {REWARD}!" }
└── buttonShare: { text: "Tell your friends" }
```
## Using Placements with Web Components
All Frak web components accept a `placement` attribute. When provided, the component looks up its configuration from the matching placement in the backend config.
### Share Button
```html
```
### Post-Purchase
```html
```
### Banner
```html
```
### Wallet Button
```html
```
### Open in App
```html
```
## Using Placements with the Core SDK
When calling SDK actions directly (without web components), pass the placement ID as the third argument:
```ts twoslash
// @noErrors
import { displayModal, displaySharingPage } from '@frak-labs/core-sdk/actions';
// Display a modal associated with the "checkout" placement
const results = await displayModal(client, {
steps: {
login: { allowSso: true },
final: { action: { key: "reward" } },
},
}, "checkout");
// Display the sharing page for the "homepage" placement
await displaySharingPage(client, {}, "homepage");
```
## Placement Configuration Options
Each placement can customize the following components. Settings defined at the placement level override the global component defaults.
### Share Button (`buttonShare`)
| Option | Type | Description |
|--------|------|-------------|
| `text` | `string` | Button text. Use `{REWARD}` placeholder for reward amount. |
| `noRewardText` | `string` | Fallback text when no reward is available. |
| `clickAction` | `string` | Which UI opens on click. Since components 1.2.0 every value opens the sharing page; `"embedded-wallet"` and `"share-modal"` are still stored and emitted for older configs. |
| `useReward` | `boolean` | Whether to display the reward amount. |
| `css` | `string` | Component-specific CSS override. |
### Wallet Button (`buttonWallet`)
| Option | Type | Description |
|--------|------|-------------|
| `position` | `"right"` \| `"left"` | Screen position of the floating wallet button. |
| `css` | `string` | Component-specific CSS override. |
### Post-Purchase (`postPurchase`)
| Option | Type | Description |
|--------|------|-------------|
| `badgeText` | `string` | Text for the badge pill above the message. |
| `refereeText` | `string` | Message shown to referred users. Use `{REWARD}` placeholder. |
| `refereeNoRewardText` | `string` | Fallback message for referees when no reward is found. |
| `referrerText` | `string` | Message shown to referrers. Use `{REWARD}` placeholder. |
| `referrerNoRewardText` | `string` | Fallback message for referrers when no reward is found. |
| `ctaText` | `string` | CTA button text. Use `{REWARD}` placeholder. |
| `ctaNoRewardText` | `string` | Fallback CTA text when no reward is found. |
| `css` | `string` | Component-specific CSS override. |
### Banner (`banner`)
| Option | Type | Description |
|--------|------|-------------|
| `referralTitle` | `string` | Title for the referral banner variant. |
| `referralDescription` | `string` | Description for the referral banner. |
| `referralCta` | `string` | CTA button text for the referral banner. |
| `inappTitle` | `string` | Title for the in-app browser banner variant. |
| `inappDescription` | `string` | Description for the in-app browser banner. |
| `inappCta` | `string` | CTA button text for the in-app browser banner. |
| `css` | `string` | Component-specific CSS override. |
### Open in App (`openInApp`)
| Option | Type | Description |
|--------|------|-------------|
| `text` | `string` | Button text override. |
| `css` | `string` | Component-specific CSS override. |
### Placement-Level Settings
In addition to component-specific settings, each placement also supports:
| Option | Type | Description |
|--------|------|-------------|
| `targetInteraction` | `string` | The interaction type to use for reward calculations in this placement. |
| `translations` | `Record` | Placement-specific translation overrides. |
| `css` | `string` | Global CSS applied to modals displayed from this placement. |
## Placement vs. HTML Attributes
Component settings can come from two sources: **placement configuration** (backend-driven) and **HTML attributes** (inline). When both are present, HTML attributes take precedence, allowing you to override placement defaults for specific instances.
```html
```
## Example: Multi-Page Setup
Here's an example of using different placements across a website:
```html
```
Each placement is configured independently in the business dashboard, giving you full control over text, styling, and behavior per section — without changing your code.
## Next Steps
- [Backend-Driven Configuration](/developers/concepts/backend-configuration) — Learn how the SDK resolves configuration from the backend.
- [Configuration](/developers/concepts/configuration) — Set up local SDK configuration.
- [Components](/developers/components) — Explore all available web components.
# Android SDK integration
> Integrate Frak into a native Android app with the Kotlin SDK, covering tracking, rewards, sharing, and referral deep links.
import { Tabs, TabItem, Aside, LinkCard, CardGrid } from '@astrojs/starlight/components';
# Android SDK
The Frak Android SDK brings referral tracking, rewards, and the sharing sheet to a native Android app. It is written in Kotlin, callable from Java, and ships as two artifacts so an app that only needs tracking never links a web view.
## Requirements
| Item | Value |
| --- | --- |
| Minimum SDK | 24 (Android 7.0) |
| Java / JVM target | 17 |
| Language | Kotlin 2.2 language level, Java call sites supported |
| License | Apache-2.0 |
## Install
Two artifacts, released together:
| Artifact | Contents |
| --- | --- |
| `id.frak.sdk:core` | Identity, config, rewards, interaction tracking, sharing links, app links. No UI, no web view. |
| `id.frak.sdk:ui` | The sharing sheet. Depends on `core`. |
```kotlin title="app/build.gradle.kts"
dependencies {
implementation("id.frak.sdk:core:1.0.0")
// Only if you show the sharing sheet
implementation("id.frak.sdk:ui:1.0.0")
}
```
Artifacts are published to Maven Central. Both ship in lockstep behind a `strictly` constraint, so take the same version for both — a mismatch fails resolution rather than linking two versions. From `1.0.0` the public surface follows semantic versioning.
The SDK's own manifest declares the `INTERNET` permission and the `` entries needed to detect the Frak wallet app, so you do not add either by hand. It declares no activity and no intent filter: your app keeps ownership of its own deep links.
## Initialize
Call `Frak.initialize` once, in `Application.onCreate` or in your launcher Activity's `onCreate` after `super.onCreate`.
```kotlin
Frak.initialize(
context = applicationContext,
config = FrakConfig(merchantId = BuildConfig.FRAK_MERCHANT_ID) {
metadata = FrakMetadata {
name = "Your Store"
currency = FrakCurrency.EUR
homepageLink = "https://your-store.com"
}
deepLink = DeepLinkHandling.Automatic
logLevel = FrakLogLevel.INFO
},
)
```
```java
Frak.initialize(
getApplicationContext(),
new FrakConfig.Builder(BuildConfig.FRAK_MERCHANT_ID)
.metadata(new FrakMetadata.Builder()
.name("Your Store")
.currency(FrakCurrency.EUR)
.homepageLink("https://your-store.com")
.build())
.deepLink(DeepLinkHandling.Automatic)
.logLevel(FrakLogLevel.INFO)
.build());
```
The Kotlin trailing-lambda form is sugar over the same `Builder`, not a second implementation.
### Configuration options
| Option | Default | Meaning |
| --- | --- | --- |
| `merchantId` | `null` | Your merchant ID from the [business dashboard](https://business.frak.id/). When null, the merchant is resolved from `packageId` instead. |
| `packageId` | `null` | Falls back to `context.packageName`. |
| `metadata` | empty | Static merchant facts: `name`, `currency`, `lang`, `logoUrl`, `homepageLink`. |
| `deepLink` | `Automatic` | `Automatic`, `Manual`, or `Disabled`. See [Referral deep links](#referral-deep-links). |
| `trackingEnabled` | `true` | A hard floor. Setting it to `false` cannot be lifted at runtime. |
| `logLevel` | `NONE` | `NONE`, `ERROR`, `WARN`, `INFO`, `DEBUG`. |
| `logSink` | `null` | A `FrakLogSink` that replaces logcat. Must be thread-safe and must not throw. |
`homepageLink` is the last fallback of the share link chain: without it, a store-wide share with no product and no explicit link has nothing to point at.
## The client
`Frak.client` throws if the SDK is not initialized; `Frak.clientOrNull` returns null instead. Every namespace member is a `suspend` function.
```kotlin
lifecycleScope.launch {
val reward = Frak.client.rewards.best(
RewardRequest { targetInteraction = "purchase" },
)
}
```
The client exposes `environment`, `anonymousId()`, `resetAnonymousId()`, `setTrackingEnabled()`, `isTrackingEnabled()`, and five namespaces: `config`, `rewards`, `sharing`, `tracking`, `appLink`.
### Calling from Java
Every suspending member has a `CompletableFuture` twin named `*Async`. The work runs on the SDK's IO dispatcher and the future **completes on the main thread**, so a continuation can touch a `View` directly.
```java
Frak.getClient().getRewards()
.bestAsync(new RewardRequest.Builder().targetInteraction("purchase").build())
.thenAccept(reward -> banner.setText(reward == null ? "" : reward.getFormatted()));
```
## Tracking
```kotlin
// A confirmed order, on your order confirmation screen
when (val result = Frak.client.tracking.purchase(
customerId = "cust_123",
orderId = "order_456",
token = "a-unique-order-token",
)) {
is FrakResult.Success -> Log.i("frak", "order tracked")
is FrakResult.Failure -> Log.w("frak", result.error.message)
}
// Any other interaction
Frak.client.tracking.track(Interaction.custom("added_to_cart"))
```
`track` and `purchase` succeed once the event is **durable**, not once it is delivered. Events are queued on disk oldest-first and retried, so an offline device still reports later.
`Interaction` is an opaque type built through static factories:
```kotlin
Interaction.custom("checkout")
Interaction.custom("checkout", mapOf("plan" to "pro"))
Interaction.sharing()
Interaction.arrival(referrerWallet, referrerClientId, referrerMerchantId, referralTimestamp)
```
You rarely build `arrival` yourself: `appLink.handleReferral` does it for you, and building a second one for the same link double-counts the arrival.
## Rewards
```kotlin
val campaigns = Frak.client.rewards.campaigns()
val best = Frak.client.rewards.best(
RewardRequest {
targetInteraction = "purchase"
products = visibleProducts.map { product ->
ProductDetails {
productId = product.id
name = product.title
}
}
},
)
```
Call `best` **once per screen for the whole visible product set**, not once per row: the cache is keyed on the encoded product list. Both calls accept a `forceRefresh` overload that skips the cache and the backoff.
`RewardTier` is a sealed class with three arms: `Amount`, `Percentage`, and `Unknown`. Always give `when` an `Unknown` branch — a campaign whose payout shape your compiled binary predates degrades to it instead of failing the whole `best` call, so a server-side tier type added after you shipped costs you one unrenderable band, not the reward display.
## Configuration resolution
```kotlin
val config = Frak.client.config.resolve()
config.displayName
config.displayLogoUrl
```
`resolve` is stale-while-revalidate with a five minute freshness window, so calling it on every screen is cheap. The resolved config is a read model: you read placements, component copy, and translations from it, and never construct one. See [Backend-driven configuration](/developers/concepts/backend-configuration/).
## Sharing
### Build a link yourself
```kotlin
val link = Frak.client.sharing.buildLink(
SharingRequest {
products = listOf(
SharingProduct(title = product.title, link = product.link) {
imageUrl = product.imageUrl
utmContent = product.id
details = ProductDetails {
productId = product.id
name = product.title
unitPrice = product.priceCents / 100.0
}
},
)
targetInteraction = "purchase"
placement = "product-page"
},
)
```
`buildLink` returns `null` only when there is nothing to link to (no `link`, no product link, and no `homepageLink`). It throws a `FrakError` when a link should have been buildable but was not, for example when tracking is disabled.
`AttributionParams` (`utmSource`, `utmMedium`, `utmCampaign`, `utmContent`, `utmTerm`, `via`, `ref`) can be set per call and merges field by field over your merchant-level defaults.
### What the OS share sheet shows
`SharingRequest` carries three optional overrides for the chooser Android raises when the user taps share:
```kotlin
SharingRequest {
targetInteraction = "purchase"
shareTitle = "Ma sélection chez Your Store"
shareText = "J'ai trouvé ça, ça peut t'intéresser"
shareImageUrl = "https://your-store.com/product.jpg"
}
```
They are the highest-precedence source: the sharing page's own copy is used when they are absent, and your merchant-level defaults below that. `shareImageUrl` is accepted for API symmetry but has no effect here — Android's chooser ships no preview image, only iOS renders one.
### The sharing sheet
The `id.frak.sdk:ui` artifact adds a ready-made sheet. Its whole public surface is `FrakSharing`, `SharingResult`, and `FrakSharingDefaults`.
```kotlin
private lateinit var sharing: FrakSharing
override fun onCreate(savedInstanceState: Bundle?) {
super.onCreate(savedInstanceState)
// In onCreate, after super.onCreate. Not a property initializer: an Activity
// has no ViewModelStore before that, and build() throws without one.
sharing = FrakSharing.Builder(::onShareResult).build(this)
}
// When a share affordance becomes visible
sharing.warm()
// On the tap
sharing.present(SharingRequest { targetInteraction = "purchase" })
```
```kotlin
val sharing = remember { FrakSharing.Builder(::onShareResult) }.build()
Button(onClick = {
sharing.present(SharingRequest { targetInteraction = "purchase" })
}) {
Text("Share and earn")
}
```
The Compose `build()` warms the sheet on composition-enter, so there is no `warm()` call to place yourself.
`Builder.heightFraction(Float)` tunes the sheet height. Values outside `0.3..1.0` are clamped and logged rather than thrown: a layout number must not crash your app. The default is `0.85`. `warm()` is cheap to call repeatedly, and `present` implies it.
`Builder.language(String?)` sets the sheet's language as a BCP 47 tag (`"en"`, `"fr-CA"`), defaulting to the device locale. It selects among the translations the page ships rather than adding one, and an unknown tag falls back to the page's own default. It rides on the pre-warmed URL, so set it once per instance: a tag that changes between `warm()` and `present` costs the warm view, not the language.
The sheet reports exactly once per session, through your callback:
```kotlin
private fun onShareResult(result: SharingResult) {
when (result) {
is SharingResult.Shared -> Log.i("frak", "shared ${result.link}")
is SharingResult.Copied -> Log.i("frak", "copied ${result.link}")
SharingResult.InstallStarted -> Unit // informational only
SharingResult.WalletOpened -> Unit // the wallet app was already installed and opened
SharingResult.Dismissed -> Unit
is SharingResult.Failed -> Log.w("frak", result.error.message)
}
}
```
`InstallStarted` is informational: it does not mean anything was installed, and it is not a cue to call `openFrakApp` again.
## Referral deep links
`DeepLinkHandling.Automatic` (the default) registers an activity lifecycle observer that reads the inbound intent and calls `handleReferral` for you. Choose `Manual` to call it yourself, or `Disabled` to opt out entirely.
Your app still declares its own intent filters for the domain or scheme you send referral links to:
```xml title="AndroidManifest.xml"
```
The `appLink` namespace covers the rest:
```kotlin
Frak.client.appLink.handleReferral(url) // decode, guard self-referral, track the arrival
Frak.client.appLink.isFrakAppInstalled() // synchronous, no async twin
Frak.client.appLink.openFrakApp() // opens the wallet, or the Play Store listing
Frak.client.appLink.installPageUrl(returnScheme, sessionId)
```
`handleReferral` returns whether a referral context was found. It is not a "stop routing" signal: your own navigation still runs.
Test an inbound link without a real referral:
```bash
adb shell am start -a android.intent.action.VIEW \
-d "https://your-store.com/product?fCtx=test_token_123" your.app.id
```
## Consent and privacy
The SDK ships no consent UI. Wire your consent platform to:
```kotlin
Frak.client.setTrackingEnabled(false) // stops tracking and purges anything queued
Frak.client.resetAnonymousId() // rotates the local identity
```
For Play Data Safety, three things leave the device and only three:
| What | Play data type |
| --- | --- |
| Anonymous ID and the `customerId` you pass to `tracking.purchase` | Personal info, **User IDs** |
| Referral and sharing events | App activity, **App interactions** |
| `customerId`, `orderId`, and the checkout token | Financial info, **Purchase history** |
No advertising ID, no `ANDROID_ID`, no install referrer, no location, no contacts. The anonymous ID is a per-install keypair held in the Android Keystore, non-exportable, and gone on uninstall, which is why it is declared as a user ID rather than a device ID.
Two caveats worth knowing before you build a compliance story on `setTrackingEnabled`: the decision is written asynchronously, so a withdrawal lost to a process kill reverts to enabled on the next launch, and the web SDK has no equivalent switch today.
## Shutting down
`Frak.shutdown()` cancels background work and unregisters the deep-link observer, after which `initialize` can run again. It is not a consent control: it records no decision.
## Next steps
# CDN / Browser Integration
> Load Frak from a CDN with a single script tag, configure it with window.FrakSetup, and drive it from plain JavaScript.
import { Aside, LinkCard, CardGrid } from '@astrojs/starlight/components';
# CDN integration
No bundler, no build step: one script tag gives you the Frak web components and the full SDK on `window`.
## Prerequisites
1. A merchant account on the [Frak business dashboard](https://business.frak.id/) with your domain registered. The main domain is registered at sign-up; add subdomains under **Allowed Domains**.
2. Any HTML page you can add a script tag to.
If you have not done that yet, start with the [Get started guide](/guides/).
## Which bundle
| Bundle | URL | What it is |
| --- | --- | --- |
| Components | `https://sdk.frak.id/components.js` | The first-party CDN pointer. Registers the `` elements, boots the SDK, and exposes the SDK on `window.FrakSetup.core`. This is the one you want. |
| Core only | `https://cdn.jsdelivr.net/npm/@frak-labs/core-sdk@1/cdn/bundle.js` | IIFE exposing `window.FrakSDK`. No UI, no auto-boot. Still served directly from jsDelivr, not on the pointer. Only for a page that drives the SDK entirely by hand. |
The rest of this page uses the components bundle. Swap the host for `sdk-dev.frak.id` to load
pre-release (`beta`) builds instead — its `onerror` fallback below follows to jsDelivr's `@beta`
tag. This is the CDN host the bundle is fetched from; do not confuse it with the `env` config
option further down, which targets the wallet/backend the SDK talks to once it is running.
:::caution[The pointer always serves the latest release, majors included]
`sdk.frak.id` redeploys within minutes of every release to `main`, with no way to pin it to a
major version from the URL — a page pointed at it picks up a bundle that reads `config.env` while
the page still sends `walletUrl` the moment that release ships. To freeze on a known major
instead, skip the pointer and load jsDelivr directly: `https://cdn.jsdelivr.net/npm/@frak-labs/components@1`
(drop the `onerror` fallback below, or point it at that same pinned URL). Check the release notes
before a version bump either way.
:::
## 1. Set the config, then load the script
The loader reads `window.FrakSetup.config` when it boots, so the config object must exist **before** the script tag runs.
```html title="index.html"
```
This is a classic deferred script, not `type="module"`. `sdk.frak.id` is a single-line `import()`
shim behind a CDN pointer with a 5-minute cache, so a release reaches you in minutes instead of
jsDelivr's 7-day floating-tag TTL. If it fails to load at all (network error, DNS, outage),
`onerror` swaps in jsDelivr's floating tag instead — the pointer file is a single `import()`, so a
failed load ran nothing and nothing double-runs. The preconnects are asymmetric on purpose: the
pointer's own fetch is no-cors, so its `` must not carry `crossorigin`, while the jsDelivr
fallback's `import()` is CORS-mode, so its `` does — a preconnected socket is only reused
when the credentials mode matches.
### Config options
| Field | Default | Meaning |
| --- | --- | --- |
| `env` | `"prod"` | The environment to run against: `"prod"`, `"dev"`, or `{ wallet, backend }`. |
| `metadata.name` | none | Your application name, shown in modals and SSO. |
| `metadata.merchantId` | resolved from your domain | Your merchant ID (UUID) from the dashboard. |
| `metadata.currency` | `"eur"` | `"eur"`, `"usd"`, or `"gbp"`. |
| `metadata.lang` | browser language | `"en"` or `"fr"`. |
| `metadata.logoUrl` | none | Logo used by some components. |
| `metadata.homepageLink` | none | Fallback link used by some components. |
| `domain` | `window.location.host` | Override only if the page host differs from your registered domain. |
| `customizations.css` | none | URL of a stylesheet applied to the modals and components. |
| `customizations.i18n` | none | Inline translation overrides, per locale or flat. |
| `waitForBackendConfig` | `true` | Wait for the backend configuration before rendering components. |
| `attribution` | none | Default UTM, `via`, and `ref` values appended to sharing URLs. |
| `preload` | `["sharing"]` | Views preloaded inside the listener iframe. Pass `[]` to disable. |
See [Configuration](/developers/concepts/configuration/) and [FrakSetup](/developers/components/frak-setup/) for the full reference.
## 2. Drop in the components
The loader watches the DOM, so an element added at any time registers itself:
```html
```
Every element and attribute is documented in the [components reference](/developers/components/).
## 3. Call the SDK from your own code
Once booted, the SDK publishes two things:
- `window.FrakSetup.client`, the client instance
- `window.FrakSetup.core`, every SDK function and action
The client is created asynchronously, so wait for the `frak:client` event before using it:
```html
```
### Track a purchase
`trackPurchaseStatus` is the exception: it takes no client, so you can call it as soon as the SDK is loaded.
```html
```
Rewards are only released once your backend confirms the order with a signed webhook. See [Validate purchases from your backend](/guides/platforms/custom/backend/).
### Events
| Event | Target | Detail | Fired when |
| --- | --- | --- | --- |
| `frak:client` | `window` | none | The client is ready, `window.FrakSetup.client` is set |
| `frak:config` | `window` | the resolved config | The backend configuration is resolved or refreshed |
| `frak:referral-success` | `window` | none | An inbound referral was processed successfully |
### The share query parameter
The loader also handles `?frakAction=share` on page load, with optional `link`, `products`, and `placement` parameters. It opens the sharing flow and then strips those parameters from the URL. That is how a link out of an email or a QR code can open the share sheet directly.
## Advanced: the core-only bundle
If you do not want the components at all, load the core bundle and create the client yourself.
This bundle is not on the `sdk.frak.id` pointer: it is still loaded straight from jsDelivr, so pin
the major the same way you would have pinned the components bundle before:
```html
```
`window.FrakSDK` carries the same functions and actions as `window.FrakSetup.core`. It exists only for this bundle: the components bundle is ESM and exposes no global.
## Next steps
# iOS SDK integration
> Integrate Frak into a native iOS app with the Swift SDK, covering tracking, rewards, the SwiftUI sharing sheet, and referral deep links.
import { Aside, LinkCard, CardGrid } from '@astrojs/starlight/components';
# iOS SDK
The Frak iOS SDK brings referral tracking, rewards, and the sharing sheet to a native iOS app. It is a Swift package with zero third-party dependencies, split in two products so an app that only needs tracking never links a web view.
## Requirements
| Item | Value |
| --- | --- |
| Minimum iOS | 15 |
| Minimum Xcode | 16 (the package declares Swift 6 language mode) |
| Dependencies | None |
| License | Apache-2.0 |
## Install
In Xcode: **File → Add Package Dependencies**, then enter `https://github.com/frak-id/frak-ios-sdk`.
Or in a `Package.swift`:
```swift title="Package.swift"
dependencies: [
.package(url: "https://github.com/frak-id/frak-ios-sdk.git", exact: "1.0.0")
],
targets: [
.target(name: "YourApp", dependencies: [
.product(name: "FrakSDK", package: "frak-ios-sdk"),
// Only if you show the sharing sheet
.product(name: "FrakSDKUI", package: "frak-ios-sdk"),
])
]
```
| Product | Contents |
| --- | --- |
| `FrakSDK` | Identity, config, rewards, interaction tracking, sharing links, app links. No UI, no web view. |
| `FrakSDKUI` | Adds the sharing sheet, a `WKWebView` inside a SwiftUI sheet. Depends on `FrakSDK`. |
The dependency only runs one way, so taking `FrakSDK` alone links no web view.
`FrakSDKVersion.current` returns the version the SDK reports on every request, which is useful in a bug report. It is the one public type absent from the [API reference](/developers/references/ios/): Swift's symbol graph extractor drops any declaration whose name starts with the module name followed by `Version`, since that is the shape of the globals Clang generates for a framework.
## Declare the wallet schemes
Add this to your `Info.plist` before anything else. It is what lets your app talk to the Frak wallet: without it, iOS answers "not installed" to every probe, so `isFrakAppInstalled()` returns false, the sharing sheet's install detection never fires, and the handoff to the wallet silently degrades to the App Store every time.
```xml title="Info.plist"
LSApplicationQueriesSchemesfrakwalletfrakwallet-dev
```
List both: `frakwallet` is the production wallet and `frakwallet-dev` is the one you test against on a dev build. Declaring only production makes a locally built dev wallet undetectable, which is exactly the build a first integration runs against.
You also declare the URL scheme (or Universal Link) your own app receives referral links on. See [Referral deep links](#referral-deep-links) below.
## Initialize
Call `Frak.initialize` once, at app startup:
```swift
import FrakSDK
@main
struct YourApp: App {
init() {
Frak.initialize(
FrakConfig(
merchantId: "your-merchant-id",
metadata: FrakMetadata(
name: "Your Store",
currency: .eur,
homepageLink: "https://your-store.com"
),
logLevel: .info
)
)
}
var body: some Scene { WindowGroup { ContentView() } }
}
```
### Configuration options
| Option | Default | Meaning |
| --- | --- | --- |
| `merchantId` | `nil` | Your merchant ID from the [business dashboard](https://business.frak.id/). When nil, the merchant is resolved from `bundleId`. |
| `bundleId` | `nil` | Falls back to `Bundle.main.bundleIdentifier`. |
| `metadata` | empty | `name`, `currency`, `lang`, `logoURL`, `homepageLink`. |
| `deepLink` | `.manual` | `.manual` or `.disabled`. iOS has no automatic mode, see below. |
| `trackingEnabled` | `true` | A hard floor. When false, no anonymous ID is ever minted. |
| `logLevel` | `.none` | `.none`, `.error`, `.warn`, `.info`, `.debug`. |
| `logSink` | `nil` | A `FrakLogSink` that replaces the default logger. |
`homepageLink` is the last fallback of the share link chain: without it, a store-wide share with no product and no explicit link has nothing to point at.
## The client
`Frak.client` is throwing-synchronous, `Frak.clientOrNull` returns an optional instead. Every namespace member on the client is `async`.
```swift
private func client() -> FrakClient? { try? Frak.client }
let reward = try await client()?.rewards.best(RewardRequest(targetInteraction: "purchase"))
```
The client exposes `environment`, `anonymousId`, `resetAnonymousId()`, `setTrackingEnabled(_:)`, `isTrackingEnabled()`, and five namespaces: `config`, `rewards`, `sharing`, `tracking`, `appLink`.
The snippets below assume you already hold a client, for example with `let client = try Frak.client`.
## Tracking
```swift
// A confirmed order, on your order confirmation screen
let result = await client.tracking.purchase(
customerId: "cust_123",
orderId: "order_456",
token: "a-unique-order-token"
)
switch result {
case .success: print("order tracked")
case .failure(let error): print(error.localizedDescription)
}
// Any other interaction
await client.tracking.track(.custom("added_to_cart"))
```
Both calls return a `Result` rather than throwing, and both succeed once the event is **durable**, not once it is delivered. Events are written to a queue on disk and drained with retries, so an offline device still reports later.
`Interaction` is built through static factories:
```swift
Interaction.custom("checkout")
Interaction.custom("checkout", data: ["plan": "pro"])
Interaction.sharing()
Interaction.arrival(referrerWallet: nil, referrerClientId: nil, referrerMerchantId: nil, referralTimestamp: nil)
```
You rarely build `arrival` yourself: `appLink.handleReferral` does it for you.
## Rewards
```swift
let campaigns = try await client.rewards.campaigns()
let best = try await client.rewards.best(
RewardRequest(
targetInteraction: "purchase",
products: visibleProducts.map { ProductDetails(productId: $0.id, name: $0.title) }
)
)
```
`best` takes a `RewardRequest` value rather than a parameter list, so a field added later is additive on both platforms. `products` is a plain array: an empty one is sent as absent.
Call `best` **once per screen for the whole visible product set**, not once per row: a single `BestReward` cannot be mapped back onto per-item rows, and the cache is keyed on the encoded product list. Both calls accept `forceRefresh: true` to skip the cache.
`RewardTier` has three cases: `.amount`, `.percentage`, and `.unknown`. Always give `switch` an `.unknown` branch — a campaign whose payout shape your compiled binary predates degrades to it instead of failing the whole `best` call, so a server-side tier type added after you shipped costs you one unrenderable band, not the reward display.
## Configuration resolution
```swift
let resolved = try await client.config.resolve()
// Or observe changes
for await config in await client.config.updates {
// react to a refreshed merchant config
}
```
`resolve` is stale-while-revalidate, `current` returns the last resolved config without a call, and `updates` is a multicast stream that replays the latest value. See [Backend-driven configuration](/developers/concepts/backend-configuration/).
## Sharing
### Build a link yourself
```swift
let link = try await client.sharing.buildLink(
SharingRequest(
products: [
SharingProduct(
title: product.title,
link: product.link,
imageURL: product.imageURL,
utmContent: product.id,
details: ProductDetails(productId: product.id, name: product.title)
)
],
targetInteraction: "purchase",
placement: "product-page"
)
)
```
`buildLink` returns `nil` only when there is nothing to link to (no request link, no product link, and no homepage fallback). It throws a `FrakError` when a link should have been buildable but was not, for example when tracking is disabled.
`AttributionParams` (`utmSource`, `utmMedium`, `utmCampaign`, `utmContent`, `utmTerm`, `via`, `ref`) can be passed per call and merges over your merchant-level defaults.
### What the OS share sheet shows
`SharingRequest` carries three optional overrides for the `UIActivityViewController` the sheet raises:
```swift
SharingRequest(
targetInteraction: "purchase",
shareTitle: "My picks at Your Store",
shareText: "Found this, thought of you",
shareImageURL: "https://your-store.com/product.jpg"
)
```
They are the highest-precedence source: the sharing page's own copy is used when they are absent, and your merchant-level defaults below that. `shareImageURL` must be `https` and is fetched under a 2 MB cap and a tap deadline — a preview that does not arrive in time is dropped, and the share still goes out with its link and attribution intact.
### The sharing sheet
`FrakSDKUI` adds a single view modifier:
```swift
import FrakSDKUI
struct ProductView: View {
@State private var isSharing = false
var body: some View {
Button("Share and earn") { isSharing = true }
.frakSharingSheet(isPresented: $isSharing, request: request) { result in
switch result {
case .shared(let link): print("shared \(link)")
case .copied(let link): print("copied \(link)")
case .installStarted: break // informational only
case .walletOpened: break // the wallet was installed and opened
case .dismissed: break
case .failed(let error): print(error.localizedDescription)
}
}
}
}
```
The callback fires once per presentation, with the most significant outcome. Ranked lowest to highest: `failed`, `dismissed`, `shared` and `copied`, `installStarted`, `walletOpened`. So a user who installs the wallet and then swipes the sheet away still reports the install, not the dismissal.
### Tuning the sheet
```swift
.frakSharingSheet(
isPresented: $isSharing,
request: request,
configuration: FrakSharingConfiguration(
heightFraction: 0.9,
install: .overlay(.init(position: .bottomRaised))
)
) { result in
// handle SharingResult
}
```
| Option | Default | Meaning |
| --- | --- | --- |
| `heightFraction` | `0.85` | Sheet height, clamped to `0.3...1.0`. |
| `install` | `.storeProductPage` | `.storeProductPage` raises a modal `SKStoreProductViewController`; `.overlay` shows an `SKOverlay` banner that does not cover the sheet. |
| `detectInstall` | `true` | Polls for the wallet becoming installable while the store surface is up, then hands off and reports `.walletOpened`. |
| `language` | device locale | Sheet language as a BCP 47 tag (`"en"`, `"fr-CA"`). Selects among the translations the page ships; an unknown tag falls back to the page's own default. Part of the pre-warmed URL, so a tag that changes between warm-up and tap costs the warm view, not the language. |
Install detection relies on the same `LSApplicationQueriesSchemes` entry that `isFrakAppInstalled()` needs. Without it, neither works.
## Referral deep links
iOS offers no automatic mode: nothing lets a library install itself in front of your app's own URL routing. Wire it yourself:
```swift
.onOpenURL { url in
Task { await Frak.clientOrNull?.appLink.handleReferral(url) }
}
```
`handleReferral` returns whether the URL carried a Frak referral context. It is not a "stop routing" signal, so keep navigating either way.
The rest of the namespace:
```swift
await client.appLink.isFrakAppInstalled()
await client.appLink.openFrakApp() // .openedApp, .openedStore, or .failed
try await client.appLink.installPageURL(returnScheme: "yourapp", sessionId: sessionId)
```
`Frak.parseReferralLink(_:)` is static and pure, so you can decode a link before the SDK is initialized.
### Info.plist
On top of the [wallet schemes](#declare-the-wallet-schemes), declare the scheme your app receives referral links on:
```xml title="Info.plist"
CFBundleURLTypesCFBundleURLNamecom.your-company.your-appCFBundleTypeRoleEditorCFBundleURLSchemesyourapp
```
To receive `https://` referral links instead of a custom scheme, add the Associated Domains capability and publish an `apple-app-site-association` file for your domain. That part is standard Universal Links setup and the SDK does not do it for you.
## Consent and privacy
The SDK ships no consent UI. Wire your consent flow to:
```swift
await client.setTrackingEnabled(false) // stops tracking and purges anything queued
await client.resetAnonymousId() // rotates the local identity
```
Both products ship a `PrivacyInfo.xcprivacy`. It declares three collected data types, all linked to the user, none used for tracking:
| Data type | What it covers |
| --- | --- |
| User ID | The anonymous ID and the `customerId` you pass to `tracking.purchase`. |
| Purchase history | `customerId`, `orderId`, and the checkout token. |
| Product interaction | Arrival, sharing, and custom interactions. |
`NSPrivacyTracking` is `false`: no ad network is in the SDK path.
## Next steps
# Installation via Package Manager
> Install the Frak SDK and web components from npm, configure them once, and call the actions from TypeScript.
import { Tabs, TabItem, Aside, LinkCard, CardGrid } from '@astrojs/starlight/components';
# Installation via package manager
For any project with a bundler: install the packages, set the config in a module that runs first, and import the components you use.
## Prerequisites
1. A package manager (npm, yarn, pnpm, or bun) and a bundler.
2. A merchant account on the [Frak business dashboard](https://business.frak.id/) with your domain registered. The main domain is registered at sign-up; add subdomains under **Allowed Domains**.
If you have not done that yet, start with the [Get started guide](/guides/).
## 1. Install
| Package | What it gives you |
| --- | --- |
| `@frak-labs/components` | The `` web components. Importing one registers it and boots the SDK. |
| `@frak-labs/core-sdk` | The client and the actions, for anything you drive yourself. |
```bash
npm install @frak-labs/components @frak-labs/core-sdk
```
```bash
yarn add @frak-labs/components @frak-labs/core-sdk
```
```bash
pnpm add @frak-labs/components @frak-labs/core-sdk
```
```bash
bun add @frak-labs/components @frak-labs/core-sdk
```
## 2. Configure
Put the config in its own module so it runs before anything imports a component:
```ts title="frak-setup.ts"
import type { FrakWalletSdkConfig } from "@frak-labs/core-sdk";
declare global {
interface Window {
FrakSetup: { config?: FrakWalletSdkConfig };
}
}
window.FrakSetup = {
config: {
metadata: {
name: "Your Store",
currency: "eur",
},
},
};
```
Every field is listed on the [FrakSetup reference](/developers/components/frak-setup/) and in [Configuration](/developers/concepts/configuration/).
## 3. Register the components
Import your config module first, then each component you use. The imports are side-effectful: they register the custom element and boot the SDK from `window.FrakSetup.config`.
```ts title="main.ts"
import "./frak-setup";
import "@frak-labs/components/banner";
import "@frak-labs/components/buttonShare";
import "@frak-labs/components/postPurchase";
```
Available subpaths: `banner`, `buttonShare`, `buttonWallet`, `openInApp`, `postPurchase`. There is no root import, so import the subpath you need.
Then use the elements in your markup:
```html
```
## 4. Call the actions
Actions live in `@frak-labs/core-sdk/actions`. All of them except `trackPurchaseStatus` take the client as their first argument, and the client is published on `window.FrakSetup.client` once the SDK is ready:
```ts
import { displayModal, watchWalletStatus } from "@frak-labs/core-sdk/actions";
import type { FrakClient } from "@frak-labs/core-sdk";
function waitForClient(): Promise {
if (window.FrakSetup?.client) return Promise.resolve(window.FrakSetup.client);
return new Promise((resolve) => {
window.addEventListener(
"frak:client",
() => resolve(window.FrakSetup.client as FrakClient),
{ once: true }
);
});
}
const client = await waitForClient();
await watchWalletStatus(client, (status) => {
console.log(status.key === "connected" ? status.wallet : "not connected");
});
await displayModal(client, {
steps: {
login: {},
final: { action: { key: "reward" } },
},
});
```
### Track a purchase
```ts
import { trackPurchaseStatus } from "@frak-labs/core-sdk/actions";
await trackPurchaseStatus({
customerId: "cust_123",
orderId: "order_456",
token: "a-unique-order-token",
});
```
Rewards are only released once your backend confirms the order with a signed webhook. See [Validate purchases from your backend](/guides/platforms/custom/backend/).
### What is available
| Action | Purpose |
| --- | --- |
| `watchWalletStatus` | Current wallet status, plus every change |
| `displayModal` | Open a modal built from steps (`login`, `final`, and more) |
| `displaySharingPage` | Open the sharing page directly |
| `sendInteraction` | Send an interaction, fire and forget |
| `trackPurchaseStatus` | Register an order so a confirmed sale can pay a reward |
| `referralInteraction`, `processReferral`, `setupReferral` | Handle an inbound referral |
| `getMerchantInformation` | Your merchant data as resolved by the backend |
| `getUserReferralStatus`, `getMergeToken` | Referral state and wallet merge token |
| `openSso`, `prepareSso`, `prepareSsoUrl` | Single sign-on flows |
| `siweAuthenticate` | Sign-In with Ethereum |
| `sendTransaction` | Ask the wallet to send a transaction |
| `modalBuilder` | Fluent builder for modal steps |
Full signatures live in the [generated SDK reference](/developers/references/readme/).
### Other entry points
`@frak-labs/core-sdk` also exposes `/rewards` and `/identity` subpaths, and `/bundle` (index plus actions in one import) for CDN-style consumption.
## Advanced: create the client yourself
If you do not use the components package, create the client by hand. Call `setupClient` **once** and reuse the promise: each call recreates the listener iframe.
```ts title="frak-client.ts"
import { setupClient, type FrakWalletSdkConfig } from "@frak-labs/core-sdk";
const config: FrakWalletSdkConfig = {
metadata: { name: "Your Store" },
};
let clientPromise: ReturnType | undefined;
export function getFrakClient() {
clientPromise ??= setupClient({ config });
return clientPromise;
}
```
## Next steps
# React Integration
> Add Frak to a React app, with the web components for the UI and the React SDK hooks for programmatic control.
import { Tabs, TabItem, Aside, LinkCard, CardGrid } from '@astrojs/starlight/components';
# React integration
There are two layers, and most apps use both:
- **The web components.** Drop ``, ``, and `` straight into your JSX. No provider, no hooks. Start here.
- **`@frak-labs/react-sdk`.** Providers and hooks for custom flows: wallet status, modals, referrals, SSO, transactions.
## Prerequisites
1. A React 18 or 19 project.
2. A merchant account on the [Frak business dashboard](https://business.frak.id/) with your domain registered. The main domain is registered at sign-up; add subdomains under **Allowed Domains**.
If you have not done that yet, start with the [Get started guide](/guides/).
## The components in JSX
Install `@frak-labs/components`, set the config in its own module, and import the components you use before rendering. The [package manager guide](/developers/integration/javascript/) covers that setup, and [Add Frak to a custom website](/guides/platforms/custom/web/) shows a full React example including the TypeScript declaration for the `` tags.
## The React SDK
### 1. Install
`@tanstack/react-query` and `viem` are peer dependencies: the hooks are React Query queries and mutations, and the SDK ships no `QueryClient` of its own.
```bash
npm install @frak-labs/react-sdk @tanstack/react-query viem
```
```bash
yarn add @frak-labs/react-sdk @tanstack/react-query viem
```
```bash
pnpm add @frak-labs/react-sdk @tanstack/react-query viem
```
```bash
bun add @frak-labs/react-sdk @tanstack/react-query viem
```
### 2. Set up the providers
Three providers, in this order: your `QueryClientProvider`, then `FrakConfigProvider` (holds the config), then `FrakIFrameClientProvider` (creates the listener iframe and the client).
```tsx twoslash title="FrakProvider.tsx"
// @noErrors
// [!include ~/snippets/integration/FrakProvider.tsx]
```
Wrap your app with it:
```tsx twoslash title="App.tsx"
// @noErrors
import { FrakProvider } from './FrakProvider';
function App() {
return (
{/* Your app content */}
);
}
export default App;
```
The config takes the same fields as everywhere else. See [FrakSetup](/developers/components/frak-setup/) and [Configuration](/developers/concepts/configuration/).
### 3. Read the wallet status
```tsx twoslash title="WalletStatus.tsx"
// @noErrors
// [!include ~/snippets/integration/react-app.tsx:wallet-status]
```
### 4. Open a modal
```tsx twoslash title="LoginButton.tsx"
// @noErrors
// [!include ~/snippets/integration/react-app.tsx:login-button]
```
### 5. Put it together
```tsx twoslash
// @noErrors
// [!include ~/snippets/integration/react-app.tsx:app]
```
```tsx twoslash
// @noErrors
// [!include ~/snippets/integration/react-app.tsx]
```
```tsx twoslash
// @noErrors
// [!include ~/snippets/integration/FrakProvider.tsx]
```
## Every hook
| Hook | Returns | What it does |
| --- | --- | --- |
| `useWalletStatus()` | query | Current wallet status, kept in sync |
| `useDisplayModal()` | mutation | Open a modal from steps, with an optional `placement` |
| `useDisplaySharingPage()` | mutation | Open the sharing page |
| `useReferralInteraction()` | value | Processes an inbound referral once the client is ready, returns the state or an error |
| `useSetupReferral()` | side effect | Wires referral handling, emits `frak:referral-success` |
| `useGetMerchantInformation()` | query | Your merchant data as resolved by the backend |
| `useGetUserReferralStatus()` | query | The user's referral state |
| `useGetMergeToken()` | query | Token used to merge a wallet |
| `useSiweAuthenticate()` | mutation | Sign-In with Ethereum |
| `useSendTransactionAction()` | mutation | Ask the wallet to send a transaction |
| `useOpenSso()` | mutation | Open the SSO flow |
| `usePrepareSso(params)` | query | Prepare an SSO session |
| `usePrepareSsoUrl(params)` | query | Build the SSO URL ahead of time, so the open is a direct user gesture and dodges popup blockers |
| `useFrakClient()` | value | The raw client, or `undefined` before it is ready |
| `useFrakConfig()` | value | The resolved config. Throws outside a `FrakConfigProvider` |
Most mutation hooks take an optional `{ mutations }` object of React Query options, and most query hooks take `{ query }`. Two exceptions: `useWalletStatus()` takes no argument, and `usePrepareSso(params)` takes the SSO parameters directly.
Full signatures live in the [generated SDK reference](/developers/references/readme/).
## Handle an inbound referral
One hook is enough on the page a referred visitor lands on:
```tsx
import { useReferralInteraction } from "@frak-labs/react-sdk";
export function ReferralHandler() {
const state = useReferralInteraction();
// "idle" | "processing" | a referral state | an Error
return null;
}
```
## Track a purchase
Purchase tracking has no hook: call the action, which needs no client.
```tsx
import { trackPurchaseStatus } from "@frak-labs/core-sdk/actions";
await trackPurchaseStatus({
customerId: "cust_123",
orderId: "order_456",
token: "a-unique-order-token",
});
```
Rewards are only released once your backend confirms the order with a signed webhook. See [Validate purchases from your backend](/guides/platforms/custom/backend/).
## Next steps
# SDK Reference
> Generated API reference for every Frak SDK, across web, Android and iOS.
import { CardGrid, LinkCard } from '@astrojs/starlight/components';
# SDK Reference
Symbol-level reference for every Frak SDK, generated from the source of
[`frak-id/wallet`](https://github.com/frak-id/wallet). If you are integrating
for the first time, read the [Developers guides](/developers/) first: these
pages document what exists, not how to wire it up.
Each SDK has its own collapsed group in the sidebar, and search covers every
symbol. The links below drop you at each package's usual entry point.
## About these pages
Everything here is generated from doc comments in the SDK source and tracks the
pinned SDK version exactly. Nothing is hand written, so corrections belong
upstream in `frak-id/wallet`, not in this repository.
# Android SDK
## Packages
| Name |
|---|
| [id.frak.sdk](/developers/references/android/id-frak-sdk/) |
| [id.frak.sdk.config](/developers/references/android/id-frak-sdk-config/) |
| [id.frak.sdk.core](/developers/references/android/id-frak-sdk-core/) |
| [id.frak.sdk.net](/developers/references/android/id-frak-sdk-net/) |
| [id.frak.sdk.rewards](/developers/references/android/id-frak-sdk-rewards/) |
| [id.frak.sdk.sharing](/developers/references/android/id-frak-sdk-sharing/) |
| [id.frak.sdk.tracking](/developers/references/android/id-frak-sdk-tracking/) |
| [id.frak.sdk.ui](/developers/references/android/id-frak-sdk-ui/) |
# id.frak.sdk
## Types
| Name | Summary |
|---|---|
| [AppLinkApi](/developers/references/android/id-frak-sdk/applinkapi/) | class [AppLinkApi](/developers/references/android/id-frak-sdk/applinkapi/) Inbound referral links and the wallet app handoff. Obtained from [FrakClient.appLink](/developers/references/android/id-frak-sdk/frakclient/applink/). |
| [ConfigApi](/developers/references/android/id-frak-sdk/configapi/) | class [ConfigApi](/developers/references/android/id-frak-sdk/configapi/) Config resolution. Obtained from [FrakClient.config](/developers/references/android/id-frak-sdk/frakclient/config/). |
| [Frak](/developers/references/android/id-frak-sdk/frak/) | object [Frak](/developers/references/android/id-frak-sdk/frak/) Entry point. Call [initialize](/developers/references/android/id-frak-sdk/frak/initialize/) once from `Application.onCreate`, then use [client](/developers/references/android/id-frak-sdk/frak/client/). |
| [FrakClient](/developers/references/android/id-frak-sdk/frakclient/) | class [FrakClient](/developers/references/android/id-frak-sdk/frakclient/) Everything the SDK can do. Obtained from [Frak.client](/developers/references/android/id-frak-sdk/frak/client/). Every suspending member has a `*Async` twin returning a [CompletableFuture](https://docs.oracle.com/en/java/javase/17/docs/api/java.base/java/util/concurrent/CompletableFuture.html), since a Java caller cannot name a `Continuation`. |
| [FrakSdkVersion](/developers/references/android/id-frak-sdk/fraksdkversion/) | object [FrakSdkVersion](/developers/references/android/id-frak-sdk/fraksdkversion/) Version of this SDK build, sent on every request. `@JvmStatic val` rather than `const val`: a `const` is inlined into the merchant's bytecode and would report their compile-time version. |
| [InternalFrakApi](/developers/references/android/id-frak-sdk/internalfrakapi/) | @[Target](https://kotlinlang.org/api/core/kotlin-stdlib/kotlin.annotation/-target/index.html)(allowedTargets = [[AnnotationTarget.CLASS](https://kotlinlang.org/api/core/kotlin-stdlib/kotlin.annotation/-annotation-target/-c-l-a-s-s/index.html), [AnnotationTarget.PROPERTY](https://kotlinlang.org/api/core/kotlin-stdlib/kotlin.annotation/-annotation-target/-p-r-o-p-e-r-t-y/index.html), [AnnotationTarget.FUNCTION](https://kotlinlang.org/api/core/kotlin-stdlib/kotlin.annotation/-annotation-target/-f-u-n-c-t-i-o-n/index.html), [AnnotationTarget.CONSTRUCTOR](https://kotlinlang.org/api/core/kotlin-stdlib/kotlin.annotation/-annotation-target/-c-o-n-s-t-r-u-c-t-o-r/index.html)]) annotation class [InternalFrakApi](/developers/references/android/id-frak-sdk/internalfrakapi/) Marks a declaration that is `public` only so the sibling `:frak-sdk-ui` module can see it, with no compatibility guarantee. Wired into binary-compatibility-validator's `nonPublicMarkers`, so marked types stay out of the committed `.api` dump. |
| [OpenAppResult](/developers/references/android/id-frak-sdk/openappresult/) | enum [OpenAppResult](/developers/references/android/id-frak-sdk/openappresult/) : [Enum](https://kotlinlang.org/api/core/kotlin-stdlib/kotlin/-enum/index.html)<[OpenAppResult](/developers/references/android/id-frak-sdk/openappresult/)> |
| [RewardsApi](/developers/references/android/id-frak-sdk/rewardsapi/) | class [RewardsApi](/developers/references/android/id-frak-sdk/rewardsapi/) Campaigns and reward selection. Obtained from [FrakClient.rewards](/developers/references/android/id-frak-sdk/frakclient/rewards/). |
| [SharingApi](/developers/references/android/id-frak-sdk/sharingapi/) | class [SharingApi](/developers/references/android/id-frak-sdk/sharingapi/) Share link construction. Obtained from [FrakClient.sharing](/developers/references/android/id-frak-sdk/frakclient/sharing/). |
| [TrackingApi](/developers/references/android/id-frak-sdk/trackingapi/) | class [TrackingApi](/developers/references/android/id-frak-sdk/trackingapi/) Interaction and purchase tracking. Obtained from [FrakClient.tracking](/developers/references/android/id-frak-sdk/frakclient/tracking/). |
# id.frak.sdk.config
## Types
| Name | Summary |
|---|---|
| [AttributionDefaults](/developers/references/android/id-frak-sdk-config/attributiondefaults/) | class [AttributionDefaults](/developers/references/android/id-frak-sdk-config/attributiondefaults/) Merged by the backend over anything the SDK supplies. |
| [BannerConfig](/developers/references/android/id-frak-sdk-config/bannerconfig/) | class [BannerConfig](/developers/references/android/id-frak-sdk-config/bannerconfig/) |
| [ButtonShareConfig](/developers/references/android/id-frak-sdk-config/buttonshareconfig/) | class [ButtonShareConfig](/developers/references/android/id-frak-sdk-config/buttonshareconfig/) |
| [ButtonWalletConfig](/developers/references/android/id-frak-sdk-config/buttonwalletconfig/) | class [ButtonWalletConfig](/developers/references/android/id-frak-sdk-config/buttonwalletconfig/) |
| [FrakResolvedConfig](/developers/references/android/id-frak-sdk-config/frakresolvedconfig/) | class [FrakResolvedConfig](/developers/references/android/id-frak-sdk-config/frakresolvedconfig/) What the backend knows about this merchant, as resolved by `GET /user/merchant/resolve`. |
| [OpenInAppConfig](/developers/references/android/id-frak-sdk-config/openinappconfig/) | class [OpenInAppConfig](/developers/references/android/id-frak-sdk-config/openinappconfig/) |
| [PostPurchaseConfig](/developers/references/android/id-frak-sdk-config/postpurchaseconfig/) | class [PostPurchaseConfig](/developers/references/android/id-frak-sdk-config/postpurchaseconfig/) |
| [ResolvedComponents](/developers/references/android/id-frak-sdk-config/resolvedcomponents/) | class [ResolvedComponents](/developers/references/android/id-frak-sdk-config/resolvedcomponents/) Every field nullable: absent means "fall through to the next tier", not "empty". |
| [ResolvedPlacement](/developers/references/android/id-frak-sdk-config/resolvedplacement/) | class [ResolvedPlacement](/developers/references/android/id-frak-sdk-config/resolvedplacement/) One placement's overrides. Tier 1 of the copy precedence. |
| [ResolvedSdkConfig](/developers/references/android/id-frak-sdk-config/resolvedsdkconfig/) | class [ResolvedSdkConfig](/developers/references/android/id-frak-sdk-config/resolvedsdkconfig/) The `sdkConfig` block of the resolve response. Wire-shaped: every field may be absent. |
# AttributionDefaults
class AttributionDefaults
Merged by the backend over anything the SDK supplies.
## Properties
| Name | Summary |
|---|---|
| [ref](/developers/references/android/id-frak-sdk-config/attributiondefaults/ref/) | val [ref](/developers/references/android/id-frak-sdk-config/attributiondefaults/ref/): [String](https://kotlinlang.org/api/core/kotlin-stdlib/kotlin/-string/index.html)? |
| [utmCampaign](/developers/references/android/id-frak-sdk-config/attributiondefaults/utmcampaign/) | val [utmCampaign](/developers/references/android/id-frak-sdk-config/attributiondefaults/utmcampaign/): [String](https://kotlinlang.org/api/core/kotlin-stdlib/kotlin/-string/index.html)? |
| [utmMedium](/developers/references/android/id-frak-sdk-config/attributiondefaults/utmmedium/) | val [utmMedium](/developers/references/android/id-frak-sdk-config/attributiondefaults/utmmedium/): [String](https://kotlinlang.org/api/core/kotlin-stdlib/kotlin/-string/index.html)? |
| [utmSource](/developers/references/android/id-frak-sdk-config/attributiondefaults/utmsource/) | val [utmSource](/developers/references/android/id-frak-sdk-config/attributiondefaults/utmsource/): [String](https://kotlinlang.org/api/core/kotlin-stdlib/kotlin/-string/index.html)? |
| [utmTerm](/developers/references/android/id-frak-sdk-config/attributiondefaults/utmterm/) | val [utmTerm](/developers/references/android/id-frak-sdk-config/attributiondefaults/utmterm/): [String](https://kotlinlang.org/api/core/kotlin-stdlib/kotlin/-string/index.html)? |
| [via](/developers/references/android/id-frak-sdk-config/attributiondefaults/via/) | val [via](/developers/references/android/id-frak-sdk-config/attributiondefaults/via/): [String](https://kotlinlang.org/api/core/kotlin-stdlib/kotlin/-string/index.html)? |
## Functions
| Name | Summary |
|---|---|
| equals | open operator override fun equals(other: [Any](https://kotlinlang.org/api/core/kotlin-stdlib/kotlin/-any/index.html)?): [Boolean](https://kotlinlang.org/api/core/kotlin-stdlib/kotlin/-boolean/index.html) |
| hashCode | open override fun hashCode(): [Int](https://kotlinlang.org/api/core/kotlin-stdlib/kotlin/-int/index.html) |
| toString | open override fun toString(): [String](https://kotlinlang.org/api/core/kotlin-stdlib/kotlin/-string/index.html) |
# ref
val ref: [String](https://kotlinlang.org/api/core/kotlin-stdlib/kotlin/-string/index.html)?
# utmCampaign
val utmCampaign: [String](https://kotlinlang.org/api/core/kotlin-stdlib/kotlin/-string/index.html)?
# utmMedium
val utmMedium: [String](https://kotlinlang.org/api/core/kotlin-stdlib/kotlin/-string/index.html)?
# utmSource
val utmSource: [String](https://kotlinlang.org/api/core/kotlin-stdlib/kotlin/-string/index.html)?
# utmTerm
val utmTerm: [String](https://kotlinlang.org/api/core/kotlin-stdlib/kotlin/-string/index.html)?
# via
val via: [String](https://kotlinlang.org/api/core/kotlin-stdlib/kotlin/-string/index.html)?
# BannerConfig
class BannerConfig
## Properties
| Name | Summary |
|---|---|
| [imageUrl](/developers/references/android/id-frak-sdk-config/bannerconfig/imageurl/) | val [imageUrl](/developers/references/android/id-frak-sdk-config/bannerconfig/imageurl/): [String](https://kotlinlang.org/api/core/kotlin-stdlib/kotlin/-string/index.html)? |
| [inappCta](/developers/references/android/id-frak-sdk-config/bannerconfig/inappcta/) | val [inappCta](/developers/references/android/id-frak-sdk-config/bannerconfig/inappcta/): [String](https://kotlinlang.org/api/core/kotlin-stdlib/kotlin/-string/index.html)? |
| [inappDescription](/developers/references/android/id-frak-sdk-config/bannerconfig/inappdescription/) | val [inappDescription](/developers/references/android/id-frak-sdk-config/bannerconfig/inappdescription/): [String](https://kotlinlang.org/api/core/kotlin-stdlib/kotlin/-string/index.html)? |
| [inappTitle](/developers/references/android/id-frak-sdk-config/bannerconfig/inapptitle/) | val [inappTitle](/developers/references/android/id-frak-sdk-config/bannerconfig/inapptitle/): [String](https://kotlinlang.org/api/core/kotlin-stdlib/kotlin/-string/index.html)? |
| [referralCta](/developers/references/android/id-frak-sdk-config/bannerconfig/referralcta/) | val [referralCta](/developers/references/android/id-frak-sdk-config/bannerconfig/referralcta/): [String](https://kotlinlang.org/api/core/kotlin-stdlib/kotlin/-string/index.html)? |
| [referralDescription](/developers/references/android/id-frak-sdk-config/bannerconfig/referraldescription/) | val [referralDescription](/developers/references/android/id-frak-sdk-config/bannerconfig/referraldescription/): [String](https://kotlinlang.org/api/core/kotlin-stdlib/kotlin/-string/index.html)? |
| [referralTitle](/developers/references/android/id-frak-sdk-config/bannerconfig/referraltitle/) | val [referralTitle](/developers/references/android/id-frak-sdk-config/bannerconfig/referraltitle/): [String](https://kotlinlang.org/api/core/kotlin-stdlib/kotlin/-string/index.html)? |
## Functions
| Name | Summary |
|---|---|
| equals | open operator override fun equals(other: [Any](https://kotlinlang.org/api/core/kotlin-stdlib/kotlin/-any/index.html)?): [Boolean](https://kotlinlang.org/api/core/kotlin-stdlib/kotlin/-boolean/index.html) |
| hashCode | open override fun hashCode(): [Int](https://kotlinlang.org/api/core/kotlin-stdlib/kotlin/-int/index.html) |
| toString | open override fun toString(): [String](https://kotlinlang.org/api/core/kotlin-stdlib/kotlin/-string/index.html) |
# imageUrl
val imageUrl: [String](https://kotlinlang.org/api/core/kotlin-stdlib/kotlin/-string/index.html)?
# inappCta
val inappCta: [String](https://kotlinlang.org/api/core/kotlin-stdlib/kotlin/-string/index.html)?
# inappDescription
val inappDescription: [String](https://kotlinlang.org/api/core/kotlin-stdlib/kotlin/-string/index.html)?
# inappTitle
val inappTitle: [String](https://kotlinlang.org/api/core/kotlin-stdlib/kotlin/-string/index.html)?
# referralCta
val referralCta: [String](https://kotlinlang.org/api/core/kotlin-stdlib/kotlin/-string/index.html)?
# referralDescription
val referralDescription: [String](https://kotlinlang.org/api/core/kotlin-stdlib/kotlin/-string/index.html)?
# referralTitle
val referralTitle: [String](https://kotlinlang.org/api/core/kotlin-stdlib/kotlin/-string/index.html)?
# ButtonShareConfig
class ButtonShareConfig
## Properties
| Name | Summary |
|---|---|
| [clickAction](/developers/references/android/id-frak-sdk-config/buttonshareconfig/clickaction/) | val [clickAction](/developers/references/android/id-frak-sdk-config/buttonshareconfig/clickaction/): [String](https://kotlinlang.org/api/core/kotlin-stdlib/kotlin/-string/index.html)? |
| [noRewardText](/developers/references/android/id-frak-sdk-config/buttonshareconfig/norewardtext/) | val [noRewardText](/developers/references/android/id-frak-sdk-config/buttonshareconfig/norewardtext/): [String](https://kotlinlang.org/api/core/kotlin-stdlib/kotlin/-string/index.html)? Copy for when there is no concrete reward to advertise (e.g. a percentage-only campaign). |
| [text](/developers/references/android/id-frak-sdk-config/buttonshareconfig/text/) | val [text](/developers/references/android/id-frak-sdk-config/buttonshareconfig/text/): [String](https://kotlinlang.org/api/core/kotlin-stdlib/kotlin/-string/index.html)? |
## Functions
| Name | Summary |
|---|---|
| equals | open operator override fun equals(other: [Any](https://kotlinlang.org/api/core/kotlin-stdlib/kotlin/-any/index.html)?): [Boolean](https://kotlinlang.org/api/core/kotlin-stdlib/kotlin/-boolean/index.html) |
| hashCode | open override fun hashCode(): [Int](https://kotlinlang.org/api/core/kotlin-stdlib/kotlin/-int/index.html) |
| toString | open override fun toString(): [String](https://kotlinlang.org/api/core/kotlin-stdlib/kotlin/-string/index.html) |
# clickAction
val clickAction: [String](https://kotlinlang.org/api/core/kotlin-stdlib/kotlin/-string/index.html)?
# noRewardText
val noRewardText: [String](https://kotlinlang.org/api/core/kotlin-stdlib/kotlin/-string/index.html)?
Copy for when there is no concrete reward to advertise (e.g. a percentage-only campaign).
# text
val text: [String](https://kotlinlang.org/api/core/kotlin-stdlib/kotlin/-string/index.html)?
# ButtonWalletConfig
class ButtonWalletConfig
## Properties
| Name | Summary |
|---|---|
| [position](/developers/references/android/id-frak-sdk-config/buttonwalletconfig/position/) | val [position](/developers/references/android/id-frak-sdk-config/buttonwalletconfig/position/): [String](https://kotlinlang.org/api/core/kotlin-stdlib/kotlin/-string/index.html)? |
## Functions
| Name | Summary |
|---|---|
| equals | open operator override fun equals(other: [Any](https://kotlinlang.org/api/core/kotlin-stdlib/kotlin/-any/index.html)?): [Boolean](https://kotlinlang.org/api/core/kotlin-stdlib/kotlin/-boolean/index.html) |
| hashCode | open override fun hashCode(): [Int](https://kotlinlang.org/api/core/kotlin-stdlib/kotlin/-int/index.html) |
| toString | open override fun toString(): [String](https://kotlinlang.org/api/core/kotlin-stdlib/kotlin/-string/index.html) |
# position
val position: [String](https://kotlinlang.org/api/core/kotlin-stdlib/kotlin/-string/index.html)?
# FrakResolvedConfig
class FrakResolvedConfig
What the backend knows about this merchant, as resolved by `GET /user/merchant/resolve`.
## Properties
| Name | Summary |
|---|---|
| [currency](/developers/references/android/id-frak-sdk-config/frakresolvedconfig/currency/) | val [currency](/developers/references/android/id-frak-sdk-config/frakresolvedconfig/currency/): [FrakCurrency](/developers/references/android/id-frak-sdk-core/frakcurrency/)? May differ from [id.frak.sdk.core.FrakMetadata.currency](/developers/references/android/id-frak-sdk-core/frakmetadata/currency/); informational only, never used for formatting. |
| [displayLogoUrl](/developers/references/android/id-frak-sdk-config/frakresolvedconfig/displaylogourl/) | val [displayLogoUrl](/developers/references/android/id-frak-sdk-config/frakresolvedconfig/displaylogourl/): [String](https://kotlinlang.org/api/core/kotlin-stdlib/kotlin/-string/index.html)? Logo to show alongside [displayName](/developers/references/android/id-frak-sdk-config/frakresolvedconfig/displayname/), or null when the backend has none on file. |
| [displayName](/developers/references/android/id-frak-sdk-config/frakresolvedconfig/displayname/) | val [displayName](/developers/references/android/id-frak-sdk-config/frakresolvedconfig/displayname/): [String](https://kotlinlang.org/api/core/kotlin-stdlib/kotlin/-string/index.html) Name to show a user: the `sdkConfig` override when the backend sent one, else name. |
| [domain](/developers/references/android/id-frak-sdk-config/frakresolvedconfig/domain/) | val [domain](/developers/references/android/id-frak-sdk-config/frakresolvedconfig/domain/): [String](https://kotlinlang.org/api/core/kotlin-stdlib/kotlin/-string/index.html) Merchant's canonical domain, not whatever domain was queried. |
| [hidden](/developers/references/android/id-frak-sdk-config/frakresolvedconfig/hidden/) | val [hidden](/developers/references/android/id-frak-sdk-config/frakresolvedconfig/hidden/): [Boolean](https://kotlinlang.org/api/core/kotlin-stdlib/kotlin/-boolean/index.html) |
| [lang](/developers/references/android/id-frak-sdk-config/frakresolvedconfig/lang/) | val [lang](/developers/references/android/id-frak-sdk-config/frakresolvedconfig/lang/): [FrakLanguage](/developers/references/android/id-frak-sdk-core/fraklanguage/)? Null when the backend sends a value this SDK's build does not recognise. |
| [merchantId](/developers/references/android/id-frak-sdk-config/frakresolvedconfig/merchantid/) | val [merchantId](/developers/references/android/id-frak-sdk-config/frakresolvedconfig/merchantid/): [String](https://kotlinlang.org/api/core/kotlin-stdlib/kotlin/-string/index.html) |
| [name](/developers/references/android/id-frak-sdk-config/frakresolvedconfig/name/) | val [name](/developers/references/android/id-frak-sdk-config/frakresolvedconfig/name/): [String](https://kotlinlang.org/api/core/kotlin-stdlib/kotlin/-string/index.html) |
| [sdkConfig](/developers/references/android/id-frak-sdk-config/frakresolvedconfig/sdkconfig/) | val [sdkConfig](/developers/references/android/id-frak-sdk-config/frakresolvedconfig/sdkconfig/): [ResolvedSdkConfig](/developers/references/android/id-frak-sdk-config/resolvedsdkconfig/)? |
## Functions
| Name | Summary |
|---|---|
| equals | open operator override fun equals(other: [Any](https://kotlinlang.org/api/core/kotlin-stdlib/kotlin/-any/index.html)?): [Boolean](https://kotlinlang.org/api/core/kotlin-stdlib/kotlin/-boolean/index.html) |
| hashCode | open override fun hashCode(): [Int](https://kotlinlang.org/api/core/kotlin-stdlib/kotlin/-int/index.html) |
| toString | open override fun toString(): [String](https://kotlinlang.org/api/core/kotlin-stdlib/kotlin/-string/index.html) |
# currency
val currency: [FrakCurrency](/developers/references/android/id-frak-sdk-core/frakcurrency/)?
May differ from [id.frak.sdk.core.FrakMetadata.currency](/developers/references/android/id-frak-sdk-core/frakmetadata/currency/); informational only, never used for formatting.
# displayLogoUrl
val displayLogoUrl: [String](https://kotlinlang.org/api/core/kotlin-stdlib/kotlin/-string/index.html)?
Logo to show alongside [displayName](/developers/references/android/id-frak-sdk-config/frakresolvedconfig/displayname/), or null when the backend has none on file.
# displayName
val displayName: [String](https://kotlinlang.org/api/core/kotlin-stdlib/kotlin/-string/index.html)
Name to show a user: the `sdkConfig` override when the backend sent one, else name.
# domain
val domain: [String](https://kotlinlang.org/api/core/kotlin-stdlib/kotlin/-string/index.html)
Merchant's canonical domain, not whatever domain was queried.
# hidden
val hidden: [Boolean](https://kotlinlang.org/api/core/kotlin-stdlib/kotlin/-boolean/index.html)
# lang
val lang: [FrakLanguage](/developers/references/android/id-frak-sdk-core/fraklanguage/)?
Null when the backend sends a value this SDK's build does not recognise.
# merchantId
val merchantId: [String](https://kotlinlang.org/api/core/kotlin-stdlib/kotlin/-string/index.html)
# name
val name: [String](https://kotlinlang.org/api/core/kotlin-stdlib/kotlin/-string/index.html)
# sdkConfig
val sdkConfig: [ResolvedSdkConfig](/developers/references/android/id-frak-sdk-config/resolvedsdkconfig/)?
# OpenInAppConfig
class OpenInAppConfig
## Properties
| Name | Summary |
|---|---|
| [text](/developers/references/android/id-frak-sdk-config/openinappconfig/text/) | val [text](/developers/references/android/id-frak-sdk-config/openinappconfig/text/): [String](https://kotlinlang.org/api/core/kotlin-stdlib/kotlin/-string/index.html)? |
## Functions
| Name | Summary |
|---|---|
| equals | open operator override fun equals(other: [Any](https://kotlinlang.org/api/core/kotlin-stdlib/kotlin/-any/index.html)?): [Boolean](https://kotlinlang.org/api/core/kotlin-stdlib/kotlin/-boolean/index.html) |
| hashCode | open override fun hashCode(): [Int](https://kotlinlang.org/api/core/kotlin-stdlib/kotlin/-int/index.html) |
| toString | open override fun toString(): [String](https://kotlinlang.org/api/core/kotlin-stdlib/kotlin/-string/index.html) |
# text
val text: [String](https://kotlinlang.org/api/core/kotlin-stdlib/kotlin/-string/index.html)?
# PostPurchaseConfig
class PostPurchaseConfig
## Properties
| Name | Summary |
|---|---|
| [badgeText](/developers/references/android/id-frak-sdk-config/postpurchaseconfig/badgetext/) | val [badgeText](/developers/references/android/id-frak-sdk-config/postpurchaseconfig/badgetext/): [String](https://kotlinlang.org/api/core/kotlin-stdlib/kotlin/-string/index.html)? |
| [ctaNoRewardText](/developers/references/android/id-frak-sdk-config/postpurchaseconfig/ctanorewardtext/) | val [ctaNoRewardText](/developers/references/android/id-frak-sdk-config/postpurchaseconfig/ctanorewardtext/): [String](https://kotlinlang.org/api/core/kotlin-stdlib/kotlin/-string/index.html)? |
| [ctaText](/developers/references/android/id-frak-sdk-config/postpurchaseconfig/ctatext/) | val [ctaText](/developers/references/android/id-frak-sdk-config/postpurchaseconfig/ctatext/): [String](https://kotlinlang.org/api/core/kotlin-stdlib/kotlin/-string/index.html)? |
| [imageUrl](/developers/references/android/id-frak-sdk-config/postpurchaseconfig/imageurl/) | val [imageUrl](/developers/references/android/id-frak-sdk-config/postpurchaseconfig/imageurl/): [String](https://kotlinlang.org/api/core/kotlin-stdlib/kotlin/-string/index.html)? |
| [refereeNoRewardText](/developers/references/android/id-frak-sdk-config/postpurchaseconfig/refereenorewardtext/) | val [refereeNoRewardText](/developers/references/android/id-frak-sdk-config/postpurchaseconfig/refereenorewardtext/): [String](https://kotlinlang.org/api/core/kotlin-stdlib/kotlin/-string/index.html)? |
| [refereeText](/developers/references/android/id-frak-sdk-config/postpurchaseconfig/refereetext/) | val [refereeText](/developers/references/android/id-frak-sdk-config/postpurchaseconfig/refereetext/): [String](https://kotlinlang.org/api/core/kotlin-stdlib/kotlin/-string/index.html)? |
| [referrerNoRewardText](/developers/references/android/id-frak-sdk-config/postpurchaseconfig/referrernorewardtext/) | val [referrerNoRewardText](/developers/references/android/id-frak-sdk-config/postpurchaseconfig/referrernorewardtext/): [String](https://kotlinlang.org/api/core/kotlin-stdlib/kotlin/-string/index.html)? |
| [referrerText](/developers/references/android/id-frak-sdk-config/postpurchaseconfig/referrertext/) | val [referrerText](/developers/references/android/id-frak-sdk-config/postpurchaseconfig/referrertext/): [String](https://kotlinlang.org/api/core/kotlin-stdlib/kotlin/-string/index.html)? |
## Functions
| Name | Summary |
|---|---|
| equals | open operator override fun equals(other: [Any](https://kotlinlang.org/api/core/kotlin-stdlib/kotlin/-any/index.html)?): [Boolean](https://kotlinlang.org/api/core/kotlin-stdlib/kotlin/-boolean/index.html) |
| hashCode | open override fun hashCode(): [Int](https://kotlinlang.org/api/core/kotlin-stdlib/kotlin/-int/index.html) |
| toString | open override fun toString(): [String](https://kotlinlang.org/api/core/kotlin-stdlib/kotlin/-string/index.html) |
# badgeText
val badgeText: [String](https://kotlinlang.org/api/core/kotlin-stdlib/kotlin/-string/index.html)?
# ctaNoRewardText
val ctaNoRewardText: [String](https://kotlinlang.org/api/core/kotlin-stdlib/kotlin/-string/index.html)?
# ctaText
val ctaText: [String](https://kotlinlang.org/api/core/kotlin-stdlib/kotlin/-string/index.html)?
# imageUrl
val imageUrl: [String](https://kotlinlang.org/api/core/kotlin-stdlib/kotlin/-string/index.html)?
# refereeNoRewardText
val refereeNoRewardText: [String](https://kotlinlang.org/api/core/kotlin-stdlib/kotlin/-string/index.html)?
# refereeText
val refereeText: [String](https://kotlinlang.org/api/core/kotlin-stdlib/kotlin/-string/index.html)?
# referrerNoRewardText
val referrerNoRewardText: [String](https://kotlinlang.org/api/core/kotlin-stdlib/kotlin/-string/index.html)?
# referrerText
val referrerText: [String](https://kotlinlang.org/api/core/kotlin-stdlib/kotlin/-string/index.html)?
# ResolvedComponents
class ResolvedComponents
Every field nullable: absent means "fall through to the next tier", not "empty".
## Properties
| Name | Summary |
|---|---|
| [banner](/developers/references/android/id-frak-sdk-config/resolvedcomponents/banner/) | val [banner](/developers/references/android/id-frak-sdk-config/resolvedcomponents/banner/): [BannerConfig](/developers/references/android/id-frak-sdk-config/bannerconfig/)? |
| [buttonShare](/developers/references/android/id-frak-sdk-config/resolvedcomponents/buttonshare/) | val [buttonShare](/developers/references/android/id-frak-sdk-config/resolvedcomponents/buttonshare/): [ButtonShareConfig](/developers/references/android/id-frak-sdk-config/buttonshareconfig/)? |
| [buttonWallet](/developers/references/android/id-frak-sdk-config/resolvedcomponents/buttonwallet/) | val [buttonWallet](/developers/references/android/id-frak-sdk-config/resolvedcomponents/buttonwallet/): [ButtonWalletConfig](/developers/references/android/id-frak-sdk-config/buttonwalletconfig/)? |
| [openInApp](/developers/references/android/id-frak-sdk-config/resolvedcomponents/openinapp/) | val [openInApp](/developers/references/android/id-frak-sdk-config/resolvedcomponents/openinapp/): [OpenInAppConfig](/developers/references/android/id-frak-sdk-config/openinappconfig/)? |
| [postPurchase](/developers/references/android/id-frak-sdk-config/resolvedcomponents/postpurchase/) | val [postPurchase](/developers/references/android/id-frak-sdk-config/resolvedcomponents/postpurchase/): [PostPurchaseConfig](/developers/references/android/id-frak-sdk-config/postpurchaseconfig/)? |
## Functions
| Name | Summary |
|---|---|
| equals | open operator override fun equals(other: [Any](https://kotlinlang.org/api/core/kotlin-stdlib/kotlin/-any/index.html)?): [Boolean](https://kotlinlang.org/api/core/kotlin-stdlib/kotlin/-boolean/index.html) |
| hashCode | open override fun hashCode(): [Int](https://kotlinlang.org/api/core/kotlin-stdlib/kotlin/-int/index.html) |
| toString | open override fun toString(): [String](https://kotlinlang.org/api/core/kotlin-stdlib/kotlin/-string/index.html) |
# banner
val banner: [BannerConfig](/developers/references/android/id-frak-sdk-config/bannerconfig/)?
# buttonShare
val buttonShare: [ButtonShareConfig](/developers/references/android/id-frak-sdk-config/buttonshareconfig/)?
# buttonWallet
val buttonWallet: [ButtonWalletConfig](/developers/references/android/id-frak-sdk-config/buttonwalletconfig/)?
# openInApp
val openInApp: [OpenInAppConfig](/developers/references/android/id-frak-sdk-config/openinappconfig/)?
# postPurchase
val postPurchase: [PostPurchaseConfig](/developers/references/android/id-frak-sdk-config/postpurchaseconfig/)?
# ResolvedPlacement
class ResolvedPlacement
One placement's overrides. Tier 1 of the copy precedence.
## Properties
| Name | Summary |
|---|---|
| [components](/developers/references/android/id-frak-sdk-config/resolvedplacement/components/) | val [components](/developers/references/android/id-frak-sdk-config/resolvedplacement/components/): [ResolvedComponents](/developers/references/android/id-frak-sdk-config/resolvedcomponents/)? |
| [targetInteraction](/developers/references/android/id-frak-sdk-config/resolvedplacement/targetinteraction/) | val [targetInteraction](/developers/references/android/id-frak-sdk-config/resolvedplacement/targetinteraction/): [String](https://kotlinlang.org/api/core/kotlin-stdlib/kotlin/-string/index.html)? |
| [translations](/developers/references/android/id-frak-sdk-config/resolvedplacement/translations/) | val [translations](/developers/references/android/id-frak-sdk-config/resolvedplacement/translations/): [Map](https://kotlinlang.org/api/core/kotlin-stdlib/kotlin.collections/-map/index.html)<[String](https://kotlinlang.org/api/core/kotlin-stdlib/kotlin/-string/index.html), [String](https://kotlinlang.org/api/core/kotlin-stdlib/kotlin/-string/index.html)> |
## Functions
| Name | Summary |
|---|---|
| equals | open operator override fun equals(other: [Any](https://kotlinlang.org/api/core/kotlin-stdlib/kotlin/-any/index.html)?): [Boolean](https://kotlinlang.org/api/core/kotlin-stdlib/kotlin/-boolean/index.html) |
| hashCode | open override fun hashCode(): [Int](https://kotlinlang.org/api/core/kotlin-stdlib/kotlin/-int/index.html) |
| toString | open override fun toString(): [String](https://kotlinlang.org/api/core/kotlin-stdlib/kotlin/-string/index.html) |
# components
val components: [ResolvedComponents](/developers/references/android/id-frak-sdk-config/resolvedcomponents/)?
# targetInteraction
val targetInteraction: [String](https://kotlinlang.org/api/core/kotlin-stdlib/kotlin/-string/index.html)?
# translations
val translations: [Map](https://kotlinlang.org/api/core/kotlin-stdlib/kotlin.collections/-map/index.html)<[String](https://kotlinlang.org/api/core/kotlin-stdlib/kotlin/-string/index.html), [String](https://kotlinlang.org/api/core/kotlin-stdlib/kotlin/-string/index.html)>
# ResolvedSdkConfig
class ResolvedSdkConfig
The `sdkConfig` block of the resolve response. Wire-shaped: every field may be absent.
## Properties
| Name | Summary |
|---|---|
| [attribution](/developers/references/android/id-frak-sdk-config/resolvedsdkconfig/attribution/) | val [attribution](/developers/references/android/id-frak-sdk-config/resolvedsdkconfig/attribution/): [AttributionDefaults](/developers/references/android/id-frak-sdk-config/attributiondefaults/)? |
| [components](/developers/references/android/id-frak-sdk-config/resolvedsdkconfig/components/) | val [components](/developers/references/android/id-frak-sdk-config/resolvedsdkconfig/components/): [ResolvedComponents](/developers/references/android/id-frak-sdk-config/resolvedcomponents/)? Tier 2 of the copy precedence. |
| [currency](/developers/references/android/id-frak-sdk-config/resolvedsdkconfig/currency/) | val [currency](/developers/references/android/id-frak-sdk-config/resolvedsdkconfig/currency/): [FrakCurrency](/developers/references/android/id-frak-sdk-core/frakcurrency/)? |
| [hidden](/developers/references/android/id-frak-sdk-config/resolvedsdkconfig/hidden/) | val [hidden](/developers/references/android/id-frak-sdk-config/resolvedsdkconfig/hidden/): [Boolean](https://kotlinlang.org/api/core/kotlin-stdlib/kotlin/-boolean/index.html) |
| [homepageLink](/developers/references/android/id-frak-sdk-config/resolvedsdkconfig/homepagelink/) | val [homepageLink](/developers/references/android/id-frak-sdk-config/resolvedsdkconfig/homepagelink/): [String](https://kotlinlang.org/api/core/kotlin-stdlib/kotlin/-string/index.html)? |
| [lang](/developers/references/android/id-frak-sdk-config/resolvedsdkconfig/lang/) | val [lang](/developers/references/android/id-frak-sdk-config/resolvedsdkconfig/lang/): [FrakLanguage](/developers/references/android/id-frak-sdk-core/fraklanguage/)? |
| [logoUrl](/developers/references/android/id-frak-sdk-config/resolvedsdkconfig/logourl/) | val [logoUrl](/developers/references/android/id-frak-sdk-config/resolvedsdkconfig/logourl/): [String](https://kotlinlang.org/api/core/kotlin-stdlib/kotlin/-string/index.html)? |
| [name](/developers/references/android/id-frak-sdk-config/resolvedsdkconfig/name/) | val [name](/developers/references/android/id-frak-sdk-config/resolvedsdkconfig/name/): [String](https://kotlinlang.org/api/core/kotlin-stdlib/kotlin/-string/index.html)? |
| [placements](/developers/references/android/id-frak-sdk-config/resolvedsdkconfig/placements/) | val [placements](/developers/references/android/id-frak-sdk-config/resolvedsdkconfig/placements/): [Map](https://kotlinlang.org/api/core/kotlin-stdlib/kotlin.collections/-map/index.html)<[String](https://kotlinlang.org/api/core/kotlin-stdlib/kotlin/-string/index.html), [ResolvedPlacement](/developers/references/android/id-frak-sdk-config/resolvedplacement/)> Tier 1 of the copy precedence. |
| [translations](/developers/references/android/id-frak-sdk-config/resolvedsdkconfig/translations/) | val [translations](/developers/references/android/id-frak-sdk-config/resolvedsdkconfig/translations/): [Map](https://kotlinlang.org/api/core/kotlin-stdlib/kotlin.collections/-map/index.html)<[String](https://kotlinlang.org/api/core/kotlin-stdlib/kotlin/-string/index.html), [String](https://kotlinlang.org/api/core/kotlin-stdlib/kotlin/-string/index.html)> |
## Functions
| Name | Summary |
|---|---|
| equals | open operator override fun equals(other: [Any](https://kotlinlang.org/api/core/kotlin-stdlib/kotlin/-any/index.html)?): [Boolean](https://kotlinlang.org/api/core/kotlin-stdlib/kotlin/-boolean/index.html) |
| hashCode | open override fun hashCode(): [Int](https://kotlinlang.org/api/core/kotlin-stdlib/kotlin/-int/index.html) |
| toString | open override fun toString(): [String](https://kotlinlang.org/api/core/kotlin-stdlib/kotlin/-string/index.html) |
# attribution
val attribution: [AttributionDefaults](/developers/references/android/id-frak-sdk-config/attributiondefaults/)?
# components
val components: [ResolvedComponents](/developers/references/android/id-frak-sdk-config/resolvedcomponents/)?
Tier 2 of the copy precedence.
# currency
val currency: [FrakCurrency](/developers/references/android/id-frak-sdk-core/frakcurrency/)?
# hidden
val hidden: [Boolean](https://kotlinlang.org/api/core/kotlin-stdlib/kotlin/-boolean/index.html)
# homepageLink
val homepageLink: [String](https://kotlinlang.org/api/core/kotlin-stdlib/kotlin/-string/index.html)?
# lang
val lang: [FrakLanguage](/developers/references/android/id-frak-sdk-core/fraklanguage/)?
# logoUrl
val logoUrl: [String](https://kotlinlang.org/api/core/kotlin-stdlib/kotlin/-string/index.html)?
# name
val name: [String](https://kotlinlang.org/api/core/kotlin-stdlib/kotlin/-string/index.html)?
# placements
val placements: [Map](https://kotlinlang.org/api/core/kotlin-stdlib/kotlin.collections/-map/index.html)<[String](https://kotlinlang.org/api/core/kotlin-stdlib/kotlin/-string/index.html), [ResolvedPlacement](/developers/references/android/id-frak-sdk-config/resolvedplacement/)>
Tier 1 of the copy precedence.
# translations
val translations: [Map](https://kotlinlang.org/api/core/kotlin-stdlib/kotlin.collections/-map/index.html)<[String](https://kotlinlang.org/api/core/kotlin-stdlib/kotlin/-string/index.html), [String](https://kotlinlang.org/api/core/kotlin-stdlib/kotlin/-string/index.html)>
# id.frak.sdk.core
## Types
| Name | Summary |
|---|---|
| [DeepLinkHandling](/developers/references/android/id-frak-sdk-core/deeplinkhandling/) | enum [DeepLinkHandling](/developers/references/android/id-frak-sdk-core/deeplinkhandling/) : [Enum](https://kotlinlang.org/api/core/kotlin-stdlib/kotlin/-enum/index.html)<[DeepLinkHandling](/developers/references/android/id-frak-sdk-core/deeplinkhandling/)> How inbound links carrying an `fCtx` reach the SDK. |
| [FrakConfig](/developers/references/android/id-frak-sdk-core/frakconfig/) | class [FrakConfig](/developers/references/android/id-frak-sdk-core/frakconfig/) Everything the SDK needs to start, supplied once at [id.frak.sdk.Frak.initialize](/developers/references/android/id-frak-sdk/frak/initialize/). Never validated at construction; an unusable config surfaces later as [FrakError.MerchantResolutionFailed](/developers/references/android/id-frak-sdk-core/frakerror/merchantresolutionfailed/). |
| [FrakCurrency](/developers/references/android/id-frak-sdk-core/frakcurrency/) | enum [FrakCurrency](/developers/references/android/id-frak-sdk-core/frakcurrency/) : [Enum](https://kotlinlang.org/api/core/kotlin-stdlib/kotlin/-enum/index.html)<[FrakCurrency](/developers/references/android/id-frak-sdk-core/frakcurrency/)> Currency a reward is advertised in. Closed set: backend rejects anything else with a 422. |
| [FrakEnvironment](/developers/references/android/id-frak-sdk-core/frakenvironment/) | sealed interface [FrakEnvironment](/developers/references/android/id-frak-sdk-core/frakenvironment/) The Frak stage the SDK talks to. |
| [FrakError](/developers/references/android/id-frak-sdk-core/frakerror/) | sealed class [FrakError](/developers/references/android/id-frak-sdk-core/frakerror/) : [Exception](https://docs.oracle.com/en/java/javase/17/docs/api/java.base/java/lang/Exception.html) Every failure the SDK can hand back, as one closed hierarchy. `CancellationException` is never wrapped into one of these, see `frakCall`. No default arguments anywhere: a sealed class's constructor is published, so a default would freeze a synthetic bridge into the `.api` dump. |
| [FrakLanguage](/developers/references/android/id-frak-sdk-core/fraklanguage/) | enum [FrakLanguage](/developers/references/android/id-frak-sdk-core/fraklanguage/) : [Enum](https://kotlinlang.org/api/core/kotlin-stdlib/kotlin/-enum/index.html)<[FrakLanguage](/developers/references/android/id-frak-sdk-core/fraklanguage/)> Language for merchant-configured copy. Only `en`/`fr` exist today. |
| [FrakLogLevel](/developers/references/android/id-frak-sdk-core/frakloglevel/) | enum [FrakLogLevel](/developers/references/android/id-frak-sdk-core/frakloglevel/) : [Enum](https://kotlinlang.org/api/core/kotlin-stdlib/kotlin/-enum/index.html)<[FrakLogLevel](/developers/references/android/id-frak-sdk-core/frakloglevel/)> Logcat verbosity. Default [NONE](/developers/references/android/id-frak-sdk-core/frakloglevel/none/). Also gates [FrakConfig.logSink](/developers/references/android/id-frak-sdk-core/frakconfig/logsink/) volume, see [FrakLogSink](/developers/references/android/id-frak-sdk-core/fraklogsink/). |
| [FrakLogSink](/developers/references/android/id-frak-sdk-core/fraklogsink/) | fun interface [FrakLogSink](/developers/references/android/id-frak-sdk-core/fraklogsink/) Receives SDK diagnostics, gated by [FrakConfig.logLevel](/developers/references/android/id-frak-sdk-core/frakconfig/loglevel/). Replaces logcat once set. |
| [FrakMetadata](/developers/references/android/id-frak-sdk-core/frakmetadata/) | class [FrakMetadata](/developers/references/android/id-frak-sdk-core/frakmetadata/) Static merchant-supplied facts, fixed at build time. Not the resolved backend config, see [id.frak.sdk.config.FrakResolvedConfig](/developers/references/android/id-frak-sdk-config/frakresolvedconfig/). |
| [FrakResult](/developers/references/android/id-frak-sdk-core/frakresult/) | sealed interface [FrakResult](/developers/references/android/id-frak-sdk-core/frakresult/)<out [T](/developers/references/android/id-frak-sdk-core/frakresult/)> Outcome of a fire-and-forget call. Not `kotlin.Result`: merchants need the typed [FrakError](/developers/references/android/id-frak-sdk-core/frakerror/) arm. |
| [ProductDetails](/developers/references/android/id-frak-sdk-core/productdetails/) | class [ProductDetails](/developers/references/android/id-frak-sdk-core/productdetails/) The purchase line item fields a campaign's `productScope` can target. Build with [Builder](/developers/references/android/id-frak-sdk-core/productdetails/builder/), or `ProductDetails { }` from Kotlin. Also returned by the SDK, on [id.frak.sdk.rewards.BestReward.matchedProducts](/developers/references/android/id-frak-sdk-rewards/bestreward/matchedproducts/), hence `equals`/`hashCode`. |
## Functions
| Name | Summary |
|---|---|
| [FrakConfig](/developers/references/android/id-frak-sdk-core/frakconfig-fun/) | fun [FrakConfig](/developers/references/android/id-frak-sdk-core/frakconfig-fun/)(configure: [FrakConfig.Builder](/developers/references/android/id-frak-sdk-core/frakconfig/builder/).() -> [Unit](https://kotlinlang.org/api/core/kotlin-stdlib/kotlin/-unit/index.html)): [FrakConfig](/developers/references/android/id-frak-sdk-core/frakconfig/) Kotlin sugar over [FrakConfig.Builder](/developers/references/android/id-frak-sdk-core/frakconfig/builder/) for the no-merchant-id form. fun [FrakConfig](/developers/references/android/id-frak-sdk-core/frakconfig-fun/)(merchantId: [String](https://kotlinlang.org/api/core/kotlin-stdlib/kotlin/-string/index.html)): [FrakConfig](/developers/references/android/id-frak-sdk-core/frakconfig/) Merchant id only: the shortest working config. fun [FrakConfig](/developers/references/android/id-frak-sdk-core/frakconfig-fun/)(merchantId: [String](https://kotlinlang.org/api/core/kotlin-stdlib/kotlin/-string/index.html), configure: [FrakConfig.Builder](/developers/references/android/id-frak-sdk-core/frakconfig/builder/).() -> [Unit](https://kotlinlang.org/api/core/kotlin-stdlib/kotlin/-unit/index.html)): [FrakConfig](/developers/references/android/id-frak-sdk-core/frakconfig/) Kotlin sugar over [FrakConfig.Builder](/developers/references/android/id-frak-sdk-core/frakconfig/builder/), for the merchant-id form. |
| [FrakMetadata](/developers/references/android/id-frak-sdk-core/frakmetadata-fun/) | fun [FrakMetadata](/developers/references/android/id-frak-sdk-core/frakmetadata-fun/)(configure: [FrakMetadata.Builder](/developers/references/android/id-frak-sdk-core/frakmetadata/builder/).() -> [Unit](https://kotlinlang.org/api/core/kotlin-stdlib/kotlin/-unit/index.html)): [FrakMetadata](/developers/references/android/id-frak-sdk-core/frakmetadata/) Kotlin sugar over [FrakMetadata.Builder](/developers/references/android/id-frak-sdk-core/frakmetadata/builder/). |
| [ProductDetails](/developers/references/android/id-frak-sdk-core/productdetails-fun/) | fun [ProductDetails](/developers/references/android/id-frak-sdk-core/productdetails-fun/)(configure: [ProductDetails.Builder](/developers/references/android/id-frak-sdk-core/productdetails/builder/).() -> [Unit](https://kotlinlang.org/api/core/kotlin-stdlib/kotlin/-unit/index.html)): [ProductDetails](/developers/references/android/id-frak-sdk-core/productdetails/) Kotlin sugar over [ProductDetails.Builder](/developers/references/android/id-frak-sdk-core/productdetails/builder/). |
# DeepLinkHandling
enum DeepLinkHandling : [Enum](https://kotlinlang.org/api/core/kotlin-stdlib/kotlin/-enum/index.html)<DeepLinkHandling>
How inbound links carrying an `fCtx` reach the SDK.
## Entries
| | |
|---|---|
| [Automatic](/developers/references/android/id-frak-sdk-core/deeplinkhandling/automatic/) | [Automatic](/developers/references/android/id-frak-sdk-core/deeplinkhandling/automatic/) The SDK watches host activities itself; calling [id.frak.sdk.AppLinkApi.handleReferral](/developers/references/android/id-frak-sdk/applinkapi/handlereferral/) as well double-tracks the arrival. Android-only. |
| [Manual](/developers/references/android/id-frak-sdk-core/deeplinkhandling/manual/) | [Manual](/developers/references/android/id-frak-sdk-core/deeplinkhandling/manual/) Merchant calls [id.frak.sdk.AppLinkApi.handleReferral](/developers/references/android/id-frak-sdk/applinkapi/handlereferral/) from their own router. |
| [Disabled](/developers/references/android/id-frak-sdk-core/deeplinkhandling/disabled/) | [Disabled](/developers/references/android/id-frak-sdk-core/deeplinkhandling/disabled/) |
## Functions
| Name | Summary |
|---|---|
| [valueOf](/developers/references/android/id-frak-sdk-core/deeplinkhandling/valueof/) | fun [valueOf](/developers/references/android/id-frak-sdk-core/deeplinkhandling/valueof/)(value: [String](https://kotlinlang.org/api/core/kotlin-stdlib/kotlin/-string/index.html)): DeepLinkHandling Returns the enum constant of this type with the specified name. The string must match exactly an identifier used to declare an enum constant in this type. (Extraneous whitespace characters are not permitted.) |
| [values](/developers/references/android/id-frak-sdk-core/deeplinkhandling/values/) | fun [values](/developers/references/android/id-frak-sdk-core/deeplinkhandling/values/)(): [Array](https://kotlinlang.org/api/core/kotlin-stdlib/kotlin/-array/index.html)<DeepLinkHandling> Returns an array containing the constants of this enum type, in the order they're declared. |
# Automatic
Automatic
The SDK watches host activities itself; calling [id.frak.sdk.AppLinkApi.handleReferral](/developers/references/android/id-frak-sdk/applinkapi/handlereferral/) as well double-tracks the arrival. Android-only.
# Disabled
Disabled
# Manual
Manual
Merchant calls [id.frak.sdk.AppLinkApi.handleReferral](/developers/references/android/id-frak-sdk/applinkapi/handlereferral/) from their own router.
# valueOf
fun valueOf(value: [String](https://kotlinlang.org/api/core/kotlin-stdlib/kotlin/-string/index.html)): [DeepLinkHandling](/developers/references/android/id-frak-sdk-core/deeplinkhandling/)
Returns the enum constant of this type with the specified name. The string must match exactly an identifier used to declare an enum constant in this type. (Extraneous whitespace characters are not permitted.)
#### Throws
| | |
|---|---|
| kotlin.IllegalArgumentException | if this enum type has no constant with the specified name |
# values
fun values(): [Array](https://kotlinlang.org/api/core/kotlin-stdlib/kotlin/-array/index.html)<[DeepLinkHandling](/developers/references/android/id-frak-sdk-core/deeplinkhandling/)>
Returns an array containing the constants of this enum type, in the order they're declared.
This method may be used to iterate over the constants.
# FrakConfig
class FrakConfig
Everything the SDK needs to start, supplied once at [id.frak.sdk.Frak.initialize](/developers/references/android/id-frak-sdk/frak/initialize/). Never validated at construction; an unusable config surfaces later as [FrakError.MerchantResolutionFailed](/developers/references/android/id-frak-sdk-core/frakerror/merchantresolutionfailed/).
## Types
| Name | Summary |
|---|---|
| [Builder](/developers/references/android/id-frak-sdk-core/frakconfig/builder/) | class [Builder](/developers/references/android/id-frak-sdk-core/frakconfig/builder/) `Builder()` exists alongside `Builder(merchantId)` because [merchantId](/developers/references/android/id-frak-sdk-core/frakconfig/builder/merchantid/) is optional. The empty one is primary: a shared `constructor(String?)` would erase to the same JVM descriptor as `constructor(String)`. |
## Properties
| Name | Summary |
|---|---|
| [deepLink](/developers/references/android/id-frak-sdk-core/frakconfig/deeplink/) | val [deepLink](/developers/references/android/id-frak-sdk-core/frakconfig/deeplink/): [DeepLinkHandling](/developers/references/android/id-frak-sdk-core/deeplinkhandling/) |
| [env](/developers/references/android/id-frak-sdk-core/frakconfig/env/) | val [env](/developers/references/android/id-frak-sdk-core/frakconfig/env/): [FrakEnvironment](/developers/references/android/id-frak-sdk-core/frakenvironment/) Merchants never set this; exists for Frak's own dev/local builds. |
| [logLevel](/developers/references/android/id-frak-sdk-core/frakconfig/loglevel/) | val [logLevel](/developers/references/android/id-frak-sdk-core/frakconfig/loglevel/): [FrakLogLevel](/developers/references/android/id-frak-sdk-core/frakloglevel/) |
| [logSink](/developers/references/android/id-frak-sdk-core/frakconfig/logsink/) | val [logSink](/developers/references/android/id-frak-sdk-core/frakconfig/logsink/): [FrakLogSink](/developers/references/android/id-frak-sdk-core/fraklogsink/)? |
| [merchantId](/developers/references/android/id-frak-sdk-core/frakconfig/merchantid/) | val [merchantId](/developers/references/android/id-frak-sdk-core/frakconfig/merchantid/): [String](https://kotlinlang.org/api/core/kotlin-stdlib/kotlin/-string/index.html)? Optional; when null, merchant is resolved from packageId instead. `merchantId` wins if both set. |
| [metadata](/developers/references/android/id-frak-sdk-core/frakconfig/metadata/) | val [metadata](/developers/references/android/id-frak-sdk-core/frakconfig/metadata/): [FrakMetadata](/developers/references/android/id-frak-sdk-core/frakmetadata/) |
| [packageId](/developers/references/android/id-frak-sdk-core/frakconfig/packageid/) | val [packageId](/developers/references/android/id-frak-sdk-core/frakconfig/packageid/): [String](https://kotlinlang.org/api/core/kotlin-stdlib/kotlin/-string/index.html)? Null reads `context.packageName` at [id.frak.sdk.Frak.initialize](/developers/references/android/id-frak-sdk/frak/initialize/). `bundleId` on iOS. |
| [trackingEnabled](/developers/references/android/id-frak-sdk-core/frakconfig/trackingenabled/) | val [trackingEnabled](/developers/references/android/id-frak-sdk-core/frakconfig/trackingenabled/): [Boolean](https://kotlinlang.org/api/core/kotlin-stdlib/kotlin/-boolean/index.html) Hard floor for tracking that [id.frak.sdk.FrakClient.setTrackingEnabled](/developers/references/android/id-frak-sdk/frakclient/settrackingenabled/) cannot lift at runtime. `false` also stops sharing, but config and reward resolution still run. |
# FrakConfig()
fun FrakConfig(merchantId: [String](https://kotlinlang.org/api/core/kotlin-stdlib/kotlin/-string/index.html), configure: [FrakConfig.Builder](/developers/references/android/id-frak-sdk-core/frakconfig/builder/).() -> [Unit](https://kotlinlang.org/api/core/kotlin-stdlib/kotlin/-unit/index.html)): [FrakConfig](/developers/references/android/id-frak-sdk-core/frakconfig/)
Kotlin sugar over [FrakConfig.Builder](/developers/references/android/id-frak-sdk-core/frakconfig/builder/), for the merchant-id form.
fun FrakConfig(merchantId: [String](https://kotlinlang.org/api/core/kotlin-stdlib/kotlin/-string/index.html)): [FrakConfig](/developers/references/android/id-frak-sdk-core/frakconfig/)
Merchant id only: the shortest working config.
fun FrakConfig(configure: [FrakConfig.Builder](/developers/references/android/id-frak-sdk-core/frakconfig/builder/).() -> [Unit](https://kotlinlang.org/api/core/kotlin-stdlib/kotlin/-unit/index.html)): [FrakConfig](/developers/references/android/id-frak-sdk-core/frakconfig/)
Kotlin sugar over [FrakConfig.Builder](/developers/references/android/id-frak-sdk-core/frakconfig/builder/) for the no-merchant-id form.
# Builder
class Builder
`Builder()` exists alongside `Builder(merchantId)` because [merchantId](/developers/references/android/id-frak-sdk-core/frakconfig/builder/merchantid/) is optional. The empty one is primary: a shared `constructor(String?)` would erase to the same JVM descriptor as `constructor(String)`.
## Constructors
| | |
|---|---|
| [Builder](/developers/references/android/id-frak-sdk-core/frakconfig/builder/builder/) | constructor()constructor(merchantId: [String](https://kotlinlang.org/api/core/kotlin-stdlib/kotlin/-string/index.html)) |
## Properties
| Name | Summary |
|---|---|
| [deepLink](/developers/references/android/id-frak-sdk-core/frakconfig/builder/deeplink/) | var [deepLink](/developers/references/android/id-frak-sdk-core/frakconfig/builder/deeplink/): [DeepLinkHandling](/developers/references/android/id-frak-sdk-core/deeplinkhandling/) |
| [env](/developers/references/android/id-frak-sdk-core/frakconfig/builder/env/) | var [env](/developers/references/android/id-frak-sdk-core/frakconfig/builder/env/): [FrakEnvironment](/developers/references/android/id-frak-sdk-core/frakenvironment/) |
| [logLevel](/developers/references/android/id-frak-sdk-core/frakconfig/builder/loglevel/) | var [logLevel](/developers/references/android/id-frak-sdk-core/frakconfig/builder/loglevel/): [FrakLogLevel](/developers/references/android/id-frak-sdk-core/frakloglevel/) |
| [logSink](/developers/references/android/id-frak-sdk-core/frakconfig/builder/logsink/) | var [logSink](/developers/references/android/id-frak-sdk-core/frakconfig/builder/logsink/): [FrakLogSink](/developers/references/android/id-frak-sdk-core/fraklogsink/)? |
| [merchantId](/developers/references/android/id-frak-sdk-core/frakconfig/builder/merchantid/) | var [merchantId](/developers/references/android/id-frak-sdk-core/frakconfig/builder/merchantid/): [String](https://kotlinlang.org/api/core/kotlin-stdlib/kotlin/-string/index.html)? |
| [metadata](/developers/references/android/id-frak-sdk-core/frakconfig/builder/metadata/) | var [metadata](/developers/references/android/id-frak-sdk-core/frakconfig/builder/metadata/): [FrakMetadata](/developers/references/android/id-frak-sdk-core/frakmetadata/) |
| [packageId](/developers/references/android/id-frak-sdk-core/frakconfig/builder/packageid/) | var [packageId](/developers/references/android/id-frak-sdk-core/frakconfig/builder/packageid/): [String](https://kotlinlang.org/api/core/kotlin-stdlib/kotlin/-string/index.html)? |
| [trackingEnabled](/developers/references/android/id-frak-sdk-core/frakconfig/builder/trackingenabled/) | var [trackingEnabled](/developers/references/android/id-frak-sdk-core/frakconfig/builder/trackingenabled/): [Boolean](https://kotlinlang.org/api/core/kotlin-stdlib/kotlin/-boolean/index.html) |
## Functions
| Name | Summary |
|---|---|
| [build](/developers/references/android/id-frak-sdk-core/frakconfig/builder/build/) | fun [build](/developers/references/android/id-frak-sdk-core/frakconfig/builder/build/)(): [FrakConfig](/developers/references/android/id-frak-sdk-core/frakconfig/) |
| [deepLink](/developers/references/android/id-frak-sdk-core/frakconfig/builder/deeplink/) | fun [deepLink](/developers/references/android/id-frak-sdk-core/frakconfig/builder/deeplink/)(deepLink: [DeepLinkHandling](/developers/references/android/id-frak-sdk-core/deeplinkhandling/)): FrakConfig.Builder |
| [env](/developers/references/android/id-frak-sdk-core/frakconfig/builder/env/) | fun [env](/developers/references/android/id-frak-sdk-core/frakconfig/builder/env/)(env: [FrakEnvironment](/developers/references/android/id-frak-sdk-core/frakenvironment/)): FrakConfig.Builder |
| [logLevel](/developers/references/android/id-frak-sdk-core/frakconfig/builder/loglevel/) | fun [logLevel](/developers/references/android/id-frak-sdk-core/frakconfig/builder/loglevel/)(logLevel: [FrakLogLevel](/developers/references/android/id-frak-sdk-core/frakloglevel/)): FrakConfig.Builder |
| [logSink](/developers/references/android/id-frak-sdk-core/frakconfig/builder/logsink/) | fun [logSink](/developers/references/android/id-frak-sdk-core/frakconfig/builder/logsink/)(logSink: [FrakLogSink](/developers/references/android/id-frak-sdk-core/fraklogsink/)?): FrakConfig.Builder |
| [merchantId](/developers/references/android/id-frak-sdk-core/frakconfig/builder/merchantid/) | fun [merchantId](/developers/references/android/id-frak-sdk-core/frakconfig/builder/merchantid/)(merchantId: [String](https://kotlinlang.org/api/core/kotlin-stdlib/kotlin/-string/index.html)?): FrakConfig.Builder |
| [metadata](/developers/references/android/id-frak-sdk-core/frakconfig/builder/metadata/) | fun [metadata](/developers/references/android/id-frak-sdk-core/frakconfig/builder/metadata/)(metadata: [FrakMetadata](/developers/references/android/id-frak-sdk-core/frakmetadata/)): FrakConfig.Builder |
| [packageId](/developers/references/android/id-frak-sdk-core/frakconfig/builder/packageid/) | fun [packageId](/developers/references/android/id-frak-sdk-core/frakconfig/builder/packageid/)(packageId: [String](https://kotlinlang.org/api/core/kotlin-stdlib/kotlin/-string/index.html)?): FrakConfig.Builder |
| [trackingEnabled](/developers/references/android/id-frak-sdk-core/frakconfig/builder/trackingenabled/) | fun [trackingEnabled](/developers/references/android/id-frak-sdk-core/frakconfig/builder/trackingenabled/)(trackingEnabled: [Boolean](https://kotlinlang.org/api/core/kotlin-stdlib/kotlin/-boolean/index.html)): FrakConfig.Builder |
# build
fun build(): [FrakConfig](/developers/references/android/id-frak-sdk-core/frakconfig/)
# Builder
constructor()
constructor(merchantId: [String](https://kotlinlang.org/api/core/kotlin-stdlib/kotlin/-string/index.html))
# deepLink
fun deepLink(deepLink: [DeepLinkHandling](/developers/references/android/id-frak-sdk-core/deeplinkhandling/)): [FrakConfig.Builder](/developers/references/android/id-frak-sdk-core/frakconfig/builder/)
var deepLink: [DeepLinkHandling](/developers/references/android/id-frak-sdk-core/deeplinkhandling/)
# env
fun env(env: [FrakEnvironment](/developers/references/android/id-frak-sdk-core/frakenvironment/)): [FrakConfig.Builder](/developers/references/android/id-frak-sdk-core/frakconfig/builder/)
var env: [FrakEnvironment](/developers/references/android/id-frak-sdk-core/frakenvironment/)
# logLevel
fun logLevel(logLevel: [FrakLogLevel](/developers/references/android/id-frak-sdk-core/frakloglevel/)): [FrakConfig.Builder](/developers/references/android/id-frak-sdk-core/frakconfig/builder/)
var logLevel: [FrakLogLevel](/developers/references/android/id-frak-sdk-core/frakloglevel/)
# logSink
fun logSink(logSink: [FrakLogSink](/developers/references/android/id-frak-sdk-core/fraklogsink/)?): [FrakConfig.Builder](/developers/references/android/id-frak-sdk-core/frakconfig/builder/)
var logSink: [FrakLogSink](/developers/references/android/id-frak-sdk-core/fraklogsink/)?
# merchantId
fun merchantId(merchantId: [String](https://kotlinlang.org/api/core/kotlin-stdlib/kotlin/-string/index.html)?): [FrakConfig.Builder](/developers/references/android/id-frak-sdk-core/frakconfig/builder/)
var merchantId: [String](https://kotlinlang.org/api/core/kotlin-stdlib/kotlin/-string/index.html)?
# metadata
fun metadata(metadata: [FrakMetadata](/developers/references/android/id-frak-sdk-core/frakmetadata/)): [FrakConfig.Builder](/developers/references/android/id-frak-sdk-core/frakconfig/builder/)
var metadata: [FrakMetadata](/developers/references/android/id-frak-sdk-core/frakmetadata/)
# packageId
fun packageId(packageId: [String](https://kotlinlang.org/api/core/kotlin-stdlib/kotlin/-string/index.html)?): [FrakConfig.Builder](/developers/references/android/id-frak-sdk-core/frakconfig/builder/)
var packageId: [String](https://kotlinlang.org/api/core/kotlin-stdlib/kotlin/-string/index.html)?
# trackingEnabled
fun trackingEnabled(trackingEnabled: [Boolean](https://kotlinlang.org/api/core/kotlin-stdlib/kotlin/-boolean/index.html)): [FrakConfig.Builder](/developers/references/android/id-frak-sdk-core/frakconfig/builder/)
var trackingEnabled: [Boolean](https://kotlinlang.org/api/core/kotlin-stdlib/kotlin/-boolean/index.html)
# deepLink
val deepLink: [DeepLinkHandling](/developers/references/android/id-frak-sdk-core/deeplinkhandling/)
# env
val env: [FrakEnvironment](/developers/references/android/id-frak-sdk-core/frakenvironment/)
Merchants never set this; exists for Frak's own dev/local builds.
# logLevel
val logLevel: [FrakLogLevel](/developers/references/android/id-frak-sdk-core/frakloglevel/)
# logSink
val logSink: [FrakLogSink](/developers/references/android/id-frak-sdk-core/fraklogsink/)?
# merchantId
val merchantId: [String](https://kotlinlang.org/api/core/kotlin-stdlib/kotlin/-string/index.html)?
Optional; when null, merchant is resolved from packageId instead. `merchantId` wins if both set.
# metadata
val metadata: [FrakMetadata](/developers/references/android/id-frak-sdk-core/frakmetadata/)
# packageId
val packageId: [String](https://kotlinlang.org/api/core/kotlin-stdlib/kotlin/-string/index.html)?
Null reads `context.packageName` at [id.frak.sdk.Frak.initialize](/developers/references/android/id-frak-sdk/frak/initialize/). `bundleId` on iOS.
# trackingEnabled
val trackingEnabled: [Boolean](https://kotlinlang.org/api/core/kotlin-stdlib/kotlin/-boolean/index.html)
Hard floor for tracking that [id.frak.sdk.FrakClient.setTrackingEnabled](/developers/references/android/id-frak-sdk/frakclient/settrackingenabled/) cannot lift at runtime. `false` also stops sharing, but config and reward resolution still run.
# FrakCurrency
enum FrakCurrency : [Enum](https://kotlinlang.org/api/core/kotlin-stdlib/kotlin/-enum/index.html)<FrakCurrency>
Currency a reward is advertised in. Closed set: backend rejects anything else with a 422.
## Entries
| | |
|---|---|
| [EUR](/developers/references/android/id-frak-sdk-core/frakcurrency/eur/) | [EUR](/developers/references/android/id-frak-sdk-core/frakcurrency/eur/) |
| [USD](/developers/references/android/id-frak-sdk-core/frakcurrency/usd/) | [USD](/developers/references/android/id-frak-sdk-core/frakcurrency/usd/) |
| [GBP](/developers/references/android/id-frak-sdk-core/frakcurrency/gbp/) | [GBP](/developers/references/android/id-frak-sdk-core/frakcurrency/gbp/) |
## Properties
| Name | Summary |
|---|---|
| [wireValue](/developers/references/android/id-frak-sdk-core/frakcurrency/wirevalue/) | val [wireValue](/developers/references/android/id-frak-sdk-core/frakcurrency/wirevalue/): [String](https://kotlinlang.org/api/core/kotlin-stdlib/kotlin/-string/index.html) |
## Functions
| Name | Summary |
|---|---|
| [valueOf](/developers/references/android/id-frak-sdk-core/frakcurrency/valueof/) | fun [valueOf](/developers/references/android/id-frak-sdk-core/frakcurrency/valueof/)(value: [String](https://kotlinlang.org/api/core/kotlin-stdlib/kotlin/-string/index.html)): FrakCurrency Returns the enum constant of this type with the specified name. The string must match exactly an identifier used to declare an enum constant in this type. (Extraneous whitespace characters are not permitted.) |
| [values](/developers/references/android/id-frak-sdk-core/frakcurrency/values/) | fun [values](/developers/references/android/id-frak-sdk-core/frakcurrency/values/)(): [Array](https://kotlinlang.org/api/core/kotlin-stdlib/kotlin/-array/index.html)<FrakCurrency> Returns an array containing the constants of this enum type, in the order they're declared. |
# EUR
EUR
# GBP
GBP
# USD
USD
# valueOf
fun valueOf(value: [String](https://kotlinlang.org/api/core/kotlin-stdlib/kotlin/-string/index.html)): [FrakCurrency](/developers/references/android/id-frak-sdk-core/frakcurrency/)
Returns the enum constant of this type with the specified name. The string must match exactly an identifier used to declare an enum constant in this type. (Extraneous whitespace characters are not permitted.)
#### Throws
| | |
|---|---|
| kotlin.IllegalArgumentException | if this enum type has no constant with the specified name |
# values
fun values(): [Array](https://kotlinlang.org/api/core/kotlin-stdlib/kotlin/-array/index.html)<[FrakCurrency](/developers/references/android/id-frak-sdk-core/frakcurrency/)>
Returns an array containing the constants of this enum type, in the order they're declared.
This method may be used to iterate over the constants.
# wireValue
val wireValue: [String](https://kotlinlang.org/api/core/kotlin-stdlib/kotlin/-string/index.html)
# FrakEnvironment
sealed interface FrakEnvironment
The Frak stage the SDK talks to.
#### Inheritors
| |
|---|
| [Production](/developers/references/android/id-frak-sdk-core/frakenvironment/production/) |
| [Development](/developers/references/android/id-frak-sdk-core/frakenvironment/development/) |
| [Custom](/developers/references/android/id-frak-sdk-core/frakenvironment/custom/) |
## Types
| Name | Summary |
|---|---|
| [Custom](/developers/references/android/id-frak-sdk-core/frakenvironment/custom/) | class [Custom](/developers/references/android/id-frak-sdk-core/frakenvironment/custom/) : FrakEnvironment Explicit origin pair for local development. On an emulator use `10.0.2.2`, not `localhost`. Must be `https://`, or `http://` to a loopback/private-network host; anything else is swapped for an unreachable placeholder and surfaces as a generic [FrakError.Network](/developers/references/android/id-frak-sdk-core/frakerror/network/) on first use. |
| [Development](/developers/references/android/id-frak-sdk-core/frakenvironment/development/) | data object [Development](/developers/references/android/id-frak-sdk-core/frakenvironment/development/) : FrakEnvironment |
| [Production](/developers/references/android/id-frak-sdk-core/frakenvironment/production/) | data object [Production](/developers/references/android/id-frak-sdk-core/frakenvironment/production/) : FrakEnvironment |
## Properties
| Name | Summary |
|---|---|
| [backend](/developers/references/android/id-frak-sdk-core/frakenvironment/backend/) | abstract val [backend](/developers/references/android/id-frak-sdk-core/frakenvironment/backend/): [String](https://kotlinlang.org/api/core/kotlin-stdlib/kotlin/-string/index.html) No trailing slash. |
| [wallet](/developers/references/android/id-frak-sdk-core/frakenvironment/wallet/) | abstract val [wallet](/developers/references/android/id-frak-sdk-core/frakenvironment/wallet/): [String](https://kotlinlang.org/api/core/kotlin-stdlib/kotlin/-string/index.html) No trailing slash. |
| [walletPackageId](/developers/references/android/id-frak-sdk-core/frakenvironment/walletpackageid/) | open val [walletPackageId](/developers/references/android/id-frak-sdk-core/frakenvironment/walletpackageid/): [String](https://kotlinlang.org/api/core/kotlin-stdlib/kotlin/-string/index.html) Probed to decide whether install can deep link instead of going to the store. |
| [walletScheme](/developers/references/android/id-frak-sdk-core/frakenvironment/walletscheme/) | open val [walletScheme](/developers/references/android/id-frak-sdk-core/frakenvironment/walletscheme/): [String](https://kotlinlang.org/api/core/kotlin-stdlib/kotlin/-string/index.html) |
# backend
abstract val backend: [String](https://kotlinlang.org/api/core/kotlin-stdlib/kotlin/-string/index.html)
No trailing slash.
# Custom
class Custom : [FrakEnvironment](/developers/references/android/id-frak-sdk-core/frakenvironment/)
Explicit origin pair for local development. On an emulator use `10.0.2.2`, not `localhost`. Must be `https://`, or `http://` to a loopback/private-network host; anything else is swapped for an unreachable placeholder and surfaces as a generic [FrakError.Network](/developers/references/android/id-frak-sdk-core/frakerror/network/) on first use.
## Constructors
| | |
|---|---|
| [Custom](/developers/references/android/id-frak-sdk-core/frakenvironment/custom/custom/) | constructor(wallet: [String](https://kotlinlang.org/api/core/kotlin-stdlib/kotlin/-string/index.html), backend: [String](https://kotlinlang.org/api/core/kotlin-stdlib/kotlin/-string/index.html)) Frak's own dev wallet package id and scheme. constructor(wallet: [String](https://kotlinlang.org/api/core/kotlin-stdlib/kotlin/-string/index.html), backend: [String](https://kotlinlang.org/api/core/kotlin-stdlib/kotlin/-string/index.html), walletPackageId: [String](https://kotlinlang.org/api/core/kotlin-stdlib/kotlin/-string/index.html), walletScheme: [String](https://kotlinlang.org/api/core/kotlin-stdlib/kotlin/-string/index.html)) |
## Properties
| Name | Summary |
|---|---|
| [backend](/developers/references/android/id-frak-sdk-core/frakenvironment/custom/backend/) | open override val [backend](/developers/references/android/id-frak-sdk-core/frakenvironment/custom/backend/): [String](https://kotlinlang.org/api/core/kotlin-stdlib/kotlin/-string/index.html) No trailing slash. |
| [wallet](/developers/references/android/id-frak-sdk-core/frakenvironment/custom/wallet/) | open override val [wallet](/developers/references/android/id-frak-sdk-core/frakenvironment/custom/wallet/): [String](https://kotlinlang.org/api/core/kotlin-stdlib/kotlin/-string/index.html) No trailing slash. |
| [walletPackageId](/developers/references/android/id-frak-sdk-core/frakenvironment/custom/walletpackageid/) | open override val [walletPackageId](/developers/references/android/id-frak-sdk-core/frakenvironment/custom/walletpackageid/): [String](https://kotlinlang.org/api/core/kotlin-stdlib/kotlin/-string/index.html) Probed to decide whether install can deep link instead of going to the store. |
| [walletScheme](/developers/references/android/id-frak-sdk-core/frakenvironment/custom/walletscheme/) | open override val [walletScheme](/developers/references/android/id-frak-sdk-core/frakenvironment/custom/walletscheme/): [String](https://kotlinlang.org/api/core/kotlin-stdlib/kotlin/-string/index.html) |
# backend
open override val backend: [String](https://kotlinlang.org/api/core/kotlin-stdlib/kotlin/-string/index.html)
No trailing slash.
# Custom
constructor(wallet: [String](https://kotlinlang.org/api/core/kotlin-stdlib/kotlin/-string/index.html), backend: [String](https://kotlinlang.org/api/core/kotlin-stdlib/kotlin/-string/index.html))
Frak's own dev wallet package id and scheme.
constructor(wallet: [String](https://kotlinlang.org/api/core/kotlin-stdlib/kotlin/-string/index.html), backend: [String](https://kotlinlang.org/api/core/kotlin-stdlib/kotlin/-string/index.html), walletPackageId: [String](https://kotlinlang.org/api/core/kotlin-stdlib/kotlin/-string/index.html), walletScheme: [String](https://kotlinlang.org/api/core/kotlin-stdlib/kotlin/-string/index.html))
# wallet
open override val wallet: [String](https://kotlinlang.org/api/core/kotlin-stdlib/kotlin/-string/index.html)
No trailing slash.
# walletPackageId
open override val walletPackageId: [String](https://kotlinlang.org/api/core/kotlin-stdlib/kotlin/-string/index.html)
Probed to decide whether install can deep link instead of going to the store.
# walletScheme
open override val walletScheme: [String](https://kotlinlang.org/api/core/kotlin-stdlib/kotlin/-string/index.html)
# Development
data object Development : [FrakEnvironment](/developers/references/android/id-frak-sdk-core/frakenvironment/)
## Properties
| Name | Summary |
|---|---|
| [backend](/developers/references/android/id-frak-sdk-core/frakenvironment/development/backend/) | open override val [backend](/developers/references/android/id-frak-sdk-core/frakenvironment/development/backend/): [String](https://kotlinlang.org/api/core/kotlin-stdlib/kotlin/-string/index.html) No trailing slash. |
| [wallet](/developers/references/android/id-frak-sdk-core/frakenvironment/development/wallet/) | open override val [wallet](/developers/references/android/id-frak-sdk-core/frakenvironment/development/wallet/): [String](https://kotlinlang.org/api/core/kotlin-stdlib/kotlin/-string/index.html) No trailing slash. |
# backend
open override val backend: [String](https://kotlinlang.org/api/core/kotlin-stdlib/kotlin/-string/index.html)
No trailing slash.
# wallet
open override val wallet: [String](https://kotlinlang.org/api/core/kotlin-stdlib/kotlin/-string/index.html)
No trailing slash.
# Production
data object Production : [FrakEnvironment](/developers/references/android/id-frak-sdk-core/frakenvironment/)
## Properties
| Name | Summary |
|---|---|
| [backend](/developers/references/android/id-frak-sdk-core/frakenvironment/production/backend/) | open override val [backend](/developers/references/android/id-frak-sdk-core/frakenvironment/production/backend/): [String](https://kotlinlang.org/api/core/kotlin-stdlib/kotlin/-string/index.html) No trailing slash. |
| [wallet](/developers/references/android/id-frak-sdk-core/frakenvironment/production/wallet/) | open override val [wallet](/developers/references/android/id-frak-sdk-core/frakenvironment/production/wallet/): [String](https://kotlinlang.org/api/core/kotlin-stdlib/kotlin/-string/index.html) No trailing slash. |
| [walletPackageId](/developers/references/android/id-frak-sdk-core/frakenvironment/production/walletpackageid/) | open override val [walletPackageId](/developers/references/android/id-frak-sdk-core/frakenvironment/production/walletpackageid/): [String](https://kotlinlang.org/api/core/kotlin-stdlib/kotlin/-string/index.html) Probed to decide whether install can deep link instead of going to the store. |
| [walletScheme](/developers/references/android/id-frak-sdk-core/frakenvironment/production/walletscheme/) | open override val [walletScheme](/developers/references/android/id-frak-sdk-core/frakenvironment/production/walletscheme/): [String](https://kotlinlang.org/api/core/kotlin-stdlib/kotlin/-string/index.html) |
# backend
open override val backend: [String](https://kotlinlang.org/api/core/kotlin-stdlib/kotlin/-string/index.html)
No trailing slash.
# wallet
open override val wallet: [String](https://kotlinlang.org/api/core/kotlin-stdlib/kotlin/-string/index.html)
No trailing slash.
# walletPackageId
open override val walletPackageId: [String](https://kotlinlang.org/api/core/kotlin-stdlib/kotlin/-string/index.html)
Probed to decide whether install can deep link instead of going to the store.
# walletScheme
open override val walletScheme: [String](https://kotlinlang.org/api/core/kotlin-stdlib/kotlin/-string/index.html)
# wallet
abstract val wallet: [String](https://kotlinlang.org/api/core/kotlin-stdlib/kotlin/-string/index.html)
No trailing slash.
# walletPackageId
open val walletPackageId: [String](https://kotlinlang.org/api/core/kotlin-stdlib/kotlin/-string/index.html)
Probed to decide whether install can deep link instead of going to the store.
# walletScheme
open val walletScheme: [String](https://kotlinlang.org/api/core/kotlin-stdlib/kotlin/-string/index.html)
# FrakError
sealed class FrakError : [Exception](https://docs.oracle.com/en/java/javase/17/docs/api/java.base/java/lang/Exception.html)
Every failure the SDK can hand back, as one closed hierarchy. `CancellationException` is never wrapped into one of these, see `frakCall`. No default arguments anywhere: a sealed class's constructor is published, so a default would freeze a synthetic bridge into the `.api` dump.
#### Inheritors
| |
|---|
| [NotInitialized](/developers/references/android/id-frak-sdk-core/frakerror/notinitialized/) |
| [Network](/developers/references/android/id-frak-sdk-core/frakerror/network/) |
| [BackingOff](/developers/references/android/id-frak-sdk-core/frakerror/backingoff/) |
| [Server](/developers/references/android/id-frak-sdk-core/frakerror/server/) |
| [Decoding](/developers/references/android/id-frak-sdk-core/frakerror/decoding/) |
| [TrackingDisabled](/developers/references/android/id-frak-sdk-core/frakerror/trackingdisabled/) |
| [AlreadyPresenting](/developers/references/android/id-frak-sdk-core/frakerror/alreadypresenting/) |
| [MerchantResolutionFailed](/developers/references/android/id-frak-sdk-core/frakerror/merchantresolutionfailed/) |
| [InternalFailure](/developers/references/android/id-frak-sdk-core/frakerror/internalfailure/) |
## Types
| Name | Summary |
|---|---|
| [AlreadyPresenting](/developers/references/android/id-frak-sdk-core/frakerror/alreadypresenting/) | class [AlreadyPresenting](/developers/references/android/id-frak-sdk-core/frakerror/alreadypresenting/) : FrakError [id.frak.sdk.ui.FrakSharing.present](/developers/references/android/id-frak-sdk-ui/fraksharing/present/) called while a sheet is already up on the same Activity. |
| [BackingOff](/developers/references/android/id-frak-sdk-core/frakerror/backingoff/) | class [BackingOff](/developers/references/android/id-frak-sdk-core/frakerror/backingoff/)(val retryAfterSeconds: [Double](https://kotlinlang.org/api/core/kotlin-stdlib/kotlin/-double/index.html)) : FrakError This resource is in a backoff window, so nothing was sent — unlike [Network](/developers/references/android/id-frak-sdk-core/frakerror/network/), where a request was attempted. Any cached copy is served in preference to raising this. |
| [Decoding](/developers/references/android/id-frak-sdk-core/frakerror/decoding/) | class [Decoding](/developers/references/android/id-frak-sdk-core/frakerror/decoding/)(message: [String](https://kotlinlang.org/api/core/kotlin-stdlib/kotlin/-string/index.html), cause: [Throwable](https://kotlinlang.org/api/core/kotlin-stdlib/kotlin/-throwable/index.html)?) : FrakError 2xx response that couldn't be read as the expected shape; distinct from [Server](/developers/references/android/id-frak-sdk-core/frakerror/server/). |
| [InternalFailure](/developers/references/android/id-frak-sdk-core/frakerror/internalfailure/) | class [InternalFailure](/developers/references/android/id-frak-sdk-core/frakerror/internalfailure/)(message: [String](https://kotlinlang.org/api/core/kotlin-stdlib/kotlin/-string/index.html), cause: [Throwable](https://kotlinlang.org/api/core/kotlin-stdlib/kotlin/-throwable/index.html)?) : FrakError A failure inside the SDK: an unexpected error that escaped an internal boundary, or a device capability it needs and cannot get. Not [Decoding](/developers/references/android/id-frak-sdk-core/frakerror/decoding/), which describes a backend body. |
| [Kind](/developers/references/android/id-frak-sdk-core/frakerror/kind/) | enum [Kind](/developers/references/android/id-frak-sdk-core/frakerror/kind/) : [Enum](https://kotlinlang.org/api/core/kotlin-stdlib/kotlin/-enum/index.html)<[FrakError.Kind](/developers/references/android/id-frak-sdk-core/frakerror/kind/)> Stable discriminator, one per arm. A `when` over [Kind](/developers/references/android/id-frak-sdk-core/frakerror/kind/) with an `else` survives a new arm; a `when` over the hierarchy does not. wireValue is spelled identically on iOS. |
| [MerchantResolutionFailed](/developers/references/android/id-frak-sdk-core/frakerror/merchantresolutionfailed/) | class [MerchantResolutionFailed](/developers/references/android/id-frak-sdk-core/frakerror/merchantresolutionfailed/)(message: [String](https://kotlinlang.org/api/core/kotlin-stdlib/kotlin/-string/index.html)) : FrakError No merchant identified: bad `packageId`, or config has neither `merchantId` nor `packageId`. |
| [Network](/developers/references/android/id-frak-sdk-core/frakerror/network/) | class [Network](/developers/references/android/id-frak-sdk-core/frakerror/network/)(cause: [Throwable](https://kotlinlang.org/api/core/kotlin-stdlib/kotlin/-throwable/index.html)) : FrakError DNS failure, no connectivity, TLS failure, timeout. cause carries the underlying [java.io.IOException](https://docs.oracle.com/en/java/javase/17/docs/api/java.base/java/io/IOException.html). |
| [NotInitialized](/developers/references/android/id-frak-sdk-core/frakerror/notinitialized/) | class [NotInitialized](/developers/references/android/id-frak-sdk-core/frakerror/notinitialized/) : FrakError Client method reached before [id.frak.sdk.Frak.initialize](/developers/references/android/id-frak-sdk/frak/initialize/). A `class`, not an `object`: `fillInStackTrace()` runs at construction, so a singleton would report the first call site. |
| [Server](/developers/references/android/id-frak-sdk-core/frakerror/server/) | class [Server](/developers/references/android/id-frak-sdk-core/frakerror/server/)(val status: [Int](https://kotlinlang.org/api/core/kotlin-stdlib/kotlin/-int/index.html), val code: [String](https://kotlinlang.org/api/core/kotlin-stdlib/kotlin/-string/index.html)?, val retryAfterSeconds: [Long](https://kotlinlang.org/api/core/kotlin-stdlib/kotlin/-long/index.html)?) : FrakError Non-2xx status. code is the `{ success: false, error, code }` envelope's code when present, null for plain-text bodies. retryAfterSeconds only from a `Retry-After` header. |
| [TrackingDisabled](/developers/references/android/id-frak-sdk-core/frakerror/trackingdisabled/) | class [TrackingDisabled](/developers/references/android/id-frak-sdk-core/frakerror/trackingdisabled/) : FrakError A tracking call made while tracking is not permitted, by config or at runtime. Not raised by config or reward resolution, which are ungated. |
## Properties
| Name | Summary |
|---|---|
| [kind](/developers/references/android/id-frak-sdk-core/frakerror/kind-prop/) | val [kind](/developers/references/android/id-frak-sdk-core/frakerror/kind-prop/): [FrakError.Kind](/developers/references/android/id-frak-sdk-core/frakerror/kind/) |
# AlreadyPresenting
class AlreadyPresenting : [FrakError](/developers/references/android/id-frak-sdk-core/frakerror/)
[id.frak.sdk.ui.FrakSharing.present](/developers/references/android/id-frak-sdk-ui/fraksharing/present/) called while a sheet is already up on the same Activity.
## Constructors
| | |
|---|---|
| [AlreadyPresenting](/developers/references/android/id-frak-sdk-core/frakerror/alreadypresenting/alreadypresenting/) | constructor() |
# AlreadyPresenting
constructor()
# BackingOff
class BackingOff(val retryAfterSeconds: [Double](https://kotlinlang.org/api/core/kotlin-stdlib/kotlin/-double/index.html)) : [FrakError](/developers/references/android/id-frak-sdk-core/frakerror/)
This resource is in a backoff window, so nothing was sent — unlike [Network](/developers/references/android/id-frak-sdk-core/frakerror/network/), where a request was attempted. Any cached copy is served in preference to raising this.
## Constructors
| | |
|---|---|
| [BackingOff](/developers/references/android/id-frak-sdk-core/frakerror/backingoff/backingoff/) | constructor(retryAfterSeconds: [Double](https://kotlinlang.org/api/core/kotlin-stdlib/kotlin/-double/index.html)) |
## Properties
| Name | Summary |
|---|---|
| [retryAfterSeconds](/developers/references/android/id-frak-sdk-core/frakerror/backingoff/retryafterseconds/) | val [retryAfterSeconds](/developers/references/android/id-frak-sdk-core/frakerror/backingoff/retryafterseconds/): [Double](https://kotlinlang.org/api/core/kotlin-stdlib/kotlin/-double/index.html) Seconds, like [Server.retryAfterSeconds](/developers/references/android/id-frak-sdk-core/frakerror/server/retryafterseconds/) and iOS's twin. Fractional: the floor is 0.5s. |
# BackingOff
constructor(retryAfterSeconds: [Double](https://kotlinlang.org/api/core/kotlin-stdlib/kotlin/-double/index.html))
# retryAfterSeconds
val retryAfterSeconds: [Double](https://kotlinlang.org/api/core/kotlin-stdlib/kotlin/-double/index.html)
Seconds, like [Server.retryAfterSeconds](/developers/references/android/id-frak-sdk-core/frakerror/server/retryafterseconds/) and iOS's twin. Fractional: the floor is 0.5s.
# Decoding
class Decoding(message: [String](https://kotlinlang.org/api/core/kotlin-stdlib/kotlin/-string/index.html), cause: [Throwable](https://kotlinlang.org/api/core/kotlin-stdlib/kotlin/-throwable/index.html)?) : [FrakError](/developers/references/android/id-frak-sdk-core/frakerror/)
2xx response that couldn't be read as the expected shape; distinct from [Server](/developers/references/android/id-frak-sdk-core/frakerror/server/).
## Constructors
| | |
|---|---|
| [Decoding](/developers/references/android/id-frak-sdk-core/frakerror/decoding/decoding/) | constructor(message: [String](https://kotlinlang.org/api/core/kotlin-stdlib/kotlin/-string/index.html), cause: [Throwable](https://kotlinlang.org/api/core/kotlin-stdlib/kotlin/-throwable/index.html)?)constructor(message: [String](https://kotlinlang.org/api/core/kotlin-stdlib/kotlin/-string/index.html)) |
# Decoding
constructor(message: [String](https://kotlinlang.org/api/core/kotlin-stdlib/kotlin/-string/index.html), cause: [Throwable](https://kotlinlang.org/api/core/kotlin-stdlib/kotlin/-throwable/index.html)?)
constructor(message: [String](https://kotlinlang.org/api/core/kotlin-stdlib/kotlin/-string/index.html))
# InternalFailure
class InternalFailure(message: [String](https://kotlinlang.org/api/core/kotlin-stdlib/kotlin/-string/index.html), cause: [Throwable](https://kotlinlang.org/api/core/kotlin-stdlib/kotlin/-throwable/index.html)?) : [FrakError](/developers/references/android/id-frak-sdk-core/frakerror/)
A failure inside the SDK: an unexpected error that escaped an internal boundary, or a device capability it needs and cannot get. Not [Decoding](/developers/references/android/id-frak-sdk-core/frakerror/decoding/), which describes a backend body.
## Constructors
| | |
|---|---|
| [InternalFailure](/developers/references/android/id-frak-sdk-core/frakerror/internalfailure/internalfailure/) | constructor(message: [String](https://kotlinlang.org/api/core/kotlin-stdlib/kotlin/-string/index.html), cause: [Throwable](https://kotlinlang.org/api/core/kotlin-stdlib/kotlin/-throwable/index.html)?)constructor(message: [String](https://kotlinlang.org/api/core/kotlin-stdlib/kotlin/-string/index.html)) |
# InternalFailure
constructor(message: [String](https://kotlinlang.org/api/core/kotlin-stdlib/kotlin/-string/index.html), cause: [Throwable](https://kotlinlang.org/api/core/kotlin-stdlib/kotlin/-throwable/index.html)?)
constructor(message: [String](https://kotlinlang.org/api/core/kotlin-stdlib/kotlin/-string/index.html))
# Kind
enum Kind : [Enum](https://kotlinlang.org/api/core/kotlin-stdlib/kotlin/-enum/index.html)<FrakError.Kind>
Stable discriminator, one per arm. A `when` over Kind with an `else` survives a new arm; a `when` over the hierarchy does not. wireValue is spelled identically on iOS.
## Entries
| | |
|---|---|
| [NOT_INITIALIZED](/developers/references/android/id-frak-sdk-core/frakerror/kind/not_initialized/) | [NOT_INITIALIZED](/developers/references/android/id-frak-sdk-core/frakerror/kind/not_initialized/) |
| [NETWORK](/developers/references/android/id-frak-sdk-core/frakerror/kind/network/) | [NETWORK](/developers/references/android/id-frak-sdk-core/frakerror/kind/network/) |
| [BACKING_OFF](/developers/references/android/id-frak-sdk-core/frakerror/kind/backing_off/) | [BACKING_OFF](/developers/references/android/id-frak-sdk-core/frakerror/kind/backing_off/) |
| [SERVER](/developers/references/android/id-frak-sdk-core/frakerror/kind/server/) | [SERVER](/developers/references/android/id-frak-sdk-core/frakerror/kind/server/) |
| [DECODING](/developers/references/android/id-frak-sdk-core/frakerror/kind/decoding/) | [DECODING](/developers/references/android/id-frak-sdk-core/frakerror/kind/decoding/) |
| [TRACKING_DISABLED](/developers/references/android/id-frak-sdk-core/frakerror/kind/tracking_disabled/) | [TRACKING_DISABLED](/developers/references/android/id-frak-sdk-core/frakerror/kind/tracking_disabled/) |
| [ALREADY_PRESENTING](/developers/references/android/id-frak-sdk-core/frakerror/kind/already_presenting/) | [ALREADY_PRESENTING](/developers/references/android/id-frak-sdk-core/frakerror/kind/already_presenting/) |
| [MERCHANT_RESOLUTION_FAILED](/developers/references/android/id-frak-sdk-core/frakerror/kind/merchant_resolution_failed/) | [MERCHANT_RESOLUTION_FAILED](/developers/references/android/id-frak-sdk-core/frakerror/kind/merchant_resolution_failed/) |
| [INTERNAL_FAILURE](/developers/references/android/id-frak-sdk-core/frakerror/kind/internal_failure/) | [INTERNAL_FAILURE](/developers/references/android/id-frak-sdk-core/frakerror/kind/internal_failure/) |
## Properties
| Name | Summary |
|---|---|
| [wireValue](/developers/references/android/id-frak-sdk-core/frakerror/kind/wirevalue/) | val [wireValue](/developers/references/android/id-frak-sdk-core/frakerror/kind/wirevalue/): [String](https://kotlinlang.org/api/core/kotlin-stdlib/kotlin/-string/index.html) |
## Functions
| Name | Summary |
|---|---|
| [valueOf](/developers/references/android/id-frak-sdk-core/frakerror/kind/valueof/) | fun [valueOf](/developers/references/android/id-frak-sdk-core/frakerror/kind/valueof/)(value: [String](https://kotlinlang.org/api/core/kotlin-stdlib/kotlin/-string/index.html)): FrakError.Kind Returns the enum constant of this type with the specified name. The string must match exactly an identifier used to declare an enum constant in this type. (Extraneous whitespace characters are not permitted.) |
| [values](/developers/references/android/id-frak-sdk-core/frakerror/kind/values/) | fun [values](/developers/references/android/id-frak-sdk-core/frakerror/kind/values/)(): [Array](https://kotlinlang.org/api/core/kotlin-stdlib/kotlin/-array/index.html)<FrakError.Kind> Returns an array containing the constants of this enum type, in the order they're declared. |
# kind
val kind: [FrakError.Kind](/developers/references/android/id-frak-sdk-core/frakerror/kind/)
# ALREADY_PRESENTING
ALREADY_PRESENTING
# BACKING_OFF
BACKING_OFF
# DECODING
DECODING
# INTERNAL_FAILURE
INTERNAL_FAILURE
# MERCHANT_RESOLUTION_FAILED
MERCHANT_RESOLUTION_FAILED
# NETWORK
NETWORK
# NOT_INITIALIZED
NOT_INITIALIZED
# SERVER
SERVER
# TRACKING_DISABLED
TRACKING_DISABLED
# valueOf
fun valueOf(value: [String](https://kotlinlang.org/api/core/kotlin-stdlib/kotlin/-string/index.html)): [FrakError.Kind](/developers/references/android/id-frak-sdk-core/frakerror/kind/)
Returns the enum constant of this type with the specified name. The string must match exactly an identifier used to declare an enum constant in this type. (Extraneous whitespace characters are not permitted.)
#### Throws
| | |
|---|---|
| kotlin.IllegalArgumentException | if this enum type has no constant with the specified name |
# values
fun values(): [Array](https://kotlinlang.org/api/core/kotlin-stdlib/kotlin/-array/index.html)<[FrakError.Kind](/developers/references/android/id-frak-sdk-core/frakerror/kind/)>
Returns an array containing the constants of this enum type, in the order they're declared.
This method may be used to iterate over the constants.
# wireValue
val wireValue: [String](https://kotlinlang.org/api/core/kotlin-stdlib/kotlin/-string/index.html)
# MerchantResolutionFailed
class MerchantResolutionFailed(message: [String](https://kotlinlang.org/api/core/kotlin-stdlib/kotlin/-string/index.html)) : [FrakError](/developers/references/android/id-frak-sdk-core/frakerror/)
No merchant identified: bad `packageId`, or config has neither `merchantId` nor `packageId`.
## Constructors
| | |
|---|---|
| [MerchantResolutionFailed](/developers/references/android/id-frak-sdk-core/frakerror/merchantresolutionfailed/merchantresolutionfailed/) | constructor(message: [String](https://kotlinlang.org/api/core/kotlin-stdlib/kotlin/-string/index.html)) |
# MerchantResolutionFailed
constructor(message: [String](https://kotlinlang.org/api/core/kotlin-stdlib/kotlin/-string/index.html))
# Network
class Network(cause: [Throwable](https://kotlinlang.org/api/core/kotlin-stdlib/kotlin/-throwable/index.html)) : [FrakError](/developers/references/android/id-frak-sdk-core/frakerror/)
DNS failure, no connectivity, TLS failure, timeout. cause carries the underlying [java.io.IOException](https://docs.oracle.com/en/java/javase/17/docs/api/java.base/java/io/IOException.html).
## Constructors
| | |
|---|---|
| [Network](/developers/references/android/id-frak-sdk-core/frakerror/network/network/) | constructor(cause: [Throwable](https://kotlinlang.org/api/core/kotlin-stdlib/kotlin/-throwable/index.html)) |
# Network
constructor(cause: [Throwable](https://kotlinlang.org/api/core/kotlin-stdlib/kotlin/-throwable/index.html))
# NotInitialized
class NotInitialized : [FrakError](/developers/references/android/id-frak-sdk-core/frakerror/)
Client method reached before [id.frak.sdk.Frak.initialize](/developers/references/android/id-frak-sdk/frak/initialize/). A `class`, not an `object`: `fillInStackTrace()` runs at construction, so a singleton would report the first call site.
## Constructors
| | |
|---|---|
| [NotInitialized](/developers/references/android/id-frak-sdk-core/frakerror/notinitialized/notinitialized/) | constructor() |
# NotInitialized
constructor()
# Server
class Server(val status: [Int](https://kotlinlang.org/api/core/kotlin-stdlib/kotlin/-int/index.html), val code: [String](https://kotlinlang.org/api/core/kotlin-stdlib/kotlin/-string/index.html)?, val retryAfterSeconds: [Long](https://kotlinlang.org/api/core/kotlin-stdlib/kotlin/-long/index.html)?) : [FrakError](/developers/references/android/id-frak-sdk-core/frakerror/)
Non-2xx status. code is the `{ success: false, error, code }` envelope's code when present, null for plain-text bodies. retryAfterSeconds only from a `Retry-After` header.
## Constructors
| | |
|---|---|
| [Server](/developers/references/android/id-frak-sdk-core/frakerror/server/server/) | constructor(status: [Int](https://kotlinlang.org/api/core/kotlin-stdlib/kotlin/-int/index.html), code: [String](https://kotlinlang.org/api/core/kotlin-stdlib/kotlin/-string/index.html)?, retryAfterSeconds: [Long](https://kotlinlang.org/api/core/kotlin-stdlib/kotlin/-long/index.html)?)constructor(status: [Int](https://kotlinlang.org/api/core/kotlin-stdlib/kotlin/-int/index.html)) Status only, for a merchant faking a failure in their own test; the SDK always has all three. |
## Properties
| Name | Summary |
|---|---|
| [code](/developers/references/android/id-frak-sdk-core/frakerror/server/code/) | val [code](/developers/references/android/id-frak-sdk-core/frakerror/server/code/): [String](https://kotlinlang.org/api/core/kotlin-stdlib/kotlin/-string/index.html)? |
| [retryAfterSeconds](/developers/references/android/id-frak-sdk-core/frakerror/server/retryafterseconds/) | val [retryAfterSeconds](/developers/references/android/id-frak-sdk-core/frakerror/server/retryafterseconds/): [Long](https://kotlinlang.org/api/core/kotlin-stdlib/kotlin/-long/index.html)? |
| [status](/developers/references/android/id-frak-sdk-core/frakerror/server/status/) | val [status](/developers/references/android/id-frak-sdk-core/frakerror/server/status/): [Int](https://kotlinlang.org/api/core/kotlin-stdlib/kotlin/-int/index.html) |
# code
val code: [String](https://kotlinlang.org/api/core/kotlin-stdlib/kotlin/-string/index.html)?
# retryAfterSeconds
val retryAfterSeconds: [Long](https://kotlinlang.org/api/core/kotlin-stdlib/kotlin/-long/index.html)?
# Server
constructor(status: [Int](https://kotlinlang.org/api/core/kotlin-stdlib/kotlin/-int/index.html), code: [String](https://kotlinlang.org/api/core/kotlin-stdlib/kotlin/-string/index.html)?, retryAfterSeconds: [Long](https://kotlinlang.org/api/core/kotlin-stdlib/kotlin/-long/index.html)?)
constructor(status: [Int](https://kotlinlang.org/api/core/kotlin-stdlib/kotlin/-int/index.html))
Status only, for a merchant faking a failure in their own test; the SDK always has all three.
# status
val status: [Int](https://kotlinlang.org/api/core/kotlin-stdlib/kotlin/-int/index.html)
# TrackingDisabled
class TrackingDisabled : [FrakError](/developers/references/android/id-frak-sdk-core/frakerror/)
A tracking call made while tracking is not permitted, by config or at runtime. Not raised by config or reward resolution, which are ungated.
## Constructors
| | |
|---|---|
| [TrackingDisabled](/developers/references/android/id-frak-sdk-core/frakerror/trackingdisabled/trackingdisabled/) | constructor() |
# TrackingDisabled
constructor()
# FrakLanguage
enum FrakLanguage : [Enum](https://kotlinlang.org/api/core/kotlin-stdlib/kotlin/-enum/index.html)<FrakLanguage>
Language for merchant-configured copy. Only `en`/`fr` exist today.
## Entries
| | |
|---|---|
| [EN](/developers/references/android/id-frak-sdk-core/fraklanguage/en/) | [EN](/developers/references/android/id-frak-sdk-core/fraklanguage/en/) |
| [FR](/developers/references/android/id-frak-sdk-core/fraklanguage/fr/) | [FR](/developers/references/android/id-frak-sdk-core/fraklanguage/fr/) |
## Properties
| Name | Summary |
|---|---|
| [wireValue](/developers/references/android/id-frak-sdk-core/fraklanguage/wirevalue/) | val [wireValue](/developers/references/android/id-frak-sdk-core/fraklanguage/wirevalue/): [String](https://kotlinlang.org/api/core/kotlin-stdlib/kotlin/-string/index.html) |
## Functions
| Name | Summary |
|---|---|
| [valueOf](/developers/references/android/id-frak-sdk-core/fraklanguage/valueof/) | fun [valueOf](/developers/references/android/id-frak-sdk-core/fraklanguage/valueof/)(value: [String](https://kotlinlang.org/api/core/kotlin-stdlib/kotlin/-string/index.html)): FrakLanguage Returns the enum constant of this type with the specified name. The string must match exactly an identifier used to declare an enum constant in this type. (Extraneous whitespace characters are not permitted.) |
| [values](/developers/references/android/id-frak-sdk-core/fraklanguage/values/) | fun [values](/developers/references/android/id-frak-sdk-core/fraklanguage/values/)(): [Array](https://kotlinlang.org/api/core/kotlin-stdlib/kotlin/-array/index.html)<FrakLanguage> Returns an array containing the constants of this enum type, in the order they're declared. |
# EN
EN
# FR
FR
# valueOf
fun valueOf(value: [String](https://kotlinlang.org/api/core/kotlin-stdlib/kotlin/-string/index.html)): [FrakLanguage](/developers/references/android/id-frak-sdk-core/fraklanguage/)
Returns the enum constant of this type with the specified name. The string must match exactly an identifier used to declare an enum constant in this type. (Extraneous whitespace characters are not permitted.)
#### Throws
| | |
|---|---|
| kotlin.IllegalArgumentException | if this enum type has no constant with the specified name |
# values
fun values(): [Array](https://kotlinlang.org/api/core/kotlin-stdlib/kotlin/-array/index.html)<[FrakLanguage](/developers/references/android/id-frak-sdk-core/fraklanguage/)>
Returns an array containing the constants of this enum type, in the order they're declared.
This method may be used to iterate over the constants.
# wireValue
val wireValue: [String](https://kotlinlang.org/api/core/kotlin-stdlib/kotlin/-string/index.html)
# FrakLogLevel
enum FrakLogLevel : [Enum](https://kotlinlang.org/api/core/kotlin-stdlib/kotlin/-enum/index.html)<FrakLogLevel>
Logcat verbosity. Default [NONE](/developers/references/android/id-frak-sdk-core/frakloglevel/none/). Also gates [FrakConfig.logSink](/developers/references/android/id-frak-sdk-core/frakconfig/logsink/) volume, see [FrakLogSink](/developers/references/android/id-frak-sdk-core/fraklogsink/).
## Entries
| | |
|---|---|
| [NONE](/developers/references/android/id-frak-sdk-core/frakloglevel/none/) | [NONE](/developers/references/android/id-frak-sdk-core/frakloglevel/none/) |
| [ERROR](/developers/references/android/id-frak-sdk-core/frakloglevel/error/) | [ERROR](/developers/references/android/id-frak-sdk-core/frakloglevel/error/) |
| [WARN](/developers/references/android/id-frak-sdk-core/frakloglevel/warn/) | [WARN](/developers/references/android/id-frak-sdk-core/frakloglevel/warn/) |
| [INFO](/developers/references/android/id-frak-sdk-core/frakloglevel/info/) | [INFO](/developers/references/android/id-frak-sdk-core/frakloglevel/info/) |
| [DEBUG](/developers/references/android/id-frak-sdk-core/frakloglevel/debug/) | [DEBUG](/developers/references/android/id-frak-sdk-core/frakloglevel/debug/) |
## Functions
| Name | Summary |
|---|---|
| [valueOf](/developers/references/android/id-frak-sdk-core/frakloglevel/valueof/) | fun [valueOf](/developers/references/android/id-frak-sdk-core/frakloglevel/valueof/)(value: [String](https://kotlinlang.org/api/core/kotlin-stdlib/kotlin/-string/index.html)): FrakLogLevel Returns the enum constant of this type with the specified name. The string must match exactly an identifier used to declare an enum constant in this type. (Extraneous whitespace characters are not permitted.) |
| [values](/developers/references/android/id-frak-sdk-core/frakloglevel/values/) | fun [values](/developers/references/android/id-frak-sdk-core/frakloglevel/values/)(): [Array](https://kotlinlang.org/api/core/kotlin-stdlib/kotlin/-array/index.html)<FrakLogLevel> Returns an array containing the constants of this enum type, in the order they're declared. |
# DEBUG
DEBUG
# ERROR
ERROR
# INFO
INFO
# NONE
NONE
# valueOf
fun valueOf(value: [String](https://kotlinlang.org/api/core/kotlin-stdlib/kotlin/-string/index.html)): [FrakLogLevel](/developers/references/android/id-frak-sdk-core/frakloglevel/)
Returns the enum constant of this type with the specified name. The string must match exactly an identifier used to declare an enum constant in this type. (Extraneous whitespace characters are not permitted.)
#### Throws
| | |
|---|---|
| kotlin.IllegalArgumentException | if this enum type has no constant with the specified name |
# values
fun values(): [Array](https://kotlinlang.org/api/core/kotlin-stdlib/kotlin/-array/index.html)<[FrakLogLevel](/developers/references/android/id-frak-sdk-core/frakloglevel/)>
Returns an array containing the constants of this enum type, in the order they're declared.
This method may be used to iterate over the constants.
# WARN
WARN
# FrakLogSink
fun interface FrakLogSink
Receives SDK diagnostics, gated by [FrakConfig.logLevel](/developers/references/android/id-frak-sdk-core/frakconfig/loglevel/). Replaces logcat once set.
## Functions
| Name | Summary |
|---|---|
| [log](/developers/references/android/id-frak-sdk-core/fraklogsink/log/) | abstract fun [log](/developers/references/android/id-frak-sdk-core/fraklogsink/log/)(level: [FrakLogLevel](/developers/references/android/id-frak-sdk-core/frakloglevel/), message: [String](https://kotlinlang.org/api/core/kotlin-stdlib/kotlin/-string/index.html), throwable: [Throwable](https://kotlinlang.org/api/core/kotlin-stdlib/kotlin/-throwable/index.html)?) Must not throw (exception is swallowed, not surfaced) and must be thread-safe. |
# log
abstract fun log(level: [FrakLogLevel](/developers/references/android/id-frak-sdk-core/frakloglevel/), message: [String](https://kotlinlang.org/api/core/kotlin-stdlib/kotlin/-string/index.html), throwable: [Throwable](https://kotlinlang.org/api/core/kotlin-stdlib/kotlin/-throwable/index.html)?)
Must not throw (exception is swallowed, not surfaced) and must be thread-safe.
# FrakMetadata
class FrakMetadata
Static merchant-supplied facts, fixed at build time. Not the resolved backend config, see [id.frak.sdk.config.FrakResolvedConfig](/developers/references/android/id-frak-sdk-config/frakresolvedconfig/).
## Types
| Name | Summary |
|---|---|
| [Builder](/developers/references/android/id-frak-sdk-core/frakmetadata/builder/) | class [Builder](/developers/references/android/id-frak-sdk-core/frakmetadata/builder/) |
## Properties
| Name | Summary |
|---|---|
| [currency](/developers/references/android/id-frak-sdk-core/frakmetadata/currency/) | val [currency](/developers/references/android/id-frak-sdk-core/frakmetadata/currency/): [FrakCurrency](/developers/references/android/id-frak-sdk-core/frakcurrency/) |
| [homepageLink](/developers/references/android/id-frak-sdk-core/frakmetadata/homepagelink/) | val [homepageLink](/developers/references/android/id-frak-sdk-core/frakmetadata/homepagelink/): [String](https://kotlinlang.org/api/core/kotlin-stdlib/kotlin/-string/index.html)? |
| [lang](/developers/references/android/id-frak-sdk-core/frakmetadata/lang/) | val [lang](/developers/references/android/id-frak-sdk-core/frakmetadata/lang/): [FrakLanguage](/developers/references/android/id-frak-sdk-core/fraklanguage/)? Null means "let the backend decide" (falls back to `en`). |
| [logoUrl](/developers/references/android/id-frak-sdk-core/frakmetadata/logourl/) | val [logoUrl](/developers/references/android/id-frak-sdk-core/frakmetadata/logourl/): [String](https://kotlinlang.org/api/core/kotlin-stdlib/kotlin/-string/index.html)? |
| [name](/developers/references/android/id-frak-sdk-core/frakmetadata/name/) | val [name](/developers/references/android/id-frak-sdk-core/frakmetadata/name/): [String](https://kotlinlang.org/api/core/kotlin-stdlib/kotlin/-string/index.html)? |
# FrakMetadata()
fun FrakMetadata(configure: [FrakMetadata.Builder](/developers/references/android/id-frak-sdk-core/frakmetadata/builder/).() -> [Unit](https://kotlinlang.org/api/core/kotlin-stdlib/kotlin/-unit/index.html)): [FrakMetadata](/developers/references/android/id-frak-sdk-core/frakmetadata/)
Kotlin sugar over [FrakMetadata.Builder](/developers/references/android/id-frak-sdk-core/frakmetadata/builder/).
# Builder
class Builder
## Constructors
| | |
|---|---|
| [Builder](/developers/references/android/id-frak-sdk-core/frakmetadata/builder/builder/) | constructor() |
## Properties
| Name | Summary |
|---|---|
| [currency](/developers/references/android/id-frak-sdk-core/frakmetadata/builder/currency/) | var [currency](/developers/references/android/id-frak-sdk-core/frakmetadata/builder/currency/): [FrakCurrency](/developers/references/android/id-frak-sdk-core/frakcurrency/) |
| [homepageLink](/developers/references/android/id-frak-sdk-core/frakmetadata/builder/homepagelink/) | var [homepageLink](/developers/references/android/id-frak-sdk-core/frakmetadata/builder/homepagelink/): [String](https://kotlinlang.org/api/core/kotlin-stdlib/kotlin/-string/index.html)? |
| [lang](/developers/references/android/id-frak-sdk-core/frakmetadata/builder/lang/) | var [lang](/developers/references/android/id-frak-sdk-core/frakmetadata/builder/lang/): [FrakLanguage](/developers/references/android/id-frak-sdk-core/fraklanguage/)? |
| [logoUrl](/developers/references/android/id-frak-sdk-core/frakmetadata/builder/logourl/) | var [logoUrl](/developers/references/android/id-frak-sdk-core/frakmetadata/builder/logourl/): [String](https://kotlinlang.org/api/core/kotlin-stdlib/kotlin/-string/index.html)? |
| [name](/developers/references/android/id-frak-sdk-core/frakmetadata/builder/name/) | var [name](/developers/references/android/id-frak-sdk-core/frakmetadata/builder/name/): [String](https://kotlinlang.org/api/core/kotlin-stdlib/kotlin/-string/index.html)? |
## Functions
| Name | Summary |
|---|---|
| [build](/developers/references/android/id-frak-sdk-core/frakmetadata/builder/build/) | fun [build](/developers/references/android/id-frak-sdk-core/frakmetadata/builder/build/)(): [FrakMetadata](/developers/references/android/id-frak-sdk-core/frakmetadata/) |
| [currency](/developers/references/android/id-frak-sdk-core/frakmetadata/builder/currency/) | fun [currency](/developers/references/android/id-frak-sdk-core/frakmetadata/builder/currency/)(currency: [FrakCurrency](/developers/references/android/id-frak-sdk-core/frakcurrency/)): FrakMetadata.Builder |
| [homepageLink](/developers/references/android/id-frak-sdk-core/frakmetadata/builder/homepagelink/) | fun [homepageLink](/developers/references/android/id-frak-sdk-core/frakmetadata/builder/homepagelink/)(homepageLink: [String](https://kotlinlang.org/api/core/kotlin-stdlib/kotlin/-string/index.html)?): FrakMetadata.Builder |
| [lang](/developers/references/android/id-frak-sdk-core/frakmetadata/builder/lang/) | fun [lang](/developers/references/android/id-frak-sdk-core/frakmetadata/builder/lang/)(lang: [FrakLanguage](/developers/references/android/id-frak-sdk-core/fraklanguage/)?): FrakMetadata.Builder |
| [logoUrl](/developers/references/android/id-frak-sdk-core/frakmetadata/builder/logourl/) | fun [logoUrl](/developers/references/android/id-frak-sdk-core/frakmetadata/builder/logourl/)(logoUrl: [String](https://kotlinlang.org/api/core/kotlin-stdlib/kotlin/-string/index.html)?): FrakMetadata.Builder |
| [name](/developers/references/android/id-frak-sdk-core/frakmetadata/builder/name/) | fun [name](/developers/references/android/id-frak-sdk-core/frakmetadata/builder/name/)(name: [String](https://kotlinlang.org/api/core/kotlin-stdlib/kotlin/-string/index.html)?): FrakMetadata.Builder |
# build
fun build(): [FrakMetadata](/developers/references/android/id-frak-sdk-core/frakmetadata/)
# Builder
constructor()
# currency
fun currency(currency: [FrakCurrency](/developers/references/android/id-frak-sdk-core/frakcurrency/)): [FrakMetadata.Builder](/developers/references/android/id-frak-sdk-core/frakmetadata/builder/)
var currency: [FrakCurrency](/developers/references/android/id-frak-sdk-core/frakcurrency/)
# homepageLink
fun homepageLink(homepageLink: [String](https://kotlinlang.org/api/core/kotlin-stdlib/kotlin/-string/index.html)?): [FrakMetadata.Builder](/developers/references/android/id-frak-sdk-core/frakmetadata/builder/)
var homepageLink: [String](https://kotlinlang.org/api/core/kotlin-stdlib/kotlin/-string/index.html)?
# lang
fun lang(lang: [FrakLanguage](/developers/references/android/id-frak-sdk-core/fraklanguage/)?): [FrakMetadata.Builder](/developers/references/android/id-frak-sdk-core/frakmetadata/builder/)
var lang: [FrakLanguage](/developers/references/android/id-frak-sdk-core/fraklanguage/)?
# logoUrl
fun logoUrl(logoUrl: [String](https://kotlinlang.org/api/core/kotlin-stdlib/kotlin/-string/index.html)?): [FrakMetadata.Builder](/developers/references/android/id-frak-sdk-core/frakmetadata/builder/)
var logoUrl: [String](https://kotlinlang.org/api/core/kotlin-stdlib/kotlin/-string/index.html)?
# name
fun name(name: [String](https://kotlinlang.org/api/core/kotlin-stdlib/kotlin/-string/index.html)?): [FrakMetadata.Builder](/developers/references/android/id-frak-sdk-core/frakmetadata/builder/)
var name: [String](https://kotlinlang.org/api/core/kotlin-stdlib/kotlin/-string/index.html)?
# currency
val currency: [FrakCurrency](/developers/references/android/id-frak-sdk-core/frakcurrency/)
# homepageLink
val homepageLink: [String](https://kotlinlang.org/api/core/kotlin-stdlib/kotlin/-string/index.html)?
# lang
val lang: [FrakLanguage](/developers/references/android/id-frak-sdk-core/fraklanguage/)?
Null means "let the backend decide" (falls back to `en`).
# logoUrl
val logoUrl: [String](https://kotlinlang.org/api/core/kotlin-stdlib/kotlin/-string/index.html)?
# name
val name: [String](https://kotlinlang.org/api/core/kotlin-stdlib/kotlin/-string/index.html)?
# FrakResult
sealed interface FrakResult<out T>
Outcome of a fire-and-forget call. Not `kotlin.Result`: merchants need the typed [FrakError](/developers/references/android/id-frak-sdk-core/frakerror/) arm.
#### Inheritors
| |
|---|
| [Success](/developers/references/android/id-frak-sdk-core/frakresult/success/) |
| [Failure](/developers/references/android/id-frak-sdk-core/frakresult/failure/) |
## Types
| Name | Summary |
|---|---|
| [Failure](/developers/references/android/id-frak-sdk-core/frakresult/failure/) | class [Failure](/developers/references/android/id-frak-sdk-core/frakresult/failure/)(val error: [FrakError](/developers/references/android/id-frak-sdk-core/frakerror/)) : FrakResult<[Nothing](https://kotlinlang.org/api/core/kotlin-stdlib/kotlin/-nothing/index.html)> |
| [Success](/developers/references/android/id-frak-sdk-core/frakresult/success/) | class [Success](/developers/references/android/id-frak-sdk-core/frakresult/success/)<out [T](/developers/references/android/id-frak-sdk-core/frakresult/success/)>(val value: [T](/developers/references/android/id-frak-sdk-core/frakresult/success/)) : FrakResult<[T](/developers/references/android/id-frak-sdk-core/frakresult/success/)> |
# Failure
class Failure(val error: [FrakError](/developers/references/android/id-frak-sdk-core/frakerror/)) : [FrakResult](/developers/references/android/id-frak-sdk-core/frakresult/)<[Nothing](https://kotlinlang.org/api/core/kotlin-stdlib/kotlin/-nothing/index.html)>
## Constructors
| | |
|---|---|
| [Failure](/developers/references/android/id-frak-sdk-core/frakresult/failure/failure/) | constructor(error: [FrakError](/developers/references/android/id-frak-sdk-core/frakerror/)) |
## Properties
| Name | Summary |
|---|---|
| [error](/developers/references/android/id-frak-sdk-core/frakresult/failure/error/) | val [error](/developers/references/android/id-frak-sdk-core/frakresult/failure/error/): [FrakError](/developers/references/android/id-frak-sdk-core/frakerror/) |
# error
val error: [FrakError](/developers/references/android/id-frak-sdk-core/frakerror/)
# Failure
constructor(error: [FrakError](/developers/references/android/id-frak-sdk-core/frakerror/))
# Success
class Success<out T>(val value: T) : [FrakResult](/developers/references/android/id-frak-sdk-core/frakresult/)<T>
## Constructors
| | |
|---|---|
| [Success](/developers/references/android/id-frak-sdk-core/frakresult/success/success/) | constructor(value: T) |
## Properties
| Name | Summary |
|---|---|
| [value](/developers/references/android/id-frak-sdk-core/frakresult/success/value/) | val [value](/developers/references/android/id-frak-sdk-core/frakresult/success/value/): T |
# Success
constructor(value: [T](/developers/references/android/id-frak-sdk-core/frakresult/success/))
# value
val value: [T](/developers/references/android/id-frak-sdk-core/frakresult/success/)
# ProductDetails
class ProductDetails
The purchase line item fields a campaign's `productScope` can target. Build with [Builder](/developers/references/android/id-frak-sdk-core/productdetails/builder/), or `ProductDetails { }` from Kotlin. Also returned by the SDK, on [id.frak.sdk.rewards.BestReward.matchedProducts](/developers/references/android/id-frak-sdk-rewards/bestreward/matchedproducts/), hence `equals`/`hashCode`.
## Types
| Name | Summary |
|---|---|
| [Builder](/developers/references/android/id-frak-sdk-core/productdetails/builder/) | class [Builder](/developers/references/android/id-frak-sdk-core/productdetails/builder/) |
## Properties
| Name | Summary |
|---|---|
| [name](/developers/references/android/id-frak-sdk-core/productdetails/name/) | val [name](/developers/references/android/id-frak-sdk-core/productdetails/name/): [String](https://kotlinlang.org/api/core/kotlin-stdlib/kotlin/-string/index.html)? |
| [productId](/developers/references/android/id-frak-sdk-core/productdetails/productid/) | val [productId](/developers/references/android/id-frak-sdk-core/productdetails/productid/): [String](https://kotlinlang.org/api/core/kotlin-stdlib/kotlin/-string/index.html)? |
| [quantity](/developers/references/android/id-frak-sdk-core/productdetails/quantity/) | val [quantity](/developers/references/android/id-frak-sdk-core/productdetails/quantity/): [Double](https://kotlinlang.org/api/core/kotlin-stdlib/kotlin/-double/index.html)? |
| [sku](/developers/references/android/id-frak-sdk-core/productdetails/sku/) | val [sku](/developers/references/android/id-frak-sdk-core/productdetails/sku/): [String](https://kotlinlang.org/api/core/kotlin-stdlib/kotlin/-string/index.html)? |
| [totalPrice](/developers/references/android/id-frak-sdk-core/productdetails/totalprice/) | val [totalPrice](/developers/references/android/id-frak-sdk-core/productdetails/totalprice/): [Double](https://kotlinlang.org/api/core/kotlin-stdlib/kotlin/-double/index.html)? |
| [unitPrice](/developers/references/android/id-frak-sdk-core/productdetails/unitprice/) | val [unitPrice](/developers/references/android/id-frak-sdk-core/productdetails/unitprice/): [Double](https://kotlinlang.org/api/core/kotlin-stdlib/kotlin/-double/index.html)? |
## Functions
| Name | Summary |
|---|---|
| equals | open operator override fun equals(other: [Any](https://kotlinlang.org/api/core/kotlin-stdlib/kotlin/-any/index.html)?): [Boolean](https://kotlinlang.org/api/core/kotlin-stdlib/kotlin/-boolean/index.html) |
| hashCode | open override fun hashCode(): [Int](https://kotlinlang.org/api/core/kotlin-stdlib/kotlin/-int/index.html) |
| toString | open override fun toString(): [String](https://kotlinlang.org/api/core/kotlin-stdlib/kotlin/-string/index.html) |
# ProductDetails()
fun ProductDetails(configure: [ProductDetails.Builder](/developers/references/android/id-frak-sdk-core/productdetails/builder/).() -> [Unit](https://kotlinlang.org/api/core/kotlin-stdlib/kotlin/-unit/index.html)): [ProductDetails](/developers/references/android/id-frak-sdk-core/productdetails/)
Kotlin sugar over [ProductDetails.Builder](/developers/references/android/id-frak-sdk-core/productdetails/builder/).
# Builder
class Builder
## Constructors
| | |
|---|---|
| [Builder](/developers/references/android/id-frak-sdk-core/productdetails/builder/builder/) | constructor() |
## Properties
| Name | Summary |
|---|---|
| [name](/developers/references/android/id-frak-sdk-core/productdetails/builder/name/) | var [name](/developers/references/android/id-frak-sdk-core/productdetails/builder/name/): [String](https://kotlinlang.org/api/core/kotlin-stdlib/kotlin/-string/index.html)? |
| [productId](/developers/references/android/id-frak-sdk-core/productdetails/builder/productid/) | var [productId](/developers/references/android/id-frak-sdk-core/productdetails/builder/productid/): [String](https://kotlinlang.org/api/core/kotlin-stdlib/kotlin/-string/index.html)? |
| [quantity](/developers/references/android/id-frak-sdk-core/productdetails/builder/quantity/) | var [quantity](/developers/references/android/id-frak-sdk-core/productdetails/builder/quantity/): [Double](https://kotlinlang.org/api/core/kotlin-stdlib/kotlin/-double/index.html)? |
| [sku](/developers/references/android/id-frak-sdk-core/productdetails/builder/sku/) | var [sku](/developers/references/android/id-frak-sdk-core/productdetails/builder/sku/): [String](https://kotlinlang.org/api/core/kotlin-stdlib/kotlin/-string/index.html)? |
| [totalPrice](/developers/references/android/id-frak-sdk-core/productdetails/builder/totalprice/) | var [totalPrice](/developers/references/android/id-frak-sdk-core/productdetails/builder/totalprice/): [Double](https://kotlinlang.org/api/core/kotlin-stdlib/kotlin/-double/index.html)? |
| [unitPrice](/developers/references/android/id-frak-sdk-core/productdetails/builder/unitprice/) | var [unitPrice](/developers/references/android/id-frak-sdk-core/productdetails/builder/unitprice/): [Double](https://kotlinlang.org/api/core/kotlin-stdlib/kotlin/-double/index.html)? |
## Functions
| Name | Summary |
|---|---|
| [build](/developers/references/android/id-frak-sdk-core/productdetails/builder/build/) | fun [build](/developers/references/android/id-frak-sdk-core/productdetails/builder/build/)(): [ProductDetails](/developers/references/android/id-frak-sdk-core/productdetails/) |
| [name](/developers/references/android/id-frak-sdk-core/productdetails/builder/name/) | fun [name](/developers/references/android/id-frak-sdk-core/productdetails/builder/name/)(name: [String](https://kotlinlang.org/api/core/kotlin-stdlib/kotlin/-string/index.html)?): ProductDetails.Builder |
| [productId](/developers/references/android/id-frak-sdk-core/productdetails/builder/productid/) | fun [productId](/developers/references/android/id-frak-sdk-core/productdetails/builder/productid/)(productId: [String](https://kotlinlang.org/api/core/kotlin-stdlib/kotlin/-string/index.html)?): ProductDetails.Builder |
| [quantity](/developers/references/android/id-frak-sdk-core/productdetails/builder/quantity/) | fun [quantity](/developers/references/android/id-frak-sdk-core/productdetails/builder/quantity/)(quantity: [Double](https://kotlinlang.org/api/core/kotlin-stdlib/kotlin/-double/index.html)?): ProductDetails.Builder |
| [sku](/developers/references/android/id-frak-sdk-core/productdetails/builder/sku/) | fun [sku](/developers/references/android/id-frak-sdk-core/productdetails/builder/sku/)(sku: [String](https://kotlinlang.org/api/core/kotlin-stdlib/kotlin/-string/index.html)?): ProductDetails.Builder |
| [totalPrice](/developers/references/android/id-frak-sdk-core/productdetails/builder/totalprice/) | fun [totalPrice](/developers/references/android/id-frak-sdk-core/productdetails/builder/totalprice/)(totalPrice: [Double](https://kotlinlang.org/api/core/kotlin-stdlib/kotlin/-double/index.html)?): ProductDetails.Builder |
| [unitPrice](/developers/references/android/id-frak-sdk-core/productdetails/builder/unitprice/) | fun [unitPrice](/developers/references/android/id-frak-sdk-core/productdetails/builder/unitprice/)(unitPrice: [Double](https://kotlinlang.org/api/core/kotlin-stdlib/kotlin/-double/index.html)?): ProductDetails.Builder |
# build
fun build(): [ProductDetails](/developers/references/android/id-frak-sdk-core/productdetails/)
# Builder
constructor()
# name
fun name(name: [String](https://kotlinlang.org/api/core/kotlin-stdlib/kotlin/-string/index.html)?): [ProductDetails.Builder](/developers/references/android/id-frak-sdk-core/productdetails/builder/)
var name: [String](https://kotlinlang.org/api/core/kotlin-stdlib/kotlin/-string/index.html)?
# productId
fun productId(productId: [String](https://kotlinlang.org/api/core/kotlin-stdlib/kotlin/-string/index.html)?): [ProductDetails.Builder](/developers/references/android/id-frak-sdk-core/productdetails/builder/)
var productId: [String](https://kotlinlang.org/api/core/kotlin-stdlib/kotlin/-string/index.html)?
# quantity
fun quantity(quantity: [Double](https://kotlinlang.org/api/core/kotlin-stdlib/kotlin/-double/index.html)?): [ProductDetails.Builder](/developers/references/android/id-frak-sdk-core/productdetails/builder/)
var quantity: [Double](https://kotlinlang.org/api/core/kotlin-stdlib/kotlin/-double/index.html)?
# sku
fun sku(sku: [String](https://kotlinlang.org/api/core/kotlin-stdlib/kotlin/-string/index.html)?): [ProductDetails.Builder](/developers/references/android/id-frak-sdk-core/productdetails/builder/)
var sku: [String](https://kotlinlang.org/api/core/kotlin-stdlib/kotlin/-string/index.html)?
# totalPrice
fun totalPrice(totalPrice: [Double](https://kotlinlang.org/api/core/kotlin-stdlib/kotlin/-double/index.html)?): [ProductDetails.Builder](/developers/references/android/id-frak-sdk-core/productdetails/builder/)
var totalPrice: [Double](https://kotlinlang.org/api/core/kotlin-stdlib/kotlin/-double/index.html)?
# unitPrice
fun unitPrice(unitPrice: [Double](https://kotlinlang.org/api/core/kotlin-stdlib/kotlin/-double/index.html)?): [ProductDetails.Builder](/developers/references/android/id-frak-sdk-core/productdetails/builder/)
var unitPrice: [Double](https://kotlinlang.org/api/core/kotlin-stdlib/kotlin/-double/index.html)?
# name
val name: [String](https://kotlinlang.org/api/core/kotlin-stdlib/kotlin/-string/index.html)?
# productId
val productId: [String](https://kotlinlang.org/api/core/kotlin-stdlib/kotlin/-string/index.html)?
# quantity
val quantity: [Double](https://kotlinlang.org/api/core/kotlin-stdlib/kotlin/-double/index.html)?
# sku
val sku: [String](https://kotlinlang.org/api/core/kotlin-stdlib/kotlin/-string/index.html)?
# totalPrice
val totalPrice: [Double](https://kotlinlang.org/api/core/kotlin-stdlib/kotlin/-double/index.html)?
# unitPrice
val unitPrice: [Double](https://kotlinlang.org/api/core/kotlin-stdlib/kotlin/-double/index.html)?
# id.frak.sdk.net
## Types
| Name | Summary |
|---|---|
| [PercentEncoding](/developers/references/android/id-frak-sdk-net/percentencoding/) | object [PercentEncoding](/developers/references/android/id-frak-sdk-net/percentencoding/) RFC 3986 percent-encoding for a single query-string value. Not `java.net.URLEncoder` (form encoding turns space into `+`), not `android.net.Uri.encode` (throws on the unit-test classpath). `public` only because `:frak-sdk-ui` needs it across the module boundary; see [InternalFrakApi](/developers/references/android/id-frak-sdk/internalfrakapi/). |
# PercentEncoding
object PercentEncoding
RFC 3986 percent-encoding for a single query-string value. Not `java.net.URLEncoder` (form encoding turns space into `+`), not `android.net.Uri.encode` (throws on the unit-test classpath). `public` only because `:frak-sdk-ui` needs it across the module boundary; see [InternalFrakApi](/developers/references/android/id-frak-sdk/internalfrakapi/).
## Functions
| Name | Summary |
|---|---|
| [encode](/developers/references/android/id-frak-sdk-net/percentencoding/encode/) | fun [encode](/developers/references/android/id-frak-sdk-net/percentencoding/encode/)(value: [String](https://kotlinlang.org/api/core/kotlin-stdlib/kotlin/-string/index.html)): [String](https://kotlinlang.org/api/core/kotlin-stdlib/kotlin/-string/index.html) Percent-encodes every byte outside RFC 3986's unreserved set. |
# encode
fun encode(value: [String](https://kotlinlang.org/api/core/kotlin-stdlib/kotlin/-string/index.html)): [String](https://kotlinlang.org/api/core/kotlin-stdlib/kotlin/-string/index.html)
Percent-encodes every byte outside RFC 3986's unreserved set.
# id.frak.sdk.rewards
## Types
| Name | Summary |
|---|---|
| [BestReward](/developers/references/android/id-frak-sdk-rewards/bestreward/) | class [BestReward](/developers/references/android/id-frak-sdk-rewards/bestreward/)(val formatted: [String](https://kotlinlang.org/api/core/kotlin-stdlib/kotlin/-string/index.html), val payoutType: [String](https://kotlinlang.org/api/core/kotlin-stdlib/kotlin/-string/index.html), val minPurchaseAmount: [String](https://kotlinlang.org/api/core/kotlin-stdlib/kotlin/-string/index.html)?, val minPurchaseValue: [Double](https://kotlinlang.org/api/core/kotlin-stdlib/kotlin/-double/index.html)?, val lockupDurationDays: [Double](https://kotlinlang.org/api/core/kotlin-stdlib/kotlin/-double/index.html)?, val isProductScoped: [Boolean](https://kotlinlang.org/api/core/kotlin-stdlib/kotlin/-boolean/index.html), val matchedProducts: [List](https://kotlinlang.org/api/core/kotlin-stdlib/kotlin.collections/-list/index.html)<[ProductDetails](/developers/references/android/id-frak-sdk-core/productdetails/)>?) The single reward worth advertising, formatted server-side. formatted contains a non-breaking space (U+00A0) before the currency symbol; render as-is, do not reformat. |
| [Campaign](/developers/references/android/id-frak-sdk-rewards/campaign/) | class [Campaign](/developers/references/android/id-frak-sdk-rewards/campaign/)(val campaignId: [String](https://kotlinlang.org/api/core/kotlin-stdlib/kotlin/-string/index.html), val name: [String](https://kotlinlang.org/api/core/kotlin-stdlib/kotlin/-string/index.html), val interactionTypeKey: [String](https://kotlinlang.org/api/core/kotlin-stdlib/kotlin/-string/index.html), val referrer: [EstimatedReward](/developers/references/android/id-frak-sdk-rewards/estimatedreward/)?, val referee: [EstimatedReward](/developers/references/android/id-frak-sdk-rewards/estimatedreward/)?, val defaultLockupSeconds: [Double](https://kotlinlang.org/api/core/kotlin-stdlib/kotlin/-double/index.html)?, val maxRewardsPerUser: [Double](https://kotlinlang.org/api/core/kotlin-stdlib/kotlin/-double/index.html)?, val expiresAt: [String](https://kotlinlang.org/api/core/kotlin-stdlib/kotlin/-string/index.html)?) One active campaign. Arrives sorted by priority descending; do not re-sort. |
| [EstimatedReward](/developers/references/android/id-frak-sdk-rewards/estimatedreward/) | sealed class [EstimatedReward](/developers/references/android/id-frak-sdk-rewards/estimatedreward/) What a campaign pays out. [Percentage](/developers/references/android/id-frak-sdk-rewards/estimatedreward/percentage/) has no concrete amount so it's suppressed from display. |
| [RewardAudience](/developers/references/android/id-frak-sdk-rewards/rewardaudience/) | enum [RewardAudience](/developers/references/android/id-frak-sdk-rewards/rewardaudience/) : [Enum](https://kotlinlang.org/api/core/kotlin-stdlib/kotlin/-enum/index.html)<[RewardAudience](/developers/references/android/id-frak-sdk-rewards/rewardaudience/)> Who a reward is being estimated for: sharer ([REFERRER](/developers/references/android/id-frak-sdk-rewards/rewardaudience/referrer/)) or arriving referee ([REFEREE](/developers/references/android/id-frak-sdk-rewards/rewardaudience/referee/)). |
| [RewardRequest](/developers/references/android/id-frak-sdk-rewards/rewardrequest/) | class [RewardRequest](/developers/references/android/id-frak-sdk-rewards/rewardrequest/) What to look a reward up for. Build with [Builder](/developers/references/android/id-frak-sdk-rewards/rewardrequest/builder/), or `RewardRequest { }` from Kotlin. |
| [RewardTier](/developers/references/android/id-frak-sdk-rewards/rewardtier/) | sealed class [RewardTier](/developers/references/android/id-frak-sdk-rewards/rewardtier/) One band of a tiered reward. Null `maxValue` means no upper bound (not a sentinel). |
| [TokenAmount](/developers/references/android/id-frak-sdk-rewards/tokenamount/) | class [TokenAmount](/developers/references/android/id-frak-sdk-rewards/tokenamount/)(val amount: [Double](https://kotlinlang.org/api/core/kotlin-stdlib/kotlin/-double/index.html), val eurAmount: [Double](https://kotlinlang.org/api/core/kotlin-stdlib/kotlin/-double/index.html), val usdAmount: [Double](https://kotlinlang.org/api/core/kotlin-stdlib/kotlin/-double/index.html), val gbpAmount: [Double](https://kotlinlang.org/api/core/kotlin-stdlib/kotlin/-double/index.html)) A reward amount in raw token units and each fiat currency the backend prices. |
## Functions
| Name | Summary |
|---|---|
| [RewardRequest](/developers/references/android/id-frak-sdk-rewards/rewardrequest-fun/) | fun [RewardRequest](/developers/references/android/id-frak-sdk-rewards/rewardrequest-fun/)(configure: [RewardRequest.Builder](/developers/references/android/id-frak-sdk-rewards/rewardrequest/builder/).() -> [Unit](https://kotlinlang.org/api/core/kotlin-stdlib/kotlin/-unit/index.html)): [RewardRequest](/developers/references/android/id-frak-sdk-rewards/rewardrequest/) Kotlin sugar over [RewardRequest.Builder](/developers/references/android/id-frak-sdk-rewards/rewardrequest/builder/). |
# BestReward
class BestReward(val formatted: [String](https://kotlinlang.org/api/core/kotlin-stdlib/kotlin/-string/index.html), val payoutType: [String](https://kotlinlang.org/api/core/kotlin-stdlib/kotlin/-string/index.html), val minPurchaseAmount: [String](https://kotlinlang.org/api/core/kotlin-stdlib/kotlin/-string/index.html)?, val minPurchaseValue: [Double](https://kotlinlang.org/api/core/kotlin-stdlib/kotlin/-double/index.html)?, val lockupDurationDays: [Double](https://kotlinlang.org/api/core/kotlin-stdlib/kotlin/-double/index.html)?, val isProductScoped: [Boolean](https://kotlinlang.org/api/core/kotlin-stdlib/kotlin/-boolean/index.html), val matchedProducts: [List](https://kotlinlang.org/api/core/kotlin-stdlib/kotlin.collections/-list/index.html)<[ProductDetails](/developers/references/android/id-frak-sdk-core/productdetails/)>?)
The single reward worth advertising, formatted server-side. formatted contains a non-breaking space (U+00A0) before the currency symbol; render as-is, do not reformat.
## Constructors
| | |
|---|---|
| [BestReward](/developers/references/android/id-frak-sdk-rewards/bestreward/bestreward/) | constructor(formatted: [String](https://kotlinlang.org/api/core/kotlin-stdlib/kotlin/-string/index.html), payoutType: [String](https://kotlinlang.org/api/core/kotlin-stdlib/kotlin/-string/index.html), minPurchaseAmount: [String](https://kotlinlang.org/api/core/kotlin-stdlib/kotlin/-string/index.html)?, minPurchaseValue: [Double](https://kotlinlang.org/api/core/kotlin-stdlib/kotlin/-double/index.html)?, lockupDurationDays: [Double](https://kotlinlang.org/api/core/kotlin-stdlib/kotlin/-double/index.html)?, isProductScoped: [Boolean](https://kotlinlang.org/api/core/kotlin-stdlib/kotlin/-boolean/index.html), matchedProducts: [List](https://kotlinlang.org/api/core/kotlin-stdlib/kotlin.collections/-list/index.html)<[ProductDetails](/developers/references/android/id-frak-sdk-core/productdetails/)>?) |
## Properties
| Name | Summary |
|---|---|
| [formatted](/developers/references/android/id-frak-sdk-rewards/bestreward/formatted/) | val [formatted](/developers/references/android/id-frak-sdk-rewards/bestreward/formatted/): [String](https://kotlinlang.org/api/core/kotlin-stdlib/kotlin/-string/index.html) |
| [isProductScoped](/developers/references/android/id-frak-sdk-rewards/bestreward/isproductscoped/) | val [isProductScoped](/developers/references/android/id-frak-sdk-rewards/bestreward/isproductscoped/): [Boolean](https://kotlinlang.org/api/core/kotlin-stdlib/kotlin/-boolean/index.html) Whether the selected campaign is gated to a `productScope`; not the reward's basis. |
| [lockupDurationDays](/developers/references/android/id-frak-sdk-rewards/bestreward/lockupdurationdays/) | val [lockupDurationDays](/developers/references/android/id-frak-sdk-rewards/bestreward/lockupdurationdays/): [Double](https://kotlinlang.org/api/core/kotlin-stdlib/kotlin/-double/index.html)? |
| [matchedProducts](/developers/references/android/id-frak-sdk-rewards/bestreward/matchedproducts/) | val [matchedProducts](/developers/references/android/id-frak-sdk-rewards/bestreward/matchedproducts/): [List](https://kotlinlang.org/api/core/kotlin-stdlib/kotlin.collections/-list/index.html)<[ProductDetails](/developers/references/android/id-frak-sdk-core/productdetails/)>? The requested products matching the winning campaign's scope; null when unscoped or none requested. |
| [minPurchaseAmount](/developers/references/android/id-frak-sdk-rewards/bestreward/minpurchaseamount/) | val [minPurchaseAmount](/developers/references/android/id-frak-sdk-rewards/bestreward/minpurchaseamount/): [String](https://kotlinlang.org/api/core/kotlin-stdlib/kotlin/-string/index.html)? |
| [minPurchaseValue](/developers/references/android/id-frak-sdk-rewards/bestreward/minpurchasevalue/) | val [minPurchaseValue](/developers/references/android/id-frak-sdk-rewards/bestreward/minpurchasevalue/): [Double](https://kotlinlang.org/api/core/kotlin-stdlib/kotlin/-double/index.html)? |
| [payoutType](/developers/references/android/id-frak-sdk-rewards/bestreward/payouttype/) | val [payoutType](/developers/references/android/id-frak-sdk-rewards/bestreward/payouttype/): [String](https://kotlinlang.org/api/core/kotlin-stdlib/kotlin/-string/index.html) `fixed`/`percentage`/`tiered`. `String`, not an enum, so a new server value still decodes. |
## Functions
| Name | Summary |
|---|---|
| equals | open operator override fun equals(other: [Any](https://kotlinlang.org/api/core/kotlin-stdlib/kotlin/-any/index.html)?): [Boolean](https://kotlinlang.org/api/core/kotlin-stdlib/kotlin/-boolean/index.html) |
| hashCode | open override fun hashCode(): [Int](https://kotlinlang.org/api/core/kotlin-stdlib/kotlin/-int/index.html) |
| toString | open override fun toString(): [String](https://kotlinlang.org/api/core/kotlin-stdlib/kotlin/-string/index.html) |
# BestReward
constructor(formatted: [String](https://kotlinlang.org/api/core/kotlin-stdlib/kotlin/-string/index.html), payoutType: [String](https://kotlinlang.org/api/core/kotlin-stdlib/kotlin/-string/index.html), minPurchaseAmount: [String](https://kotlinlang.org/api/core/kotlin-stdlib/kotlin/-string/index.html)?, minPurchaseValue: [Double](https://kotlinlang.org/api/core/kotlin-stdlib/kotlin/-double/index.html)?, lockupDurationDays: [Double](https://kotlinlang.org/api/core/kotlin-stdlib/kotlin/-double/index.html)?, isProductScoped: [Boolean](https://kotlinlang.org/api/core/kotlin-stdlib/kotlin/-boolean/index.html), matchedProducts: [List](https://kotlinlang.org/api/core/kotlin-stdlib/kotlin.collections/-list/index.html)<[ProductDetails](/developers/references/android/id-frak-sdk-core/productdetails/)>?)
# formatted
val formatted: [String](https://kotlinlang.org/api/core/kotlin-stdlib/kotlin/-string/index.html)
# isProductScoped
val isProductScoped: [Boolean](https://kotlinlang.org/api/core/kotlin-stdlib/kotlin/-boolean/index.html)
Whether the selected campaign is gated to a `productScope`; not the reward's basis.
# lockupDurationDays
val lockupDurationDays: [Double](https://kotlinlang.org/api/core/kotlin-stdlib/kotlin/-double/index.html)?
# matchedProducts
val matchedProducts: [List](https://kotlinlang.org/api/core/kotlin-stdlib/kotlin.collections/-list/index.html)<[ProductDetails](/developers/references/android/id-frak-sdk-core/productdetails/)>?
The requested products matching the winning campaign's scope; null when unscoped or none requested.
# minPurchaseAmount
val minPurchaseAmount: [String](https://kotlinlang.org/api/core/kotlin-stdlib/kotlin/-string/index.html)?
# minPurchaseValue
val minPurchaseValue: [Double](https://kotlinlang.org/api/core/kotlin-stdlib/kotlin/-double/index.html)?
# payoutType
val payoutType: [String](https://kotlinlang.org/api/core/kotlin-stdlib/kotlin/-string/index.html)
`fixed`/`percentage`/`tiered`. `String`, not an enum, so a new server value still decodes.
# Campaign
class Campaign(val campaignId: [String](https://kotlinlang.org/api/core/kotlin-stdlib/kotlin/-string/index.html), val name: [String](https://kotlinlang.org/api/core/kotlin-stdlib/kotlin/-string/index.html), val interactionTypeKey: [String](https://kotlinlang.org/api/core/kotlin-stdlib/kotlin/-string/index.html), val referrer: [EstimatedReward](/developers/references/android/id-frak-sdk-rewards/estimatedreward/)?, val referee: [EstimatedReward](/developers/references/android/id-frak-sdk-rewards/estimatedreward/)?, val defaultLockupSeconds: [Double](https://kotlinlang.org/api/core/kotlin-stdlib/kotlin/-double/index.html)?, val maxRewardsPerUser: [Double](https://kotlinlang.org/api/core/kotlin-stdlib/kotlin/-double/index.html)?, val expiresAt: [String](https://kotlinlang.org/api/core/kotlin-stdlib/kotlin/-string/index.html)?)
One active campaign. Arrives sorted by priority descending; do not re-sort.
## Constructors
| | |
|---|---|
| [Campaign](/developers/references/android/id-frak-sdk-rewards/campaign/campaign/) | constructor(campaignId: [String](https://kotlinlang.org/api/core/kotlin-stdlib/kotlin/-string/index.html), name: [String](https://kotlinlang.org/api/core/kotlin-stdlib/kotlin/-string/index.html), interactionTypeKey: [String](https://kotlinlang.org/api/core/kotlin-stdlib/kotlin/-string/index.html), referrer: [EstimatedReward](/developers/references/android/id-frak-sdk-rewards/estimatedreward/)?, referee: [EstimatedReward](/developers/references/android/id-frak-sdk-rewards/estimatedreward/)?, defaultLockupSeconds: [Double](https://kotlinlang.org/api/core/kotlin-stdlib/kotlin/-double/index.html)?, maxRewardsPerUser: [Double](https://kotlinlang.org/api/core/kotlin-stdlib/kotlin/-double/index.html)?, expiresAt: [String](https://kotlinlang.org/api/core/kotlin-stdlib/kotlin/-string/index.html)?) |
## Properties
| Name | Summary |
|---|---|
| [campaignId](/developers/references/android/id-frak-sdk-rewards/campaign/campaignid/) | val [campaignId](/developers/references/android/id-frak-sdk-rewards/campaign/campaignid/): [String](https://kotlinlang.org/api/core/kotlin-stdlib/kotlin/-string/index.html) |
| [defaultLockupSeconds](/developers/references/android/id-frak-sdk-rewards/campaign/defaultlockupseconds/) | val [defaultLockupSeconds](/developers/references/android/id-frak-sdk-rewards/campaign/defaultlockupseconds/): [Double](https://kotlinlang.org/api/core/kotlin-stdlib/kotlin/-double/index.html)? Whole days a reward is locked before it can be claimed, when configured. |
| [expiresAt](/developers/references/android/id-frak-sdk-rewards/campaign/expiresat/) | val [expiresAt](/developers/references/android/id-frak-sdk-rewards/campaign/expiresat/): [String](https://kotlinlang.org/api/core/kotlin-stdlib/kotlin/-string/index.html)? ISO-8601 expiry, or null for a campaign that never expires. |
| [interactionTypeKey](/developers/references/android/id-frak-sdk-rewards/campaign/interactiontypekey/) | val [interactionTypeKey](/developers/references/android/id-frak-sdk-rewards/campaign/interactiontypekey/): [String](https://kotlinlang.org/api/core/kotlin-stdlib/kotlin/-string/index.html) The interaction that triggers this campaign, e.g. `purchase`. Open on the wire. |
| [maxRewardsPerUser](/developers/references/android/id-frak-sdk-rewards/campaign/maxrewardsperuser/) | val [maxRewardsPerUser](/developers/references/android/id-frak-sdk-rewards/campaign/maxrewardsperuser/): [Double](https://kotlinlang.org/api/core/kotlin-stdlib/kotlin/-double/index.html)? |
| [name](/developers/references/android/id-frak-sdk-rewards/campaign/name/) | val [name](/developers/references/android/id-frak-sdk-rewards/campaign/name/): [String](https://kotlinlang.org/api/core/kotlin-stdlib/kotlin/-string/index.html) |
| [referee](/developers/references/android/id-frak-sdk-rewards/campaign/referee/) | val [referee](/developers/references/android/id-frak-sdk-rewards/campaign/referee/): [EstimatedReward](/developers/references/android/id-frak-sdk-rewards/estimatedreward/)? What the person arriving through the link earns. |
| [referrer](/developers/references/android/id-frak-sdk-rewards/campaign/referrer/) | val [referrer](/developers/references/android/id-frak-sdk-rewards/campaign/referrer/): [EstimatedReward](/developers/references/android/id-frak-sdk-rewards/estimatedreward/)? What the sharer earns. Absent when the campaign rewards only the referee. |
## Functions
| Name | Summary |
|---|---|
| equals | open operator override fun equals(other: [Any](https://kotlinlang.org/api/core/kotlin-stdlib/kotlin/-any/index.html)?): [Boolean](https://kotlinlang.org/api/core/kotlin-stdlib/kotlin/-boolean/index.html) |
| hashCode | open override fun hashCode(): [Int](https://kotlinlang.org/api/core/kotlin-stdlib/kotlin/-int/index.html) |
| toString | open override fun toString(): [String](https://kotlinlang.org/api/core/kotlin-stdlib/kotlin/-string/index.html) |
# Campaign
constructor(campaignId: [String](https://kotlinlang.org/api/core/kotlin-stdlib/kotlin/-string/index.html), name: [String](https://kotlinlang.org/api/core/kotlin-stdlib/kotlin/-string/index.html), interactionTypeKey: [String](https://kotlinlang.org/api/core/kotlin-stdlib/kotlin/-string/index.html), referrer: [EstimatedReward](/developers/references/android/id-frak-sdk-rewards/estimatedreward/)?, referee: [EstimatedReward](/developers/references/android/id-frak-sdk-rewards/estimatedreward/)?, defaultLockupSeconds: [Double](https://kotlinlang.org/api/core/kotlin-stdlib/kotlin/-double/index.html)?, maxRewardsPerUser: [Double](https://kotlinlang.org/api/core/kotlin-stdlib/kotlin/-double/index.html)?, expiresAt: [String](https://kotlinlang.org/api/core/kotlin-stdlib/kotlin/-string/index.html)?)
# campaignId
val campaignId: [String](https://kotlinlang.org/api/core/kotlin-stdlib/kotlin/-string/index.html)
# defaultLockupSeconds
val defaultLockupSeconds: [Double](https://kotlinlang.org/api/core/kotlin-stdlib/kotlin/-double/index.html)?
Whole days a reward is locked before it can be claimed, when configured.
# expiresAt
val expiresAt: [String](https://kotlinlang.org/api/core/kotlin-stdlib/kotlin/-string/index.html)?
ISO-8601 expiry, or null for a campaign that never expires.
# interactionTypeKey
val interactionTypeKey: [String](https://kotlinlang.org/api/core/kotlin-stdlib/kotlin/-string/index.html)
The interaction that triggers this campaign, e.g. `purchase`. Open on the wire.
# maxRewardsPerUser
val maxRewardsPerUser: [Double](https://kotlinlang.org/api/core/kotlin-stdlib/kotlin/-double/index.html)?
# name
val name: [String](https://kotlinlang.org/api/core/kotlin-stdlib/kotlin/-string/index.html)
# referee
val referee: [EstimatedReward](/developers/references/android/id-frak-sdk-rewards/estimatedreward/)?
What the person arriving through the link earns.
# referrer
val referrer: [EstimatedReward](/developers/references/android/id-frak-sdk-rewards/estimatedreward/)?
What the sharer earns. Absent when the campaign rewards only the referee.
# EstimatedReward
sealed class EstimatedReward
What a campaign pays out. [Percentage](/developers/references/android/id-frak-sdk-rewards/estimatedreward/percentage/) has no concrete amount so it's suppressed from display.
#### Inheritors
| |
|---|
| [Fixed](/developers/references/android/id-frak-sdk-rewards/estimatedreward/fixed/) |
| [Percentage](/developers/references/android/id-frak-sdk-rewards/estimatedreward/percentage/) |
| [Tiered](/developers/references/android/id-frak-sdk-rewards/estimatedreward/tiered/) |
| [Unknown](/developers/references/android/id-frak-sdk-rewards/estimatedreward/unknown/) |
## Types
| Name | Summary |
|---|---|
| [Fixed](/developers/references/android/id-frak-sdk-rewards/estimatedreward/fixed/) | class [Fixed](/developers/references/android/id-frak-sdk-rewards/estimatedreward/fixed/)(val amount: [TokenAmount](/developers/references/android/id-frak-sdk-rewards/tokenamount/)) : EstimatedReward |
| [Percentage](/developers/references/android/id-frak-sdk-rewards/estimatedreward/percentage/) | class [Percentage](/developers/references/android/id-frak-sdk-rewards/estimatedreward/percentage/)(val percent: [Double](https://kotlinlang.org/api/core/kotlin-stdlib/kotlin/-double/index.html), val percentOf: [String](https://kotlinlang.org/api/core/kotlin-stdlib/kotlin/-string/index.html), val maxAmount: [TokenAmount](/developers/references/android/id-frak-sdk-rewards/tokenamount/)?, val minAmount: [TokenAmount](/developers/references/android/id-frak-sdk-rewards/tokenamount/)?) : EstimatedReward |
| [Tiered](/developers/references/android/id-frak-sdk-rewards/estimatedreward/tiered/) | class [Tiered](/developers/references/android/id-frak-sdk-rewards/estimatedreward/tiered/)(val tierField: [String](https://kotlinlang.org/api/core/kotlin-stdlib/kotlin/-string/index.html), val tiers: [List](https://kotlinlang.org/api/core/kotlin-stdlib/kotlin.collections/-list/index.html)<[RewardTier](/developers/references/android/id-frak-sdk-rewards/rewardtier/)>) : EstimatedReward |
| [Unknown](/developers/references/android/id-frak-sdk-rewards/estimatedreward/unknown/) | class [Unknown](/developers/references/android/id-frak-sdk-rewards/estimatedreward/unknown/)(val payoutType: [String](https://kotlinlang.org/api/core/kotlin-stdlib/kotlin/-string/index.html)) : EstimatedReward A payout type newer than this binary. Never rendered, never dropped. |
# Fixed
class Fixed(val amount: [TokenAmount](/developers/references/android/id-frak-sdk-rewards/tokenamount/)) : [EstimatedReward](/developers/references/android/id-frak-sdk-rewards/estimatedreward/)
## Constructors
| | |
|---|---|
| [Fixed](/developers/references/android/id-frak-sdk-rewards/estimatedreward/fixed/fixed/) | constructor(amount: [TokenAmount](/developers/references/android/id-frak-sdk-rewards/tokenamount/)) |
## Properties
| Name | Summary |
|---|---|
| [amount](/developers/references/android/id-frak-sdk-rewards/estimatedreward/fixed/amount/) | val [amount](/developers/references/android/id-frak-sdk-rewards/estimatedreward/fixed/amount/): [TokenAmount](/developers/references/android/id-frak-sdk-rewards/tokenamount/) |
## Functions
| Name | Summary |
|---|---|
| equals | open operator override fun equals(other: [Any](https://kotlinlang.org/api/core/kotlin-stdlib/kotlin/-any/index.html)?): [Boolean](https://kotlinlang.org/api/core/kotlin-stdlib/kotlin/-boolean/index.html) |
| hashCode | open override fun hashCode(): [Int](https://kotlinlang.org/api/core/kotlin-stdlib/kotlin/-int/index.html) |
| toString | open override fun toString(): [String](https://kotlinlang.org/api/core/kotlin-stdlib/kotlin/-string/index.html) |
# amount
val amount: [TokenAmount](/developers/references/android/id-frak-sdk-rewards/tokenamount/)
# Fixed
constructor(amount: [TokenAmount](/developers/references/android/id-frak-sdk-rewards/tokenamount/))
# Percentage
class Percentage(val percent: [Double](https://kotlinlang.org/api/core/kotlin-stdlib/kotlin/-double/index.html), val percentOf: [String](https://kotlinlang.org/api/core/kotlin-stdlib/kotlin/-string/index.html), val maxAmount: [TokenAmount](/developers/references/android/id-frak-sdk-rewards/tokenamount/)?, val minAmount: [TokenAmount](/developers/references/android/id-frak-sdk-rewards/tokenamount/)?) : [EstimatedReward](/developers/references/android/id-frak-sdk-rewards/estimatedreward/)
## Constructors
| | |
|---|---|
| [Percentage](/developers/references/android/id-frak-sdk-rewards/estimatedreward/percentage/percentage/) | constructor(percent: [Double](https://kotlinlang.org/api/core/kotlin-stdlib/kotlin/-double/index.html), percentOf: [String](https://kotlinlang.org/api/core/kotlin-stdlib/kotlin/-string/index.html), maxAmount: [TokenAmount](/developers/references/android/id-frak-sdk-rewards/tokenamount/)?, minAmount: [TokenAmount](/developers/references/android/id-frak-sdk-rewards/tokenamount/)?) |
## Properties
| Name | Summary |
|---|---|
| [maxAmount](/developers/references/android/id-frak-sdk-rewards/estimatedreward/percentage/maxamount/) | val [maxAmount](/developers/references/android/id-frak-sdk-rewards/estimatedreward/percentage/maxamount/): [TokenAmount](/developers/references/android/id-frak-sdk-rewards/tokenamount/)? |
| [minAmount](/developers/references/android/id-frak-sdk-rewards/estimatedreward/percentage/minamount/) | val [minAmount](/developers/references/android/id-frak-sdk-rewards/estimatedreward/percentage/minamount/): [TokenAmount](/developers/references/android/id-frak-sdk-rewards/tokenamount/)? |
| [percent](/developers/references/android/id-frak-sdk-rewards/estimatedreward/percentage/percent/) | val [percent](/developers/references/android/id-frak-sdk-rewards/estimatedreward/percentage/percent/): [Double](https://kotlinlang.org/api/core/kotlin-stdlib/kotlin/-double/index.html) |
| [percentOf](/developers/references/android/id-frak-sdk-rewards/estimatedreward/percentage/percentof/) | val [percentOf](/developers/references/android/id-frak-sdk-rewards/estimatedreward/percentage/percentof/): [String](https://kotlinlang.org/api/core/kotlin-stdlib/kotlin/-string/index.html) What the percentage applies to, e.g. `purchase_amount`. Open on the wire. |
## Functions
| Name | Summary |
|---|---|
| equals | open operator override fun equals(other: [Any](https://kotlinlang.org/api/core/kotlin-stdlib/kotlin/-any/index.html)?): [Boolean](https://kotlinlang.org/api/core/kotlin-stdlib/kotlin/-boolean/index.html) |
| hashCode | open override fun hashCode(): [Int](https://kotlinlang.org/api/core/kotlin-stdlib/kotlin/-int/index.html) |
| toString | open override fun toString(): [String](https://kotlinlang.org/api/core/kotlin-stdlib/kotlin/-string/index.html) |
# maxAmount
val maxAmount: [TokenAmount](/developers/references/android/id-frak-sdk-rewards/tokenamount/)?
# minAmount
val minAmount: [TokenAmount](/developers/references/android/id-frak-sdk-rewards/tokenamount/)?
# percent
val percent: [Double](https://kotlinlang.org/api/core/kotlin-stdlib/kotlin/-double/index.html)
# Percentage
constructor(percent: [Double](https://kotlinlang.org/api/core/kotlin-stdlib/kotlin/-double/index.html), percentOf: [String](https://kotlinlang.org/api/core/kotlin-stdlib/kotlin/-string/index.html), maxAmount: [TokenAmount](/developers/references/android/id-frak-sdk-rewards/tokenamount/)?, minAmount: [TokenAmount](/developers/references/android/id-frak-sdk-rewards/tokenamount/)?)
# percentOf
val percentOf: [String](https://kotlinlang.org/api/core/kotlin-stdlib/kotlin/-string/index.html)
What the percentage applies to, e.g. `purchase_amount`. Open on the wire.
# Tiered
class Tiered(val tierField: [String](https://kotlinlang.org/api/core/kotlin-stdlib/kotlin/-string/index.html), val tiers: [List](https://kotlinlang.org/api/core/kotlin-stdlib/kotlin.collections/-list/index.html)<[RewardTier](/developers/references/android/id-frak-sdk-rewards/rewardtier/)>) : [EstimatedReward](/developers/references/android/id-frak-sdk-rewards/estimatedreward/)
## Constructors
| | |
|---|---|
| [Tiered](/developers/references/android/id-frak-sdk-rewards/estimatedreward/tiered/tiered/) | constructor(tierField: [String](https://kotlinlang.org/api/core/kotlin-stdlib/kotlin/-string/index.html), tiers: [List](https://kotlinlang.org/api/core/kotlin-stdlib/kotlin.collections/-list/index.html)<[RewardTier](/developers/references/android/id-frak-sdk-rewards/rewardtier/)>) |
## Properties
| Name | Summary |
|---|---|
| [tierField](/developers/references/android/id-frak-sdk-rewards/estimatedreward/tiered/tierfield/) | val [tierField](/developers/references/android/id-frak-sdk-rewards/estimatedreward/tiered/tierfield/): [String](https://kotlinlang.org/api/core/kotlin-stdlib/kotlin/-string/index.html) |
| [tiers](/developers/references/android/id-frak-sdk-rewards/estimatedreward/tiered/tiers/) | val [tiers](/developers/references/android/id-frak-sdk-rewards/estimatedreward/tiered/tiers/): [List](https://kotlinlang.org/api/core/kotlin-stdlib/kotlin.collections/-list/index.html)<[RewardTier](/developers/references/android/id-frak-sdk-rewards/rewardtier/)> |
## Functions
| Name | Summary |
|---|---|
| equals | open operator override fun equals(other: [Any](https://kotlinlang.org/api/core/kotlin-stdlib/kotlin/-any/index.html)?): [Boolean](https://kotlinlang.org/api/core/kotlin-stdlib/kotlin/-boolean/index.html) |
| hashCode | open override fun hashCode(): [Int](https://kotlinlang.org/api/core/kotlin-stdlib/kotlin/-int/index.html) |
| toString | open override fun toString(): [String](https://kotlinlang.org/api/core/kotlin-stdlib/kotlin/-string/index.html) |
# Tiered
constructor(tierField: [String](https://kotlinlang.org/api/core/kotlin-stdlib/kotlin/-string/index.html), tiers: [List](https://kotlinlang.org/api/core/kotlin-stdlib/kotlin.collections/-list/index.html)<[RewardTier](/developers/references/android/id-frak-sdk-rewards/rewardtier/)>)
# tierField
val tierField: [String](https://kotlinlang.org/api/core/kotlin-stdlib/kotlin/-string/index.html)
# tiers
val tiers: [List](https://kotlinlang.org/api/core/kotlin-stdlib/kotlin.collections/-list/index.html)<[RewardTier](/developers/references/android/id-frak-sdk-rewards/rewardtier/)>
# Unknown
class Unknown(val payoutType: [String](https://kotlinlang.org/api/core/kotlin-stdlib/kotlin/-string/index.html)) : [EstimatedReward](/developers/references/android/id-frak-sdk-rewards/estimatedreward/)
A payout type newer than this binary. Never rendered, never dropped.
## Constructors
| | |
|---|---|
| [Unknown](/developers/references/android/id-frak-sdk-rewards/estimatedreward/unknown/unknown/) | constructor(payoutType: [String](https://kotlinlang.org/api/core/kotlin-stdlib/kotlin/-string/index.html)) |
## Properties
| Name | Summary |
|---|---|
| [payoutType](/developers/references/android/id-frak-sdk-rewards/estimatedreward/unknown/payouttype/) | val [payoutType](/developers/references/android/id-frak-sdk-rewards/estimatedreward/unknown/payouttype/): [String](https://kotlinlang.org/api/core/kotlin-stdlib/kotlin/-string/index.html) |
## Functions
| Name | Summary |
|---|---|
| equals | open operator override fun equals(other: [Any](https://kotlinlang.org/api/core/kotlin-stdlib/kotlin/-any/index.html)?): [Boolean](https://kotlinlang.org/api/core/kotlin-stdlib/kotlin/-boolean/index.html) |
| hashCode | open override fun hashCode(): [Int](https://kotlinlang.org/api/core/kotlin-stdlib/kotlin/-int/index.html) |
| toString | open override fun toString(): [String](https://kotlinlang.org/api/core/kotlin-stdlib/kotlin/-string/index.html) |
# payoutType
val payoutType: [String](https://kotlinlang.org/api/core/kotlin-stdlib/kotlin/-string/index.html)
# Unknown
constructor(payoutType: [String](https://kotlinlang.org/api/core/kotlin-stdlib/kotlin/-string/index.html))
# RewardAudience
enum RewardAudience : [Enum](https://kotlinlang.org/api/core/kotlin-stdlib/kotlin/-enum/index.html)<RewardAudience>
Who a reward is being estimated for: sharer ([REFERRER](/developers/references/android/id-frak-sdk-rewards/rewardaudience/referrer/)) or arriving referee ([REFEREE](/developers/references/android/id-frak-sdk-rewards/rewardaudience/referee/)).
## Entries
| | |
|---|---|
| [REFERRER](/developers/references/android/id-frak-sdk-rewards/rewardaudience/referrer/) | [REFERRER](/developers/references/android/id-frak-sdk-rewards/rewardaudience/referrer/) |
| [REFEREE](/developers/references/android/id-frak-sdk-rewards/rewardaudience/referee/) | [REFEREE](/developers/references/android/id-frak-sdk-rewards/rewardaudience/referee/) |
## Properties
| Name | Summary |
|---|---|
| [wireValue](/developers/references/android/id-frak-sdk-rewards/rewardaudience/wirevalue/) | val [wireValue](/developers/references/android/id-frak-sdk-rewards/rewardaudience/wirevalue/): [String](https://kotlinlang.org/api/core/kotlin-stdlib/kotlin/-string/index.html) |
## Functions
| Name | Summary |
|---|---|
| [valueOf](/developers/references/android/id-frak-sdk-rewards/rewardaudience/valueof/) | fun [valueOf](/developers/references/android/id-frak-sdk-rewards/rewardaudience/valueof/)(value: [String](https://kotlinlang.org/api/core/kotlin-stdlib/kotlin/-string/index.html)): RewardAudience Returns the enum constant of this type with the specified name. The string must match exactly an identifier used to declare an enum constant in this type. (Extraneous whitespace characters are not permitted.) |
| [values](/developers/references/android/id-frak-sdk-rewards/rewardaudience/values/) | fun [values](/developers/references/android/id-frak-sdk-rewards/rewardaudience/values/)(): [Array](https://kotlinlang.org/api/core/kotlin-stdlib/kotlin/-array/index.html)<RewardAudience> Returns an array containing the constants of this enum type, in the order they're declared. |
# REFEREE
REFEREE
# REFERRER
REFERRER
# valueOf
fun valueOf(value: [String](https://kotlinlang.org/api/core/kotlin-stdlib/kotlin/-string/index.html)): [RewardAudience](/developers/references/android/id-frak-sdk-rewards/rewardaudience/)
Returns the enum constant of this type with the specified name. The string must match exactly an identifier used to declare an enum constant in this type. (Extraneous whitespace characters are not permitted.)
#### Throws
| | |
|---|---|
| kotlin.IllegalArgumentException | if this enum type has no constant with the specified name |
# values
fun values(): [Array](https://kotlinlang.org/api/core/kotlin-stdlib/kotlin/-array/index.html)<[RewardAudience](/developers/references/android/id-frak-sdk-rewards/rewardaudience/)>
Returns an array containing the constants of this enum type, in the order they're declared.
This method may be used to iterate over the constants.
# wireValue
val wireValue: [String](https://kotlinlang.org/api/core/kotlin-stdlib/kotlin/-string/index.html)
# RewardRequest
class RewardRequest
What to look a reward up for. Build with [Builder](/developers/references/android/id-frak-sdk-rewards/rewardrequest/builder/), or `RewardRequest { }` from Kotlin.
## Types
| Name | Summary |
|---|---|
| [Builder](/developers/references/android/id-frak-sdk-rewards/rewardrequest/builder/) | class [Builder](/developers/references/android/id-frak-sdk-rewards/rewardrequest/builder/) |
## Properties
| Name | Summary |
|---|---|
| [audience](/developers/references/android/id-frak-sdk-rewards/rewardrequest/audience/) | val [audience](/developers/references/android/id-frak-sdk-rewards/rewardrequest/audience/): [RewardAudience](/developers/references/android/id-frak-sdk-rewards/rewardaudience/)? Referrer or referee. Null ranks both. |
| [products](/developers/references/android/id-frak-sdk-rewards/rewardrequest/products/) | val [products](/developers/references/android/id-frak-sdk-rewards/rewardrequest/products/): [List](https://kotlinlang.org/api/core/kotlin-stdlib/kotlin.collections/-list/index.html)<[ProductDetails](/developers/references/android/id-frak-sdk-core/productdetails/)> Products currently in view, when known. Advisory: a campaign scoped to none of them is ranked below one matching at least one. |
| [targetInteraction](/developers/references/android/id-frak-sdk-rewards/rewardrequest/targetinteraction/) | val [targetInteraction](/developers/references/android/id-frak-sdk-rewards/rewardrequest/targetinteraction/): [String](https://kotlinlang.org/api/core/kotlin-stdlib/kotlin/-string/index.html)? Which interaction the reward is for, e.g. `purchase`. Free-form; a typo silently never matches. |
## Functions
| Name | Summary |
|---|---|
| equals | open operator override fun equals(other: [Any](https://kotlinlang.org/api/core/kotlin-stdlib/kotlin/-any/index.html)?): [Boolean](https://kotlinlang.org/api/core/kotlin-stdlib/kotlin/-boolean/index.html) |
| hashCode | open override fun hashCode(): [Int](https://kotlinlang.org/api/core/kotlin-stdlib/kotlin/-int/index.html) |
| toString | open override fun toString(): [String](https://kotlinlang.org/api/core/kotlin-stdlib/kotlin/-string/index.html) |
# RewardRequest()
fun RewardRequest(configure: [RewardRequest.Builder](/developers/references/android/id-frak-sdk-rewards/rewardrequest/builder/).() -> [Unit](https://kotlinlang.org/api/core/kotlin-stdlib/kotlin/-unit/index.html)): [RewardRequest](/developers/references/android/id-frak-sdk-rewards/rewardrequest/)
Kotlin sugar over [RewardRequest.Builder](/developers/references/android/id-frak-sdk-rewards/rewardrequest/builder/).
# audience
val audience: [RewardAudience](/developers/references/android/id-frak-sdk-rewards/rewardaudience/)?
Referrer or referee. Null ranks both.
# Builder
class Builder
## Constructors
| | |
|---|---|
| [Builder](/developers/references/android/id-frak-sdk-rewards/rewardrequest/builder/builder/) | constructor() |
## Properties
| Name | Summary |
|---|---|
| [audience](/developers/references/android/id-frak-sdk-rewards/rewardrequest/builder/audience/) | var [audience](/developers/references/android/id-frak-sdk-rewards/rewardrequest/builder/audience/): [RewardAudience](/developers/references/android/id-frak-sdk-rewards/rewardaudience/)? |
| [products](/developers/references/android/id-frak-sdk-rewards/rewardrequest/builder/products/) | var [products](/developers/references/android/id-frak-sdk-rewards/rewardrequest/builder/products/): [List](https://kotlinlang.org/api/core/kotlin-stdlib/kotlin.collections/-list/index.html)<[ProductDetails](/developers/references/android/id-frak-sdk-core/productdetails/)> |
| [targetInteraction](/developers/references/android/id-frak-sdk-rewards/rewardrequest/builder/targetinteraction/) | var [targetInteraction](/developers/references/android/id-frak-sdk-rewards/rewardrequest/builder/targetinteraction/): [String](https://kotlinlang.org/api/core/kotlin-stdlib/kotlin/-string/index.html)? |
## Functions
| Name | Summary |
|---|---|
| [addProduct](/developers/references/android/id-frak-sdk-rewards/rewardrequest/builder/addproduct/) | fun [addProduct](/developers/references/android/id-frak-sdk-rewards/rewardrequest/builder/addproduct/)(product: [ProductDetails](/developers/references/android/id-frak-sdk-core/productdetails/)): RewardRequest.Builder |
| [audience](/developers/references/android/id-frak-sdk-rewards/rewardrequest/builder/audience/) | fun [audience](/developers/references/android/id-frak-sdk-rewards/rewardrequest/builder/audience/)(audience: [RewardAudience](/developers/references/android/id-frak-sdk-rewards/rewardaudience/)?): RewardRequest.Builder |
| [build](/developers/references/android/id-frak-sdk-rewards/rewardrequest/builder/build/) | fun [build](/developers/references/android/id-frak-sdk-rewards/rewardrequest/builder/build/)(): [RewardRequest](/developers/references/android/id-frak-sdk-rewards/rewardrequest/) Copies [products](/developers/references/android/id-frak-sdk-rewards/rewardrequest/builder/products/), so mutating the caller's list cannot change an already-built request. |
| [products](/developers/references/android/id-frak-sdk-rewards/rewardrequest/builder/products/) | fun [products](/developers/references/android/id-frak-sdk-rewards/rewardrequest/builder/products/)(products: [List](https://kotlinlang.org/api/core/kotlin-stdlib/kotlin.collections/-list/index.html)<[ProductDetails](/developers/references/android/id-frak-sdk-core/productdetails/)>): RewardRequest.Builder |
| [targetInteraction](/developers/references/android/id-frak-sdk-rewards/rewardrequest/builder/targetinteraction/) | fun [targetInteraction](/developers/references/android/id-frak-sdk-rewards/rewardrequest/builder/targetinteraction/)(targetInteraction: [String](https://kotlinlang.org/api/core/kotlin-stdlib/kotlin/-string/index.html)?): RewardRequest.Builder |
# addProduct
fun addProduct(product: [ProductDetails](/developers/references/android/id-frak-sdk-core/productdetails/)): [RewardRequest.Builder](/developers/references/android/id-frak-sdk-rewards/rewardrequest/builder/)
# audience
fun audience(audience: [RewardAudience](/developers/references/android/id-frak-sdk-rewards/rewardaudience/)?): [RewardRequest.Builder](/developers/references/android/id-frak-sdk-rewards/rewardrequest/builder/)
var audience: [RewardAudience](/developers/references/android/id-frak-sdk-rewards/rewardaudience/)?
# build
fun build(): [RewardRequest](/developers/references/android/id-frak-sdk-rewards/rewardrequest/)
Copies [products](/developers/references/android/id-frak-sdk-rewards/rewardrequest/builder/products/), so mutating the caller's list cannot change an already-built request.
# Builder
constructor()
# products
fun products(products: [List](https://kotlinlang.org/api/core/kotlin-stdlib/kotlin.collections/-list/index.html)<[ProductDetails](/developers/references/android/id-frak-sdk-core/productdetails/)>): [RewardRequest.Builder](/developers/references/android/id-frak-sdk-rewards/rewardrequest/builder/)
var products: [List](https://kotlinlang.org/api/core/kotlin-stdlib/kotlin.collections/-list/index.html)<[ProductDetails](/developers/references/android/id-frak-sdk-core/productdetails/)>
# targetInteraction
fun targetInteraction(targetInteraction: [String](https://kotlinlang.org/api/core/kotlin-stdlib/kotlin/-string/index.html)?): [RewardRequest.Builder](/developers/references/android/id-frak-sdk-rewards/rewardrequest/builder/)
var targetInteraction: [String](https://kotlinlang.org/api/core/kotlin-stdlib/kotlin/-string/index.html)?
# products
val products: [List](https://kotlinlang.org/api/core/kotlin-stdlib/kotlin.collections/-list/index.html)<[ProductDetails](/developers/references/android/id-frak-sdk-core/productdetails/)>
Products currently in view, when known. Advisory: a campaign scoped to none of them is ranked below one matching at least one.
# targetInteraction
val targetInteraction: [String](https://kotlinlang.org/api/core/kotlin-stdlib/kotlin/-string/index.html)?
Which interaction the reward is for, e.g. `purchase`. Free-form; a typo silently never matches.
# RewardTier
sealed class RewardTier
One band of a tiered reward. Null `maxValue` means no upper bound (not a sentinel).
#### Inheritors
| |
|---|
| [Amount](/developers/references/android/id-frak-sdk-rewards/rewardtier/amount/) |
| [Percentage](/developers/references/android/id-frak-sdk-rewards/rewardtier/percentage/) |
| [Unknown](/developers/references/android/id-frak-sdk-rewards/rewardtier/unknown/) |
## Types
| Name | Summary |
|---|---|
| [Amount](/developers/references/android/id-frak-sdk-rewards/rewardtier/amount/) | class [Amount](/developers/references/android/id-frak-sdk-rewards/rewardtier/amount/)(val minValue: [Double](https://kotlinlang.org/api/core/kotlin-stdlib/kotlin/-double/index.html), val maxValue: [Double](https://kotlinlang.org/api/core/kotlin-stdlib/kotlin/-double/index.html)?, val amount: [TokenAmount](/developers/references/android/id-frak-sdk-rewards/tokenamount/)) : RewardTier |
| [Percentage](/developers/references/android/id-frak-sdk-rewards/rewardtier/percentage/) | class [Percentage](/developers/references/android/id-frak-sdk-rewards/rewardtier/percentage/)(val minValue: [Double](https://kotlinlang.org/api/core/kotlin-stdlib/kotlin/-double/index.html), val maxValue: [Double](https://kotlinlang.org/api/core/kotlin-stdlib/kotlin/-double/index.html)?, val percent: [Double](https://kotlinlang.org/api/core/kotlin-stdlib/kotlin/-double/index.html)) : RewardTier |
| [Unknown](/developers/references/android/id-frak-sdk-rewards/rewardtier/unknown/) | class [Unknown](/developers/references/android/id-frak-sdk-rewards/rewardtier/unknown/)(val minValue: [Double](https://kotlinlang.org/api/core/kotlin-stdlib/kotlin/-double/index.html), val maxValue: [Double](https://kotlinlang.org/api/core/kotlin-stdlib/kotlin/-double/index.html)?) : RewardTier A tier shape this build does not know, kept so one unrecognised band cannot fail the whole reward. Mirrors [EstimatedReward.Unknown](/developers/references/android/id-frak-sdk-rewards/estimatedreward/unknown/); the bounds are the fields every tier carries. |
## Properties
| Name | Summary |
|---|---|
| [maxValue](/developers/references/android/id-frak-sdk-rewards/rewardtier/maxvalue/) | abstract val [maxValue](/developers/references/android/id-frak-sdk-rewards/rewardtier/maxvalue/): [Double](https://kotlinlang.org/api/core/kotlin-stdlib/kotlin/-double/index.html)? |
| [minValue](/developers/references/android/id-frak-sdk-rewards/rewardtier/minvalue/) | abstract val [minValue](/developers/references/android/id-frak-sdk-rewards/rewardtier/minvalue/): [Double](https://kotlinlang.org/api/core/kotlin-stdlib/kotlin/-double/index.html) |
# Amount
class Amount(val minValue: [Double](https://kotlinlang.org/api/core/kotlin-stdlib/kotlin/-double/index.html), val maxValue: [Double](https://kotlinlang.org/api/core/kotlin-stdlib/kotlin/-double/index.html)?, val amount: [TokenAmount](/developers/references/android/id-frak-sdk-rewards/tokenamount/)) : [RewardTier](/developers/references/android/id-frak-sdk-rewards/rewardtier/)
## Constructors
| | |
|---|---|
| [Amount](/developers/references/android/id-frak-sdk-rewards/rewardtier/amount/amount/) | constructor(minValue: [Double](https://kotlinlang.org/api/core/kotlin-stdlib/kotlin/-double/index.html), maxValue: [Double](https://kotlinlang.org/api/core/kotlin-stdlib/kotlin/-double/index.html)?, amount: [TokenAmount](/developers/references/android/id-frak-sdk-rewards/tokenamount/)) |
## Properties
| Name | Summary |
|---|---|
| [amount](/developers/references/android/id-frak-sdk-rewards/rewardtier/amount/amount-prop/) | val [amount](/developers/references/android/id-frak-sdk-rewards/rewardtier/amount/amount-prop/): [TokenAmount](/developers/references/android/id-frak-sdk-rewards/tokenamount/) |
| [maxValue](/developers/references/android/id-frak-sdk-rewards/rewardtier/amount/maxvalue/) | open override val [maxValue](/developers/references/android/id-frak-sdk-rewards/rewardtier/amount/maxvalue/): [Double](https://kotlinlang.org/api/core/kotlin-stdlib/kotlin/-double/index.html)? |
| [minValue](/developers/references/android/id-frak-sdk-rewards/rewardtier/amount/minvalue/) | open override val [minValue](/developers/references/android/id-frak-sdk-rewards/rewardtier/amount/minvalue/): [Double](https://kotlinlang.org/api/core/kotlin-stdlib/kotlin/-double/index.html) |
## Functions
| Name | Summary |
|---|---|
| equals | open operator override fun equals(other: [Any](https://kotlinlang.org/api/core/kotlin-stdlib/kotlin/-any/index.html)?): [Boolean](https://kotlinlang.org/api/core/kotlin-stdlib/kotlin/-boolean/index.html) |
| hashCode | open override fun hashCode(): [Int](https://kotlinlang.org/api/core/kotlin-stdlib/kotlin/-int/index.html) |
| toString | open override fun toString(): [String](https://kotlinlang.org/api/core/kotlin-stdlib/kotlin/-string/index.html) |
# Amount
constructor(minValue: [Double](https://kotlinlang.org/api/core/kotlin-stdlib/kotlin/-double/index.html), maxValue: [Double](https://kotlinlang.org/api/core/kotlin-stdlib/kotlin/-double/index.html)?, amount: [TokenAmount](/developers/references/android/id-frak-sdk-rewards/tokenamount/))
# amount
val amount: [TokenAmount](/developers/references/android/id-frak-sdk-rewards/tokenamount/)
# maxValue
open override val maxValue: [Double](https://kotlinlang.org/api/core/kotlin-stdlib/kotlin/-double/index.html)?
# minValue
open override val minValue: [Double](https://kotlinlang.org/api/core/kotlin-stdlib/kotlin/-double/index.html)
# maxValue
abstract val maxValue: [Double](https://kotlinlang.org/api/core/kotlin-stdlib/kotlin/-double/index.html)?
# minValue
abstract val minValue: [Double](https://kotlinlang.org/api/core/kotlin-stdlib/kotlin/-double/index.html)
# Percentage
class Percentage(val minValue: [Double](https://kotlinlang.org/api/core/kotlin-stdlib/kotlin/-double/index.html), val maxValue: [Double](https://kotlinlang.org/api/core/kotlin-stdlib/kotlin/-double/index.html)?, val percent: [Double](https://kotlinlang.org/api/core/kotlin-stdlib/kotlin/-double/index.html)) : [RewardTier](/developers/references/android/id-frak-sdk-rewards/rewardtier/)
## Constructors
| | |
|---|---|
| [Percentage](/developers/references/android/id-frak-sdk-rewards/rewardtier/percentage/percentage/) | constructor(minValue: [Double](https://kotlinlang.org/api/core/kotlin-stdlib/kotlin/-double/index.html), maxValue: [Double](https://kotlinlang.org/api/core/kotlin-stdlib/kotlin/-double/index.html)?, percent: [Double](https://kotlinlang.org/api/core/kotlin-stdlib/kotlin/-double/index.html)) |
## Properties
| Name | Summary |
|---|---|
| [maxValue](/developers/references/android/id-frak-sdk-rewards/rewardtier/percentage/maxvalue/) | open override val [maxValue](/developers/references/android/id-frak-sdk-rewards/rewardtier/percentage/maxvalue/): [Double](https://kotlinlang.org/api/core/kotlin-stdlib/kotlin/-double/index.html)? |
| [minValue](/developers/references/android/id-frak-sdk-rewards/rewardtier/percentage/minvalue/) | open override val [minValue](/developers/references/android/id-frak-sdk-rewards/rewardtier/percentage/minvalue/): [Double](https://kotlinlang.org/api/core/kotlin-stdlib/kotlin/-double/index.html) |
| [percent](/developers/references/android/id-frak-sdk-rewards/rewardtier/percentage/percent/) | val [percent](/developers/references/android/id-frak-sdk-rewards/rewardtier/percentage/percent/): [Double](https://kotlinlang.org/api/core/kotlin-stdlib/kotlin/-double/index.html) |
## Functions
| Name | Summary |
|---|---|
| equals | open operator override fun equals(other: [Any](https://kotlinlang.org/api/core/kotlin-stdlib/kotlin/-any/index.html)?): [Boolean](https://kotlinlang.org/api/core/kotlin-stdlib/kotlin/-boolean/index.html) |
| hashCode | open override fun hashCode(): [Int](https://kotlinlang.org/api/core/kotlin-stdlib/kotlin/-int/index.html) |
| toString | open override fun toString(): [String](https://kotlinlang.org/api/core/kotlin-stdlib/kotlin/-string/index.html) |
# maxValue
open override val maxValue: [Double](https://kotlinlang.org/api/core/kotlin-stdlib/kotlin/-double/index.html)?
# minValue
open override val minValue: [Double](https://kotlinlang.org/api/core/kotlin-stdlib/kotlin/-double/index.html)
# percent
val percent: [Double](https://kotlinlang.org/api/core/kotlin-stdlib/kotlin/-double/index.html)
# Percentage
constructor(minValue: [Double](https://kotlinlang.org/api/core/kotlin-stdlib/kotlin/-double/index.html), maxValue: [Double](https://kotlinlang.org/api/core/kotlin-stdlib/kotlin/-double/index.html)?, percent: [Double](https://kotlinlang.org/api/core/kotlin-stdlib/kotlin/-double/index.html))
# Unknown
class Unknown(val minValue: [Double](https://kotlinlang.org/api/core/kotlin-stdlib/kotlin/-double/index.html), val maxValue: [Double](https://kotlinlang.org/api/core/kotlin-stdlib/kotlin/-double/index.html)?) : [RewardTier](/developers/references/android/id-frak-sdk-rewards/rewardtier/)
A tier shape this build does not know, kept so one unrecognised band cannot fail the whole reward. Mirrors [EstimatedReward.Unknown](/developers/references/android/id-frak-sdk-rewards/estimatedreward/unknown/); the bounds are the fields every tier carries.
## Constructors
| | |
|---|---|
| [Unknown](/developers/references/android/id-frak-sdk-rewards/rewardtier/unknown/unknown/) | constructor(minValue: [Double](https://kotlinlang.org/api/core/kotlin-stdlib/kotlin/-double/index.html), maxValue: [Double](https://kotlinlang.org/api/core/kotlin-stdlib/kotlin/-double/index.html)?) |
## Properties
| Name | Summary |
|---|---|
| [maxValue](/developers/references/android/id-frak-sdk-rewards/rewardtier/unknown/maxvalue/) | open override val [maxValue](/developers/references/android/id-frak-sdk-rewards/rewardtier/unknown/maxvalue/): [Double](https://kotlinlang.org/api/core/kotlin-stdlib/kotlin/-double/index.html)? |
| [minValue](/developers/references/android/id-frak-sdk-rewards/rewardtier/unknown/minvalue/) | open override val [minValue](/developers/references/android/id-frak-sdk-rewards/rewardtier/unknown/minvalue/): [Double](https://kotlinlang.org/api/core/kotlin-stdlib/kotlin/-double/index.html) |
## Functions
| Name | Summary |
|---|---|
| equals | open operator override fun equals(other: [Any](https://kotlinlang.org/api/core/kotlin-stdlib/kotlin/-any/index.html)?): [Boolean](https://kotlinlang.org/api/core/kotlin-stdlib/kotlin/-boolean/index.html) |
| hashCode | open override fun hashCode(): [Int](https://kotlinlang.org/api/core/kotlin-stdlib/kotlin/-int/index.html) |
| toString | open override fun toString(): [String](https://kotlinlang.org/api/core/kotlin-stdlib/kotlin/-string/index.html) |
# maxValue
open override val maxValue: [Double](https://kotlinlang.org/api/core/kotlin-stdlib/kotlin/-double/index.html)?
# minValue
open override val minValue: [Double](https://kotlinlang.org/api/core/kotlin-stdlib/kotlin/-double/index.html)
# Unknown
constructor(minValue: [Double](https://kotlinlang.org/api/core/kotlin-stdlib/kotlin/-double/index.html), maxValue: [Double](https://kotlinlang.org/api/core/kotlin-stdlib/kotlin/-double/index.html)?)
# TokenAmount
class TokenAmount(val amount: [Double](https://kotlinlang.org/api/core/kotlin-stdlib/kotlin/-double/index.html), val eurAmount: [Double](https://kotlinlang.org/api/core/kotlin-stdlib/kotlin/-double/index.html), val usdAmount: [Double](https://kotlinlang.org/api/core/kotlin-stdlib/kotlin/-double/index.html), val gbpAmount: [Double](https://kotlinlang.org/api/core/kotlin-stdlib/kotlin/-double/index.html))
A reward amount in raw token units and each fiat currency the backend prices.
## Constructors
| | |
|---|---|
| [TokenAmount](/developers/references/android/id-frak-sdk-rewards/tokenamount/tokenamount/) | constructor(amount: [Double](https://kotlinlang.org/api/core/kotlin-stdlib/kotlin/-double/index.html), eurAmount: [Double](https://kotlinlang.org/api/core/kotlin-stdlib/kotlin/-double/index.html), usdAmount: [Double](https://kotlinlang.org/api/core/kotlin-stdlib/kotlin/-double/index.html), gbpAmount: [Double](https://kotlinlang.org/api/core/kotlin-stdlib/kotlin/-double/index.html)) |
## Properties
| Name | Summary |
|---|---|
| [amount](/developers/references/android/id-frak-sdk-rewards/tokenamount/amount/) | val [amount](/developers/references/android/id-frak-sdk-rewards/tokenamount/amount/): [Double](https://kotlinlang.org/api/core/kotlin-stdlib/kotlin/-double/index.html) Non-zero even when every fiat field is zero (fiat is `0` when unpriced, not worthless). |
| [eurAmount](/developers/references/android/id-frak-sdk-rewards/tokenamount/euramount/) | val [eurAmount](/developers/references/android/id-frak-sdk-rewards/tokenamount/euramount/): [Double](https://kotlinlang.org/api/core/kotlin-stdlib/kotlin/-double/index.html) |
| [gbpAmount](/developers/references/android/id-frak-sdk-rewards/tokenamount/gbpamount/) | val [gbpAmount](/developers/references/android/id-frak-sdk-rewards/tokenamount/gbpamount/): [Double](https://kotlinlang.org/api/core/kotlin-stdlib/kotlin/-double/index.html) |
| [usdAmount](/developers/references/android/id-frak-sdk-rewards/tokenamount/usdamount/) | val [usdAmount](/developers/references/android/id-frak-sdk-rewards/tokenamount/usdamount/): [Double](https://kotlinlang.org/api/core/kotlin-stdlib/kotlin/-double/index.html) |
## Functions
| Name | Summary |
|---|---|
| equals | open operator override fun equals(other: [Any](https://kotlinlang.org/api/core/kotlin-stdlib/kotlin/-any/index.html)?): [Boolean](https://kotlinlang.org/api/core/kotlin-stdlib/kotlin/-boolean/index.html) |
| hashCode | open override fun hashCode(): [Int](https://kotlinlang.org/api/core/kotlin-stdlib/kotlin/-int/index.html) |
| toString | open override fun toString(): [String](https://kotlinlang.org/api/core/kotlin-stdlib/kotlin/-string/index.html) |
# amount
val amount: [Double](https://kotlinlang.org/api/core/kotlin-stdlib/kotlin/-double/index.html)
Non-zero even when every fiat field is zero (fiat is `0` when unpriced, not worthless).
# eurAmount
val eurAmount: [Double](https://kotlinlang.org/api/core/kotlin-stdlib/kotlin/-double/index.html)
# gbpAmount
val gbpAmount: [Double](https://kotlinlang.org/api/core/kotlin-stdlib/kotlin/-double/index.html)
# TokenAmount
constructor(amount: [Double](https://kotlinlang.org/api/core/kotlin-stdlib/kotlin/-double/index.html), eurAmount: [Double](https://kotlinlang.org/api/core/kotlin-stdlib/kotlin/-double/index.html), usdAmount: [Double](https://kotlinlang.org/api/core/kotlin-stdlib/kotlin/-double/index.html), gbpAmount: [Double](https://kotlinlang.org/api/core/kotlin-stdlib/kotlin/-double/index.html))
# usdAmount
val usdAmount: [Double](https://kotlinlang.org/api/core/kotlin-stdlib/kotlin/-double/index.html)
# id.frak.sdk.sharing
## Types
| Name | Summary |
|---|---|
| [AttributionParams](/developers/references/android/id-frak-sdk-sharing/attributionparams/) | class [AttributionParams](/developers/references/android/id-frak-sdk-sharing/attributionparams/) Per-call attribution overrides for a share link's UTM parameters, merged over the merchant-level [AttributionDefaults](/developers/references/android/id-frak-sdk-config/attributiondefaults/) field by field. Build with [Builder](/developers/references/android/id-frak-sdk-sharing/attributionparams/builder/), or `AttributionParams { }` from Kotlin. |
| [FrakContext](/developers/references/android/id-frak-sdk-sharing/frakcontext/) | sealed interface [FrakContext](/developers/references/android/id-frak-sdk-sharing/frakcontext/) Referral context carried in a share link's `fCtx`: who shared, for which merchant, and when. Two layouts live on the wire with genuinely different information, hence sealed rather than nullable fields on one type. |
| [SharingProduct](/developers/references/android/id-frak-sdk-sharing/sharingproduct/) | class [SharingProduct](/developers/references/android/id-frak-sdk-sharing/sharingproduct/) One product to advertise on the sharing sheet. Build with [Builder](/developers/references/android/id-frak-sdk-sharing/sharingproduct/builder/), or `SharingProduct(title, link) { }` from Kotlin. |
| [SharingRequest](/developers/references/android/id-frak-sdk-sharing/sharingrequest/) | class [SharingRequest](/developers/references/android/id-frak-sdk-sharing/sharingrequest/) What to share; passed to `buildSharingLink` or to the sheet. Build with [Builder](/developers/references/android/id-frak-sdk-sharing/sharingrequest/builder/), or `SharingRequest { }` from Kotlin. |
## Functions
| Name | Summary |
|---|---|
| [AttributionParams](/developers/references/android/id-frak-sdk-sharing/attributionparams-fun/) | fun [AttributionParams](/developers/references/android/id-frak-sdk-sharing/attributionparams-fun/)(configure: [AttributionParams.Builder](/developers/references/android/id-frak-sdk-sharing/attributionparams/builder/).() -> [Unit](https://kotlinlang.org/api/core/kotlin-stdlib/kotlin/-unit/index.html)): [AttributionParams](/developers/references/android/id-frak-sdk-sharing/attributionparams/) Kotlin sugar over [AttributionParams.Builder](/developers/references/android/id-frak-sdk-sharing/attributionparams/builder/). |
| [SharingProduct](/developers/references/android/id-frak-sdk-sharing/sharingproduct-fun/) | fun [SharingProduct](/developers/references/android/id-frak-sdk-sharing/sharingproduct-fun/)(title: [String](https://kotlinlang.org/api/core/kotlin-stdlib/kotlin/-string/index.html), link: [String](https://kotlinlang.org/api/core/kotlin-stdlib/kotlin/-string/index.html)): [SharingProduct](/developers/references/android/id-frak-sdk-sharing/sharingproduct/) Title and link only. fun [SharingProduct](/developers/references/android/id-frak-sdk-sharing/sharingproduct-fun/)(title: [String](https://kotlinlang.org/api/core/kotlin-stdlib/kotlin/-string/index.html), link: [String](https://kotlinlang.org/api/core/kotlin-stdlib/kotlin/-string/index.html), configure: [SharingProduct.Builder](/developers/references/android/id-frak-sdk-sharing/sharingproduct/builder/).() -> [Unit](https://kotlinlang.org/api/core/kotlin-stdlib/kotlin/-unit/index.html)): [SharingProduct](/developers/references/android/id-frak-sdk-sharing/sharingproduct/) Kotlin sugar over [SharingProduct.Builder](/developers/references/android/id-frak-sdk-sharing/sharingproduct/builder/). |
| [SharingRequest](/developers/references/android/id-frak-sdk-sharing/sharingrequest-fun/) | fun [SharingRequest](/developers/references/android/id-frak-sdk-sharing/sharingrequest-fun/)(configure: [SharingRequest.Builder](/developers/references/android/id-frak-sdk-sharing/sharingrequest/builder/).() -> [Unit](https://kotlinlang.org/api/core/kotlin-stdlib/kotlin/-unit/index.html)): [SharingRequest](/developers/references/android/id-frak-sdk-sharing/sharingrequest/) Kotlin sugar over [SharingRequest.Builder](/developers/references/android/id-frak-sdk-sharing/sharingrequest/builder/). |
# AttributionParams
class AttributionParams
Per-call attribution overrides for a share link's UTM parameters, merged over the merchant-level [AttributionDefaults](/developers/references/android/id-frak-sdk-config/attributiondefaults/) field by field. Build with [Builder](/developers/references/android/id-frak-sdk-sharing/attributionparams/builder/), or `AttributionParams { }` from Kotlin.
## Types
| Name | Summary |
|---|---|
| [Builder](/developers/references/android/id-frak-sdk-sharing/attributionparams/builder/) | class [Builder](/developers/references/android/id-frak-sdk-sharing/attributionparams/builder/) |
## Properties
| Name | Summary |
|---|---|
| [ref](/developers/references/android/id-frak-sdk-sharing/attributionparams/ref/) | val [ref](/developers/references/android/id-frak-sdk-sharing/attributionparams/ref/): [String](https://kotlinlang.org/api/core/kotlin-stdlib/kotlin/-string/index.html)? |
| [utmCampaign](/developers/references/android/id-frak-sdk-sharing/attributionparams/utmcampaign/) | val [utmCampaign](/developers/references/android/id-frak-sdk-sharing/attributionparams/utmcampaign/): [String](https://kotlinlang.org/api/core/kotlin-stdlib/kotlin/-string/index.html)? |
| [utmContent](/developers/references/android/id-frak-sdk-sharing/attributionparams/utmcontent/) | val [utmContent](/developers/references/android/id-frak-sdk-sharing/attributionparams/utmcontent/): [String](https://kotlinlang.org/api/core/kotlin-stdlib/kotlin/-string/index.html)? |
| [utmMedium](/developers/references/android/id-frak-sdk-sharing/attributionparams/utmmedium/) | val [utmMedium](/developers/references/android/id-frak-sdk-sharing/attributionparams/utmmedium/): [String](https://kotlinlang.org/api/core/kotlin-stdlib/kotlin/-string/index.html)? |
| [utmSource](/developers/references/android/id-frak-sdk-sharing/attributionparams/utmsource/) | val [utmSource](/developers/references/android/id-frak-sdk-sharing/attributionparams/utmsource/): [String](https://kotlinlang.org/api/core/kotlin-stdlib/kotlin/-string/index.html)? |
| [utmTerm](/developers/references/android/id-frak-sdk-sharing/attributionparams/utmterm/) | val [utmTerm](/developers/references/android/id-frak-sdk-sharing/attributionparams/utmterm/): [String](https://kotlinlang.org/api/core/kotlin-stdlib/kotlin/-string/index.html)? |
| [via](/developers/references/android/id-frak-sdk-sharing/attributionparams/via/) | val [via](/developers/references/android/id-frak-sdk-sharing/attributionparams/via/): [String](https://kotlinlang.org/api/core/kotlin-stdlib/kotlin/-string/index.html)? |
## Functions
| Name | Summary |
|---|---|
| equals | open operator override fun equals(other: [Any](https://kotlinlang.org/api/core/kotlin-stdlib/kotlin/-any/index.html)?): [Boolean](https://kotlinlang.org/api/core/kotlin-stdlib/kotlin/-boolean/index.html) |
| hashCode | open override fun hashCode(): [Int](https://kotlinlang.org/api/core/kotlin-stdlib/kotlin/-int/index.html) |
| toString | open override fun toString(): [String](https://kotlinlang.org/api/core/kotlin-stdlib/kotlin/-string/index.html) |
# AttributionParams()
fun AttributionParams(configure: [AttributionParams.Builder](/developers/references/android/id-frak-sdk-sharing/attributionparams/builder/).() -> [Unit](https://kotlinlang.org/api/core/kotlin-stdlib/kotlin/-unit/index.html)): [AttributionParams](/developers/references/android/id-frak-sdk-sharing/attributionparams/)
Kotlin sugar over [AttributionParams.Builder](/developers/references/android/id-frak-sdk-sharing/attributionparams/builder/).
# Builder
class Builder
## Constructors
| | |
|---|---|
| [Builder](/developers/references/android/id-frak-sdk-sharing/attributionparams/builder/builder/) | constructor() |
## Properties
| Name | Summary |
|---|---|
| [ref](/developers/references/android/id-frak-sdk-sharing/attributionparams/builder/ref/) | var [ref](/developers/references/android/id-frak-sdk-sharing/attributionparams/builder/ref/): [String](https://kotlinlang.org/api/core/kotlin-stdlib/kotlin/-string/index.html)? |
| [utmCampaign](/developers/references/android/id-frak-sdk-sharing/attributionparams/builder/utmcampaign/) | var [utmCampaign](/developers/references/android/id-frak-sdk-sharing/attributionparams/builder/utmcampaign/): [String](https://kotlinlang.org/api/core/kotlin-stdlib/kotlin/-string/index.html)? |
| [utmContent](/developers/references/android/id-frak-sdk-sharing/attributionparams/builder/utmcontent/) | var [utmContent](/developers/references/android/id-frak-sdk-sharing/attributionparams/builder/utmcontent/): [String](https://kotlinlang.org/api/core/kotlin-stdlib/kotlin/-string/index.html)? |
| [utmMedium](/developers/references/android/id-frak-sdk-sharing/attributionparams/builder/utmmedium/) | var [utmMedium](/developers/references/android/id-frak-sdk-sharing/attributionparams/builder/utmmedium/): [String](https://kotlinlang.org/api/core/kotlin-stdlib/kotlin/-string/index.html)? |
| [utmSource](/developers/references/android/id-frak-sdk-sharing/attributionparams/builder/utmsource/) | var [utmSource](/developers/references/android/id-frak-sdk-sharing/attributionparams/builder/utmsource/): [String](https://kotlinlang.org/api/core/kotlin-stdlib/kotlin/-string/index.html)? |
| [utmTerm](/developers/references/android/id-frak-sdk-sharing/attributionparams/builder/utmterm/) | var [utmTerm](/developers/references/android/id-frak-sdk-sharing/attributionparams/builder/utmterm/): [String](https://kotlinlang.org/api/core/kotlin-stdlib/kotlin/-string/index.html)? |
| [via](/developers/references/android/id-frak-sdk-sharing/attributionparams/builder/via/) | var [via](/developers/references/android/id-frak-sdk-sharing/attributionparams/builder/via/): [String](https://kotlinlang.org/api/core/kotlin-stdlib/kotlin/-string/index.html)? |
## Functions
| Name | Summary |
|---|---|
| [build](/developers/references/android/id-frak-sdk-sharing/attributionparams/builder/build/) | fun [build](/developers/references/android/id-frak-sdk-sharing/attributionparams/builder/build/)(): [AttributionParams](/developers/references/android/id-frak-sdk-sharing/attributionparams/) |
| [ref](/developers/references/android/id-frak-sdk-sharing/attributionparams/builder/ref/) | fun [ref](/developers/references/android/id-frak-sdk-sharing/attributionparams/builder/ref/)(ref: [String](https://kotlinlang.org/api/core/kotlin-stdlib/kotlin/-string/index.html)?): AttributionParams.Builder |
| [utmCampaign](/developers/references/android/id-frak-sdk-sharing/attributionparams/builder/utmcampaign/) | fun [utmCampaign](/developers/references/android/id-frak-sdk-sharing/attributionparams/builder/utmcampaign/)(utmCampaign: [String](https://kotlinlang.org/api/core/kotlin-stdlib/kotlin/-string/index.html)?): AttributionParams.Builder |
| [utmContent](/developers/references/android/id-frak-sdk-sharing/attributionparams/builder/utmcontent/) | fun [utmContent](/developers/references/android/id-frak-sdk-sharing/attributionparams/builder/utmcontent/)(utmContent: [String](https://kotlinlang.org/api/core/kotlin-stdlib/kotlin/-string/index.html)?): AttributionParams.Builder |
| [utmMedium](/developers/references/android/id-frak-sdk-sharing/attributionparams/builder/utmmedium/) | fun [utmMedium](/developers/references/android/id-frak-sdk-sharing/attributionparams/builder/utmmedium/)(utmMedium: [String](https://kotlinlang.org/api/core/kotlin-stdlib/kotlin/-string/index.html)?): AttributionParams.Builder |
| [utmSource](/developers/references/android/id-frak-sdk-sharing/attributionparams/builder/utmsource/) | fun [utmSource](/developers/references/android/id-frak-sdk-sharing/attributionparams/builder/utmsource/)(utmSource: [String](https://kotlinlang.org/api/core/kotlin-stdlib/kotlin/-string/index.html)?): AttributionParams.Builder |
| [utmTerm](/developers/references/android/id-frak-sdk-sharing/attributionparams/builder/utmterm/) | fun [utmTerm](/developers/references/android/id-frak-sdk-sharing/attributionparams/builder/utmterm/)(utmTerm: [String](https://kotlinlang.org/api/core/kotlin-stdlib/kotlin/-string/index.html)?): AttributionParams.Builder |
| [via](/developers/references/android/id-frak-sdk-sharing/attributionparams/builder/via/) | fun [via](/developers/references/android/id-frak-sdk-sharing/attributionparams/builder/via/)(via: [String](https://kotlinlang.org/api/core/kotlin-stdlib/kotlin/-string/index.html)?): AttributionParams.Builder |
# build
fun build(): [AttributionParams](/developers/references/android/id-frak-sdk-sharing/attributionparams/)
# Builder
constructor()
# ref
fun ref(ref: [String](https://kotlinlang.org/api/core/kotlin-stdlib/kotlin/-string/index.html)?): [AttributionParams.Builder](/developers/references/android/id-frak-sdk-sharing/attributionparams/builder/)
var ref: [String](https://kotlinlang.org/api/core/kotlin-stdlib/kotlin/-string/index.html)?
# utmCampaign
fun utmCampaign(utmCampaign: [String](https://kotlinlang.org/api/core/kotlin-stdlib/kotlin/-string/index.html)?): [AttributionParams.Builder](/developers/references/android/id-frak-sdk-sharing/attributionparams/builder/)
var utmCampaign: [String](https://kotlinlang.org/api/core/kotlin-stdlib/kotlin/-string/index.html)?
# utmContent
fun utmContent(utmContent: [String](https://kotlinlang.org/api/core/kotlin-stdlib/kotlin/-string/index.html)?): [AttributionParams.Builder](/developers/references/android/id-frak-sdk-sharing/attributionparams/builder/)
var utmContent: [String](https://kotlinlang.org/api/core/kotlin-stdlib/kotlin/-string/index.html)?
# utmMedium
fun utmMedium(utmMedium: [String](https://kotlinlang.org/api/core/kotlin-stdlib/kotlin/-string/index.html)?): [AttributionParams.Builder](/developers/references/android/id-frak-sdk-sharing/attributionparams/builder/)
var utmMedium: [String](https://kotlinlang.org/api/core/kotlin-stdlib/kotlin/-string/index.html)?
# utmSource
fun utmSource(utmSource: [String](https://kotlinlang.org/api/core/kotlin-stdlib/kotlin/-string/index.html)?): [AttributionParams.Builder](/developers/references/android/id-frak-sdk-sharing/attributionparams/builder/)
var utmSource: [String](https://kotlinlang.org/api/core/kotlin-stdlib/kotlin/-string/index.html)?
# utmTerm
fun utmTerm(utmTerm: [String](https://kotlinlang.org/api/core/kotlin-stdlib/kotlin/-string/index.html)?): [AttributionParams.Builder](/developers/references/android/id-frak-sdk-sharing/attributionparams/builder/)
var utmTerm: [String](https://kotlinlang.org/api/core/kotlin-stdlib/kotlin/-string/index.html)?
# via
fun via(via: [String](https://kotlinlang.org/api/core/kotlin-stdlib/kotlin/-string/index.html)?): [AttributionParams.Builder](/developers/references/android/id-frak-sdk-sharing/attributionparams/builder/)
var via: [String](https://kotlinlang.org/api/core/kotlin-stdlib/kotlin/-string/index.html)?
# ref
val ref: [String](https://kotlinlang.org/api/core/kotlin-stdlib/kotlin/-string/index.html)?
# utmCampaign
val utmCampaign: [String](https://kotlinlang.org/api/core/kotlin-stdlib/kotlin/-string/index.html)?
# utmContent
val utmContent: [String](https://kotlinlang.org/api/core/kotlin-stdlib/kotlin/-string/index.html)?
# utmMedium
val utmMedium: [String](https://kotlinlang.org/api/core/kotlin-stdlib/kotlin/-string/index.html)?
# utmSource
val utmSource: [String](https://kotlinlang.org/api/core/kotlin-stdlib/kotlin/-string/index.html)?
# utmTerm
val utmTerm: [String](https://kotlinlang.org/api/core/kotlin-stdlib/kotlin/-string/index.html)?
# via
val via: [String](https://kotlinlang.org/api/core/kotlin-stdlib/kotlin/-string/index.html)?
# FrakContext
sealed interface FrakContext
Referral context carried in a share link's `fCtx`: who shared, for which merchant, and when. Two layouts live on the wire with genuinely different information, hence sealed rather than nullable fields on one type.
#### Inheritors
| |
|---|
| [V1](/developers/references/android/id-frak-sdk-sharing/frakcontext/v1/) |
| [V2](/developers/references/android/id-frak-sdk-sharing/frakcontext/v2/) |
## Types
| Name | Summary |
|---|---|
| [V1](/developers/references/android/id-frak-sdk-sharing/frakcontext/v1/) | class [V1](/developers/references/android/id-frak-sdk-sharing/frakcontext/v1/) : FrakContext Legacy layout: bare wallet address from pre-anonymous-id web builds. Decoded, never minted. |
| [V2](/developers/references/android/id-frak-sdk-sharing/frakcontext/v2/) | class [V2](/developers/references/android/id-frak-sdk-sharing/frakcontext/v2/) : FrakContext Current layout. Carries the merchant, a share timestamp, and at least one of clientId / wallet. |
# V1
class V1 : [FrakContext](/developers/references/android/id-frak-sdk-sharing/frakcontext/)
Legacy layout: bare wallet address from pre-anonymous-id web builds. Decoded, never minted.
## Properties
| Name | Summary |
|---|---|
| [wallet](/developers/references/android/id-frak-sdk-sharing/frakcontext/v1/wallet/) | val [wallet](/developers/references/android/id-frak-sdk-sharing/frakcontext/v1/wallet/): [String](https://kotlinlang.org/api/core/kotlin-stdlib/kotlin/-string/index.html) |
## Functions
| Name | Summary |
|---|---|
| equals | open operator override fun equals(other: [Any](https://kotlinlang.org/api/core/kotlin-stdlib/kotlin/-any/index.html)?): [Boolean](https://kotlinlang.org/api/core/kotlin-stdlib/kotlin/-boolean/index.html) |
| hashCode | open override fun hashCode(): [Int](https://kotlinlang.org/api/core/kotlin-stdlib/kotlin/-int/index.html) |
| toString | open override fun toString(): [String](https://kotlinlang.org/api/core/kotlin-stdlib/kotlin/-string/index.html) |
# wallet
val wallet: [String](https://kotlinlang.org/api/core/kotlin-stdlib/kotlin/-string/index.html)
# V2
class V2 : [FrakContext](/developers/references/android/id-frak-sdk-sharing/frakcontext/)
Current layout. Carries the merchant, a share timestamp, and at least one of clientId / wallet.
## Properties
| Name | Summary |
|---|---|
| [clientId](/developers/references/android/id-frak-sdk-sharing/frakcontext/v2/clientid/) | val [clientId](/developers/references/android/id-frak-sdk-sharing/frakcontext/v2/clientid/): [String](https://kotlinlang.org/api/core/kotlin-stdlib/kotlin/-string/index.html)? |
| [merchantId](/developers/references/android/id-frak-sdk-sharing/frakcontext/v2/merchantid/) | val [merchantId](/developers/references/android/id-frak-sdk-sharing/frakcontext/v2/merchantid/): [String](https://kotlinlang.org/api/core/kotlin-stdlib/kotlin/-string/index.html) |
| [timestamp](/developers/references/android/id-frak-sdk-sharing/frakcontext/v2/timestamp/) | val [timestamp](/developers/references/android/id-frak-sdk-sharing/frakcontext/v2/timestamp/): [Long](https://kotlinlang.org/api/core/kotlin-stdlib/kotlin/-long/index.html) |
| [wallet](/developers/references/android/id-frak-sdk-sharing/frakcontext/v2/wallet/) | val [wallet](/developers/references/android/id-frak-sdk-sharing/frakcontext/v2/wallet/): [String](https://kotlinlang.org/api/core/kotlin-stdlib/kotlin/-string/index.html)? |
## Functions
| Name | Summary |
|---|---|
| equals | open operator override fun equals(other: [Any](https://kotlinlang.org/api/core/kotlin-stdlib/kotlin/-any/index.html)?): [Boolean](https://kotlinlang.org/api/core/kotlin-stdlib/kotlin/-boolean/index.html) |
| hashCode | open override fun hashCode(): [Int](https://kotlinlang.org/api/core/kotlin-stdlib/kotlin/-int/index.html) |
| toString | open override fun toString(): [String](https://kotlinlang.org/api/core/kotlin-stdlib/kotlin/-string/index.html) |
# clientId
val clientId: [String](https://kotlinlang.org/api/core/kotlin-stdlib/kotlin/-string/index.html)?
# merchantId
val merchantId: [String](https://kotlinlang.org/api/core/kotlin-stdlib/kotlin/-string/index.html)
# timestamp
val timestamp: [Long](https://kotlinlang.org/api/core/kotlin-stdlib/kotlin/-long/index.html)
# wallet
val wallet: [String](https://kotlinlang.org/api/core/kotlin-stdlib/kotlin/-string/index.html)?
# SharingProduct
class SharingProduct
One product to advertise on the sharing sheet. Build with [Builder](/developers/references/android/id-frak-sdk-sharing/sharingproduct/builder/), or `SharingProduct(title, link) { }` from Kotlin.
## Types
| Name | Summary |
|---|---|
| [Builder](/developers/references/android/id-frak-sdk-sharing/sharingproduct/builder/) | class [Builder](/developers/references/android/id-frak-sdk-sharing/sharingproduct/builder/)(title: [String](https://kotlinlang.org/api/core/kotlin-stdlib/kotlin/-string/index.html), link: [String](https://kotlinlang.org/api/core/kotlin-stdlib/kotlin/-string/index.html)) |
## Properties
| Name | Summary |
|---|---|
| [details](/developers/references/android/id-frak-sdk-sharing/sharingproduct/details/) | val [details](/developers/references/android/id-frak-sdk-sharing/sharingproduct/details/): [ProductDetails](/developers/references/android/id-frak-sdk-core/productdetails/)? Scope fields for reward selection; [ProductDetails](/developers/references/android/id-frak-sdk-core/productdetails/) is what a `productScope` matches on. |
| [imageUrl](/developers/references/android/id-frak-sdk-sharing/sharingproduct/imageurl/) | val [imageUrl](/developers/references/android/id-frak-sdk-sharing/sharingproduct/imageurl/): [String](https://kotlinlang.org/api/core/kotlin-stdlib/kotlin/-string/index.html)? |
| [link](/developers/references/android/id-frak-sdk-sharing/sharingproduct/link/) | val [link](/developers/references/android/id-frak-sdk-sharing/sharingproduct/link/): [String](https://kotlinlang.org/api/core/kotlin-stdlib/kotlin/-string/index.html) |
| [title](/developers/references/android/id-frak-sdk-sharing/sharingproduct/title/) | val [title](/developers/references/android/id-frak-sdk-sharing/sharingproduct/title/): [String](https://kotlinlang.org/api/core/kotlin-stdlib/kotlin/-string/index.html) |
| [utmContent](/developers/references/android/id-frak-sdk-sharing/sharingproduct/utmcontent/) | val [utmContent](/developers/references/android/id-frak-sdk-sharing/sharingproduct/utmcontent/): [String](https://kotlinlang.org/api/core/kotlin-stdlib/kotlin/-string/index.html)? `utm_content` for a link built from this product; highest-priority source for that field. |
# SharingProduct()
fun SharingProduct(title: [String](https://kotlinlang.org/api/core/kotlin-stdlib/kotlin/-string/index.html), link: [String](https://kotlinlang.org/api/core/kotlin-stdlib/kotlin/-string/index.html), configure: [SharingProduct.Builder](/developers/references/android/id-frak-sdk-sharing/sharingproduct/builder/).() -> [Unit](https://kotlinlang.org/api/core/kotlin-stdlib/kotlin/-unit/index.html)): [SharingProduct](/developers/references/android/id-frak-sdk-sharing/sharingproduct/)
Kotlin sugar over [SharingProduct.Builder](/developers/references/android/id-frak-sdk-sharing/sharingproduct/builder/).
fun SharingProduct(title: [String](https://kotlinlang.org/api/core/kotlin-stdlib/kotlin/-string/index.html), link: [String](https://kotlinlang.org/api/core/kotlin-stdlib/kotlin/-string/index.html)): [SharingProduct](/developers/references/android/id-frak-sdk-sharing/sharingproduct/)
Title and link only.
# Builder
class Builder(title: [String](https://kotlinlang.org/api/core/kotlin-stdlib/kotlin/-string/index.html), link: [String](https://kotlinlang.org/api/core/kotlin-stdlib/kotlin/-string/index.html))
## Constructors
| | |
|---|---|
| [Builder](/developers/references/android/id-frak-sdk-sharing/sharingproduct/builder/builder/) | constructor(title: [String](https://kotlinlang.org/api/core/kotlin-stdlib/kotlin/-string/index.html), link: [String](https://kotlinlang.org/api/core/kotlin-stdlib/kotlin/-string/index.html)) |
## Properties
| Name | Summary |
|---|---|
| [details](/developers/references/android/id-frak-sdk-sharing/sharingproduct/builder/details/) | var [details](/developers/references/android/id-frak-sdk-sharing/sharingproduct/builder/details/): [ProductDetails](/developers/references/android/id-frak-sdk-core/productdetails/)? |
| [imageUrl](/developers/references/android/id-frak-sdk-sharing/sharingproduct/builder/imageurl/) | var [imageUrl](/developers/references/android/id-frak-sdk-sharing/sharingproduct/builder/imageurl/): [String](https://kotlinlang.org/api/core/kotlin-stdlib/kotlin/-string/index.html)? |
| [utmContent](/developers/references/android/id-frak-sdk-sharing/sharingproduct/builder/utmcontent/) | var [utmContent](/developers/references/android/id-frak-sdk-sharing/sharingproduct/builder/utmcontent/): [String](https://kotlinlang.org/api/core/kotlin-stdlib/kotlin/-string/index.html)? |
## Functions
| Name | Summary |
|---|---|
| [build](/developers/references/android/id-frak-sdk-sharing/sharingproduct/builder/build/) | fun [build](/developers/references/android/id-frak-sdk-sharing/sharingproduct/builder/build/)(): [SharingProduct](/developers/references/android/id-frak-sdk-sharing/sharingproduct/) |
| [details](/developers/references/android/id-frak-sdk-sharing/sharingproduct/builder/details/) | fun [details](/developers/references/android/id-frak-sdk-sharing/sharingproduct/builder/details/)(details: [ProductDetails](/developers/references/android/id-frak-sdk-core/productdetails/)?): SharingProduct.Builder |
| [imageUrl](/developers/references/android/id-frak-sdk-sharing/sharingproduct/builder/imageurl/) | fun [imageUrl](/developers/references/android/id-frak-sdk-sharing/sharingproduct/builder/imageurl/)(imageUrl: [String](https://kotlinlang.org/api/core/kotlin-stdlib/kotlin/-string/index.html)?): SharingProduct.Builder |
| [utmContent](/developers/references/android/id-frak-sdk-sharing/sharingproduct/builder/utmcontent/) | fun [utmContent](/developers/references/android/id-frak-sdk-sharing/sharingproduct/builder/utmcontent/)(utmContent: [String](https://kotlinlang.org/api/core/kotlin-stdlib/kotlin/-string/index.html)?): SharingProduct.Builder |
# build
fun build(): [SharingProduct](/developers/references/android/id-frak-sdk-sharing/sharingproduct/)
# Builder
constructor(title: [String](https://kotlinlang.org/api/core/kotlin-stdlib/kotlin/-string/index.html), link: [String](https://kotlinlang.org/api/core/kotlin-stdlib/kotlin/-string/index.html))
# details
fun details(details: [ProductDetails](/developers/references/android/id-frak-sdk-core/productdetails/)?): [SharingProduct.Builder](/developers/references/android/id-frak-sdk-sharing/sharingproduct/builder/)
var details: [ProductDetails](/developers/references/android/id-frak-sdk-core/productdetails/)?
# imageUrl
fun imageUrl(imageUrl: [String](https://kotlinlang.org/api/core/kotlin-stdlib/kotlin/-string/index.html)?): [SharingProduct.Builder](/developers/references/android/id-frak-sdk-sharing/sharingproduct/builder/)
var imageUrl: [String](https://kotlinlang.org/api/core/kotlin-stdlib/kotlin/-string/index.html)?
# utmContent
fun utmContent(utmContent: [String](https://kotlinlang.org/api/core/kotlin-stdlib/kotlin/-string/index.html)?): [SharingProduct.Builder](/developers/references/android/id-frak-sdk-sharing/sharingproduct/builder/)
var utmContent: [String](https://kotlinlang.org/api/core/kotlin-stdlib/kotlin/-string/index.html)?
# details
val details: [ProductDetails](/developers/references/android/id-frak-sdk-core/productdetails/)?
Scope fields for reward selection; [ProductDetails](/developers/references/android/id-frak-sdk-core/productdetails/) is what a `productScope` matches on.
# imageUrl
val imageUrl: [String](https://kotlinlang.org/api/core/kotlin-stdlib/kotlin/-string/index.html)?
# link
val link: [String](https://kotlinlang.org/api/core/kotlin-stdlib/kotlin/-string/index.html)
# title
val title: [String](https://kotlinlang.org/api/core/kotlin-stdlib/kotlin/-string/index.html)
# utmContent
val utmContent: [String](https://kotlinlang.org/api/core/kotlin-stdlib/kotlin/-string/index.html)?
`utm_content` for a link built from this product; highest-priority source for that field.
# SharingRequest
class SharingRequest
What to share; passed to `buildSharingLink` or to the sheet. Build with [Builder](/developers/references/android/id-frak-sdk-sharing/sharingrequest/builder/), or `SharingRequest { }` from Kotlin.
## Types
| Name | Summary |
|---|---|
| [Builder](/developers/references/android/id-frak-sdk-sharing/sharingrequest/builder/) | class [Builder](/developers/references/android/id-frak-sdk-sharing/sharingrequest/builder/) |
## Properties
| Name | Summary |
|---|---|
| [attribution](/developers/references/android/id-frak-sdk-sharing/sharingrequest/attribution/) | val [attribution](/developers/references/android/id-frak-sdk-sharing/sharingrequest/attribution/): [AttributionParams](/developers/references/android/id-frak-sdk-sharing/attributionparams/)? |
| [link](/developers/references/android/id-frak-sdk-sharing/sharingrequest/link/) | val [link](/developers/references/android/id-frak-sdk-sharing/sharingrequest/link/): [String](https://kotlinlang.org/api/core/kotlin-stdlib/kotlin/-string/index.html)? Falls back to the merchant's `homepageLink`, then [id.frak.sdk.core.FrakMetadata.homepageLink](/developers/references/android/id-frak-sdk-core/frakmetadata/homepagelink/). |
| [logoUrl](/developers/references/android/id-frak-sdk-sharing/sharingrequest/logourl/) | val [logoUrl](/developers/references/android/id-frak-sdk-sharing/sharingrequest/logourl/): [String](https://kotlinlang.org/api/core/kotlin-stdlib/kotlin/-string/index.html)? |
| [placement](/developers/references/android/id-frak-sdk-sharing/sharingrequest/placement/) | val [placement](/developers/references/android/id-frak-sdk-sharing/sharingrequest/placement/): [String](https://kotlinlang.org/api/core/kotlin-stdlib/kotlin/-string/index.html)? Which configured placement's copy to render, e.g. `product-page`. Accepted but not yet acted on. |
| [products](/developers/references/android/id-frak-sdk-sharing/sharingrequest/products/) | val [products](/developers/references/android/id-frak-sdk-sharing/sharingrequest/products/): [List](https://kotlinlang.org/api/core/kotlin-stdlib/kotlin.collections/-list/index.html)<[SharingProduct](/developers/references/android/id-frak-sdk-sharing/sharingproduct/)> |
| [shareImageUrl](/developers/references/android/id-frak-sdk-sharing/sharingrequest/shareimageurl/) | val [shareImageUrl](/developers/references/android/id-frak-sdk-sharing/sharingrequest/shareimageurl/): [String](https://kotlinlang.org/api/core/kotlin-stdlib/kotlin/-string/index.html)? Highest-precedence override for the OS share sheet's preview image. iOS only; Android ships no preview. |
| [shareText](/developers/references/android/id-frak-sdk-sharing/sharingrequest/sharetext/) | val [shareText](/developers/references/android/id-frak-sdk-sharing/sharingrequest/sharetext/): [String](https://kotlinlang.org/api/core/kotlin-stdlib/kotlin/-string/index.html)? Highest-precedence override for the OS share sheet's body text. |
| [shareTitle](/developers/references/android/id-frak-sdk-sharing/sharingrequest/sharetitle/) | val [shareTitle](/developers/references/android/id-frak-sdk-sharing/sharingrequest/sharetitle/): [String](https://kotlinlang.org/api/core/kotlin-stdlib/kotlin/-string/index.html)? Highest-precedence override for the OS share sheet's title. |
| [targetInteraction](/developers/references/android/id-frak-sdk-sharing/sharingrequest/targetinteraction/) | val [targetInteraction](/developers/references/android/id-frak-sdk-sharing/sharingrequest/targetinteraction/): [String](https://kotlinlang.org/api/core/kotlin-stdlib/kotlin/-string/index.html)? |
# SharingRequest()
fun SharingRequest(configure: [SharingRequest.Builder](/developers/references/android/id-frak-sdk-sharing/sharingrequest/builder/).() -> [Unit](https://kotlinlang.org/api/core/kotlin-stdlib/kotlin/-unit/index.html)): [SharingRequest](/developers/references/android/id-frak-sdk-sharing/sharingrequest/)
Kotlin sugar over [SharingRequest.Builder](/developers/references/android/id-frak-sdk-sharing/sharingrequest/builder/).
# attribution
val attribution: [AttributionParams](/developers/references/android/id-frak-sdk-sharing/attributionparams/)?
# Builder
class Builder
## Constructors
| | |
|---|---|
| [Builder](/developers/references/android/id-frak-sdk-sharing/sharingrequest/builder/builder/) | constructor() |
## Properties
| Name | Summary |
|---|---|
| [attribution](/developers/references/android/id-frak-sdk-sharing/sharingrequest/builder/attribution/) | var [attribution](/developers/references/android/id-frak-sdk-sharing/sharingrequest/builder/attribution/): [AttributionParams](/developers/references/android/id-frak-sdk-sharing/attributionparams/)? |
| [link](/developers/references/android/id-frak-sdk-sharing/sharingrequest/builder/link/) | var [link](/developers/references/android/id-frak-sdk-sharing/sharingrequest/builder/link/): [String](https://kotlinlang.org/api/core/kotlin-stdlib/kotlin/-string/index.html)? |
| [logoUrl](/developers/references/android/id-frak-sdk-sharing/sharingrequest/builder/logourl/) | var [logoUrl](/developers/references/android/id-frak-sdk-sharing/sharingrequest/builder/logourl/): [String](https://kotlinlang.org/api/core/kotlin-stdlib/kotlin/-string/index.html)? |
| [placement](/developers/references/android/id-frak-sdk-sharing/sharingrequest/builder/placement/) | var [placement](/developers/references/android/id-frak-sdk-sharing/sharingrequest/builder/placement/): [String](https://kotlinlang.org/api/core/kotlin-stdlib/kotlin/-string/index.html)? |
| [products](/developers/references/android/id-frak-sdk-sharing/sharingrequest/builder/products/) | var [products](/developers/references/android/id-frak-sdk-sharing/sharingrequest/builder/products/): [List](https://kotlinlang.org/api/core/kotlin-stdlib/kotlin.collections/-list/index.html)<[SharingProduct](/developers/references/android/id-frak-sdk-sharing/sharingproduct/)> |
| [shareImageUrl](/developers/references/android/id-frak-sdk-sharing/sharingrequest/builder/shareimageurl/) | var [shareImageUrl](/developers/references/android/id-frak-sdk-sharing/sharingrequest/builder/shareimageurl/): [String](https://kotlinlang.org/api/core/kotlin-stdlib/kotlin/-string/index.html)? |
| [shareText](/developers/references/android/id-frak-sdk-sharing/sharingrequest/builder/sharetext/) | var [shareText](/developers/references/android/id-frak-sdk-sharing/sharingrequest/builder/sharetext/): [String](https://kotlinlang.org/api/core/kotlin-stdlib/kotlin/-string/index.html)? |
| [shareTitle](/developers/references/android/id-frak-sdk-sharing/sharingrequest/builder/sharetitle/) | var [shareTitle](/developers/references/android/id-frak-sdk-sharing/sharingrequest/builder/sharetitle/): [String](https://kotlinlang.org/api/core/kotlin-stdlib/kotlin/-string/index.html)? |
| [targetInteraction](/developers/references/android/id-frak-sdk-sharing/sharingrequest/builder/targetinteraction/) | var [targetInteraction](/developers/references/android/id-frak-sdk-sharing/sharingrequest/builder/targetinteraction/): [String](https://kotlinlang.org/api/core/kotlin-stdlib/kotlin/-string/index.html)? |
## Functions
| Name | Summary |
|---|---|
| [addProduct](/developers/references/android/id-frak-sdk-sharing/sharingrequest/builder/addproduct/) | fun [addProduct](/developers/references/android/id-frak-sdk-sharing/sharingrequest/builder/addproduct/)(product: [SharingProduct](/developers/references/android/id-frak-sdk-sharing/sharingproduct/)): SharingRequest.Builder |
| [attribution](/developers/references/android/id-frak-sdk-sharing/sharingrequest/builder/attribution/) | fun [attribution](/developers/references/android/id-frak-sdk-sharing/sharingrequest/builder/attribution/)(attribution: [AttributionParams](/developers/references/android/id-frak-sdk-sharing/attributionparams/)?): SharingRequest.Builder |
| [build](/developers/references/android/id-frak-sdk-sharing/sharingrequest/builder/build/) | fun [build](/developers/references/android/id-frak-sdk-sharing/sharingrequest/builder/build/)(): [SharingRequest](/developers/references/android/id-frak-sdk-sharing/sharingrequest/) Copies [products](/developers/references/android/id-frak-sdk-sharing/sharingrequest/builder/products/), so mutating the caller's list cannot change an already-built request. |
| [link](/developers/references/android/id-frak-sdk-sharing/sharingrequest/builder/link/) | fun [link](/developers/references/android/id-frak-sdk-sharing/sharingrequest/builder/link/)(link: [String](https://kotlinlang.org/api/core/kotlin-stdlib/kotlin/-string/index.html)?): SharingRequest.Builder |
| [logoUrl](/developers/references/android/id-frak-sdk-sharing/sharingrequest/builder/logourl/) | fun [logoUrl](/developers/references/android/id-frak-sdk-sharing/sharingrequest/builder/logourl/)(logoUrl: [String](https://kotlinlang.org/api/core/kotlin-stdlib/kotlin/-string/index.html)?): SharingRequest.Builder |
| [placement](/developers/references/android/id-frak-sdk-sharing/sharingrequest/builder/placement/) | fun [placement](/developers/references/android/id-frak-sdk-sharing/sharingrequest/builder/placement/)(placement: [String](https://kotlinlang.org/api/core/kotlin-stdlib/kotlin/-string/index.html)?): SharingRequest.Builder |
| [products](/developers/references/android/id-frak-sdk-sharing/sharingrequest/builder/products/) | fun [products](/developers/references/android/id-frak-sdk-sharing/sharingrequest/builder/products/)(products: [List](https://kotlinlang.org/api/core/kotlin-stdlib/kotlin.collections/-list/index.html)<[SharingProduct](/developers/references/android/id-frak-sdk-sharing/sharingproduct/)>): SharingRequest.Builder |
| [shareImageUrl](/developers/references/android/id-frak-sdk-sharing/sharingrequest/builder/shareimageurl/) | fun [shareImageUrl](/developers/references/android/id-frak-sdk-sharing/sharingrequest/builder/shareimageurl/)(shareImageUrl: [String](https://kotlinlang.org/api/core/kotlin-stdlib/kotlin/-string/index.html)?): SharingRequest.Builder |
| [shareText](/developers/references/android/id-frak-sdk-sharing/sharingrequest/builder/sharetext/) | fun [shareText](/developers/references/android/id-frak-sdk-sharing/sharingrequest/builder/sharetext/)(shareText: [String](https://kotlinlang.org/api/core/kotlin-stdlib/kotlin/-string/index.html)?): SharingRequest.Builder |
| [shareTitle](/developers/references/android/id-frak-sdk-sharing/sharingrequest/builder/sharetitle/) | fun [shareTitle](/developers/references/android/id-frak-sdk-sharing/sharingrequest/builder/sharetitle/)(shareTitle: [String](https://kotlinlang.org/api/core/kotlin-stdlib/kotlin/-string/index.html)?): SharingRequest.Builder |
| [targetInteraction](/developers/references/android/id-frak-sdk-sharing/sharingrequest/builder/targetinteraction/) | fun [targetInteraction](/developers/references/android/id-frak-sdk-sharing/sharingrequest/builder/targetinteraction/)(targetInteraction: [String](https://kotlinlang.org/api/core/kotlin-stdlib/kotlin/-string/index.html)?): SharingRequest.Builder |
# addProduct
fun addProduct(product: [SharingProduct](/developers/references/android/id-frak-sdk-sharing/sharingproduct/)): [SharingRequest.Builder](/developers/references/android/id-frak-sdk-sharing/sharingrequest/builder/)
# attribution
fun attribution(attribution: [AttributionParams](/developers/references/android/id-frak-sdk-sharing/attributionparams/)?): [SharingRequest.Builder](/developers/references/android/id-frak-sdk-sharing/sharingrequest/builder/)
var attribution: [AttributionParams](/developers/references/android/id-frak-sdk-sharing/attributionparams/)?
# build
fun build(): [SharingRequest](/developers/references/android/id-frak-sdk-sharing/sharingrequest/)
Copies [products](/developers/references/android/id-frak-sdk-sharing/sharingrequest/builder/products/), so mutating the caller's list cannot change an already-built request.
# Builder
constructor()
# link
fun link(link: [String](https://kotlinlang.org/api/core/kotlin-stdlib/kotlin/-string/index.html)?): [SharingRequest.Builder](/developers/references/android/id-frak-sdk-sharing/sharingrequest/builder/)
var link: [String](https://kotlinlang.org/api/core/kotlin-stdlib/kotlin/-string/index.html)?
# logoUrl
fun logoUrl(logoUrl: [String](https://kotlinlang.org/api/core/kotlin-stdlib/kotlin/-string/index.html)?): [SharingRequest.Builder](/developers/references/android/id-frak-sdk-sharing/sharingrequest/builder/)
var logoUrl: [String](https://kotlinlang.org/api/core/kotlin-stdlib/kotlin/-string/index.html)?
# placement
fun placement(placement: [String](https://kotlinlang.org/api/core/kotlin-stdlib/kotlin/-string/index.html)?): [SharingRequest.Builder](/developers/references/android/id-frak-sdk-sharing/sharingrequest/builder/)
var placement: [String](https://kotlinlang.org/api/core/kotlin-stdlib/kotlin/-string/index.html)?
# products
fun products(products: [List](https://kotlinlang.org/api/core/kotlin-stdlib/kotlin.collections/-list/index.html)<[SharingProduct](/developers/references/android/id-frak-sdk-sharing/sharingproduct/)>): [SharingRequest.Builder](/developers/references/android/id-frak-sdk-sharing/sharingrequest/builder/)
var products: [List](https://kotlinlang.org/api/core/kotlin-stdlib/kotlin.collections/-list/index.html)<[SharingProduct](/developers/references/android/id-frak-sdk-sharing/sharingproduct/)>
# shareImageUrl
fun shareImageUrl(shareImageUrl: [String](https://kotlinlang.org/api/core/kotlin-stdlib/kotlin/-string/index.html)?): [SharingRequest.Builder](/developers/references/android/id-frak-sdk-sharing/sharingrequest/builder/)
var shareImageUrl: [String](https://kotlinlang.org/api/core/kotlin-stdlib/kotlin/-string/index.html)?
# shareText
fun shareText(shareText: [String](https://kotlinlang.org/api/core/kotlin-stdlib/kotlin/-string/index.html)?): [SharingRequest.Builder](/developers/references/android/id-frak-sdk-sharing/sharingrequest/builder/)
var shareText: [String](https://kotlinlang.org/api/core/kotlin-stdlib/kotlin/-string/index.html)?
# shareTitle
fun shareTitle(shareTitle: [String](https://kotlinlang.org/api/core/kotlin-stdlib/kotlin/-string/index.html)?): [SharingRequest.Builder](/developers/references/android/id-frak-sdk-sharing/sharingrequest/builder/)
var shareTitle: [String](https://kotlinlang.org/api/core/kotlin-stdlib/kotlin/-string/index.html)?
# targetInteraction
fun targetInteraction(targetInteraction: [String](https://kotlinlang.org/api/core/kotlin-stdlib/kotlin/-string/index.html)?): [SharingRequest.Builder](/developers/references/android/id-frak-sdk-sharing/sharingrequest/builder/)
var targetInteraction: [String](https://kotlinlang.org/api/core/kotlin-stdlib/kotlin/-string/index.html)?
# link
val link: [String](https://kotlinlang.org/api/core/kotlin-stdlib/kotlin/-string/index.html)?
Falls back to the merchant's `homepageLink`, then [id.frak.sdk.core.FrakMetadata.homepageLink](/developers/references/android/id-frak-sdk-core/frakmetadata/homepagelink/).
# logoUrl
val logoUrl: [String](https://kotlinlang.org/api/core/kotlin-stdlib/kotlin/-string/index.html)?
# placement
val placement: [String](https://kotlinlang.org/api/core/kotlin-stdlib/kotlin/-string/index.html)?
Which configured placement's copy to render, e.g. `product-page`. Accepted but not yet acted on.
# products
val products: [List](https://kotlinlang.org/api/core/kotlin-stdlib/kotlin.collections/-list/index.html)<[SharingProduct](/developers/references/android/id-frak-sdk-sharing/sharingproduct/)>
# shareImageUrl
val shareImageUrl: [String](https://kotlinlang.org/api/core/kotlin-stdlib/kotlin/-string/index.html)?
Highest-precedence override for the OS share sheet's preview image. iOS only; Android ships no preview.
# shareText
val shareText: [String](https://kotlinlang.org/api/core/kotlin-stdlib/kotlin/-string/index.html)?
Highest-precedence override for the OS share sheet's body text.
# shareTitle
val shareTitle: [String](https://kotlinlang.org/api/core/kotlin-stdlib/kotlin/-string/index.html)?
Highest-precedence override for the OS share sheet's title.
# targetInteraction
val targetInteraction: [String](https://kotlinlang.org/api/core/kotlin-stdlib/kotlin/-string/index.html)?
# id.frak.sdk.tracking
## Types
| Name | Summary |
|---|---|
| [Interaction](/developers/references/android/id-frak-sdk-tracking/interaction/) | class [Interaction](/developers/references/android/id-frak-sdk-tracking/interaction/) Something the user did that the merchant wants attributed. Closed to the three shapes `POST /user/track/interaction` accepts; use [custom](/developers/references/android/id-frak-sdk-tracking/interaction/companion/custom/) for anything else. |
# Interaction
class Interaction
Something the user did that the merchant wants attributed. Closed to the three shapes `POST /user/track/interaction` accepts; use [custom](/developers/references/android/id-frak-sdk-tracking/interaction/companion/custom/) for anything else.
## Types
| Name | Summary |
|---|---|
| [Companion](/developers/references/android/id-frak-sdk-tracking/interaction/companion/) | object [Companion](/developers/references/android/id-frak-sdk-tracking/interaction/companion/) |
## Functions
| Name | Summary |
|---|---|
| equals | open operator override fun equals(other: [Any](https://kotlinlang.org/api/core/kotlin-stdlib/kotlin/-any/index.html)?): [Boolean](https://kotlinlang.org/api/core/kotlin-stdlib/kotlin/-boolean/index.html) |
| hashCode | open override fun hashCode(): [Int](https://kotlinlang.org/api/core/kotlin-stdlib/kotlin/-int/index.html) |
| toString | open override fun toString(): [String](https://kotlinlang.org/api/core/kotlin-stdlib/kotlin/-string/index.html) |
# Companion
object Companion
## Functions
| Name | Summary |
|---|---|
| [arrival](/developers/references/android/id-frak-sdk-tracking/interaction/companion/arrival/) | fun [arrival](/developers/references/android/id-frak-sdk-tracking/interaction/companion/arrival/)(referrerWallet: [String](https://kotlinlang.org/api/core/kotlin-stdlib/kotlin/-string/index.html)?, referrerClientId: [String](https://kotlinlang.org/api/core/kotlin-stdlib/kotlin/-string/index.html)?, referrerMerchantId: [String](https://kotlinlang.org/api/core/kotlin-stdlib/kotlin/-string/index.html)?, referralTimestamp: [Long](https://kotlinlang.org/api/core/kotlin-stdlib/kotlin/-long/index.html)?): [Interaction](/developers/references/android/id-frak-sdk-tracking/interaction/) A referral arrival. Built for you by [id.frak.sdk.AppLinkApi.handleReferral](/developers/references/android/id-frak-sdk/applinkapi/handlereferral/); tracking one yourself for a link the SDK already handled double-counts it, as the `arrival` schema carries no idempotency key. |
| [custom](/developers/references/android/id-frak-sdk-tracking/interaction/companion/custom/) | fun [custom](/developers/references/android/id-frak-sdk-tracking/interaction/companion/custom/)(customType: [String](https://kotlinlang.org/api/core/kotlin-stdlib/kotlin/-string/index.html)): [Interaction](/developers/references/android/id-frak-sdk-tracking/interaction/) Anything the three built-in shapes do not cover. [customType](/developers/references/android/id-frak-sdk-tracking/interaction/companion/custom/) is free-form; the route's schema is the authority, so an unrecognised value comes back as a 4xx. fun [custom](/developers/references/android/id-frak-sdk-tracking/interaction/companion/custom/)(customType: [String](https://kotlinlang.org/api/core/kotlin-stdlib/kotlin/-string/index.html), data: [Map](https://kotlinlang.org/api/core/kotlin-stdlib/kotlin.collections/-map/index.html)<[String](https://kotlinlang.org/api/core/kotlin-stdlib/kotlin/-string/index.html), [String](https://kotlinlang.org/api/core/kotlin-stdlib/kotlin/-string/index.html)>): [Interaction](/developers/references/android/id-frak-sdk-tracking/interaction/) [data](/developers/references/android/id-frak-sdk-tracking/interaction/companion/custom/) is sent verbatim as the event's `data` object. fun [custom](/developers/references/android/id-frak-sdk-tracking/interaction/companion/custom/)(customType: [String](https://kotlinlang.org/api/core/kotlin-stdlib/kotlin/-string/index.html), data: [Map](https://kotlinlang.org/api/core/kotlin-stdlib/kotlin.collections/-map/index.html)<[String](https://kotlinlang.org/api/core/kotlin-stdlib/kotlin/-string/index.html), [String](https://kotlinlang.org/api/core/kotlin-stdlib/kotlin/-string/index.html)>, idempotencyKey: [String](https://kotlinlang.org/api/core/kotlin-stdlib/kotlin/-string/index.html)?): [Interaction](/developers/references/android/id-frak-sdk-tracking/interaction/) |
| [sharing](/developers/references/android/id-frak-sdk-tracking/interaction/companion/sharing/) | fun [sharing](/developers/references/android/id-frak-sdk-tracking/interaction/companion/sharing/)(): [Interaction](/developers/references/android/id-frak-sdk-tracking/interaction/) A share, timestamped at enqueue. What the sharing sheet reports when the user shares. fun [sharing](/developers/references/android/id-frak-sdk-tracking/interaction/companion/sharing/)(purchaseId: [String](https://kotlinlang.org/api/core/kotlin-stdlib/kotlin/-string/index.html)?): [Interaction](/developers/references/android/id-frak-sdk-tracking/interaction/) A share tied to a purchase, timestamped at enqueue. fun [sharing](/developers/references/android/id-frak-sdk-tracking/interaction/companion/sharing/)(sharingTimestamp: [Long](https://kotlinlang.org/api/core/kotlin-stdlib/kotlin/-long/index.html)?, purchaseId: [String](https://kotlinlang.org/api/core/kotlin-stdlib/kotlin/-string/index.html)?): [Interaction](/developers/references/android/id-frak-sdk-tracking/interaction/) A share with an explicit timestamp and/or the purchase it followed. [sharingTimestamp](/developers/references/android/id-frak-sdk-tracking/interaction/companion/sharing/) is Unix SECONDS; null is stamped at enqueue, so a queued event reports when the share happened rather than when it was delivered. |
# arrival
fun arrival(referrerWallet: [String](https://kotlinlang.org/api/core/kotlin-stdlib/kotlin/-string/index.html)?, referrerClientId: [String](https://kotlinlang.org/api/core/kotlin-stdlib/kotlin/-string/index.html)?, referrerMerchantId: [String](https://kotlinlang.org/api/core/kotlin-stdlib/kotlin/-string/index.html)?, referralTimestamp: [Long](https://kotlinlang.org/api/core/kotlin-stdlib/kotlin/-long/index.html)?): [Interaction](/developers/references/android/id-frak-sdk-tracking/interaction/)
A referral arrival. Built for you by [id.frak.sdk.AppLinkApi.handleReferral](/developers/references/android/id-frak-sdk/applinkapi/handlereferral/); tracking one yourself for a link the SDK already handled double-counts it, as the `arrival` schema carries no idempotency key.
# custom
fun custom(customType: [String](https://kotlinlang.org/api/core/kotlin-stdlib/kotlin/-string/index.html)): [Interaction](/developers/references/android/id-frak-sdk-tracking/interaction/)
Anything the three built-in shapes do not cover. customType is free-form; the route's schema is the authority, so an unrecognised value comes back as a 4xx.
fun custom(customType: [String](https://kotlinlang.org/api/core/kotlin-stdlib/kotlin/-string/index.html), data: [Map](https://kotlinlang.org/api/core/kotlin-stdlib/kotlin.collections/-map/index.html)<[String](https://kotlinlang.org/api/core/kotlin-stdlib/kotlin/-string/index.html), [String](https://kotlinlang.org/api/core/kotlin-stdlib/kotlin/-string/index.html)>): [Interaction](/developers/references/android/id-frak-sdk-tracking/interaction/)
data is sent verbatim as the event's `data` object.
fun custom(customType: [String](https://kotlinlang.org/api/core/kotlin-stdlib/kotlin/-string/index.html), data: [Map](https://kotlinlang.org/api/core/kotlin-stdlib/kotlin.collections/-map/index.html)<[String](https://kotlinlang.org/api/core/kotlin-stdlib/kotlin/-string/index.html), [String](https://kotlinlang.org/api/core/kotlin-stdlib/kotlin/-string/index.html)>, idempotencyKey: [String](https://kotlinlang.org/api/core/kotlin-stdlib/kotlin/-string/index.html)?): [Interaction](/developers/references/android/id-frak-sdk-tracking/interaction/)
#### Parameters
android
| | |
|---|---|
| idempotencyKey | overrides the key the SDK stamps at enqueue. |
# sharing
fun sharing(): [Interaction](/developers/references/android/id-frak-sdk-tracking/interaction/)
A share, timestamped at enqueue. What the sharing sheet reports when the user shares.
fun sharing(purchaseId: [String](https://kotlinlang.org/api/core/kotlin-stdlib/kotlin/-string/index.html)?): [Interaction](/developers/references/android/id-frak-sdk-tracking/interaction/)
A share tied to a purchase, timestamped at enqueue.
fun sharing(sharingTimestamp: [Long](https://kotlinlang.org/api/core/kotlin-stdlib/kotlin/-long/index.html)?, purchaseId: [String](https://kotlinlang.org/api/core/kotlin-stdlib/kotlin/-string/index.html)?): [Interaction](/developers/references/android/id-frak-sdk-tracking/interaction/)
A share with an explicit timestamp and/or the purchase it followed. sharingTimestamp is Unix SECONDS; null is stamped at enqueue, so a queued event reports when the share happened rather than when it was delivered.
# id.frak.sdk.ui
## Types
| Name | Summary |
|---|---|
| [FrakSharing](/developers/references/android/id-frak-sdk-ui/fraksharing/) | class [FrakSharing](/developers/references/android/id-frak-sdk-ui/fraksharing/) The Frak sharing sheet. Build it once per screen, [warm](/developers/references/android/id-frak-sdk-ui/fraksharing/warm/) it when a share affordance becomes visible, then [present](/developers/references/android/id-frak-sdk-ui/fraksharing/present/) on the tap. |
| [FrakSharingDefaults](/developers/references/android/id-frak-sdk-ui/fraksharingdefaults/) | object [FrakSharingDefaults](/developers/references/android/id-frak-sdk-ui/fraksharingdefaults/) Tunable defaults for [FrakSharing](/developers/references/android/id-frak-sdk-ui/fraksharing/). |
| [SharingResult](/developers/references/android/id-frak-sdk-ui/sharingresult/) | sealed interface [SharingResult](/developers/references/android/id-frak-sdk-ui/sharingresult/) How a sharing session ended. A session can produce several; the callback reports only the most significant: walletOpened > install > shared/copied > dismissed. |
# FrakSharing
class FrakSharing
The Frak sharing sheet. Build it once per screen, [warm](/developers/references/android/id-frak-sdk-ui/fraksharing/warm/) it when a share affordance becomes visible, then [present](/developers/references/android/id-frak-sdk-ui/fraksharing/present/) on the tap.
A sheet that is up survives a configuration change, but not process death. Use one instance per Activity: two share a warm web view and a "one sheet at a time" guard, and after a configuration change a live session reports to whichever was built first, not whichever presented.
## Types
| Name | Summary |
|---|---|
| [Builder](/developers/references/android/id-frak-sdk-ui/fraksharing/builder/) | class [Builder](/developers/references/android/id-frak-sdk-ui/fraksharing/builder/)(callback: [FrakSharing.ResultCallback](/developers/references/android/id-frak-sdk-ui/fraksharing/resultcallback/)) Builds a FrakSharing against a hosting Activity. |
| [ResultCallback](/developers/references/android/id-frak-sdk-ui/fraksharing/resultcallback/) | fun interface [ResultCallback](/developers/references/android/id-frak-sdk-ui/fraksharing/resultcallback/) How a sharing session ended. Always invoked on the main thread, and it can arrive after the hosting Activity is destroyed, so write it defensively. Should be a stable reference. |
## Functions
| Name | Summary |
|---|---|
| [present](/developers/references/android/id-frak-sdk-ui/fraksharing/present/) | fun [present](/developers/references/android/id-frak-sdk-ui/fraksharing/present/)(request: [SharingRequest](/developers/references/android/id-frak-sdk-sharing/sharingrequest/)) Opens the sheet. No-op if the hosting Activity is finishing, destroyed, or not at least `STARTED`. |
| [warm](/developers/references/android/id-frak-sdk-ui/fraksharing/warm/) | fun [warm](/developers/references/android/id-frak-sdk-ui/fraksharing/warm/)() Starts warming the pooled web view and the identity/config reads. Call when a share affordance becomes visible; cheap to call repeatedly, and [present](/developers/references/android/id-frak-sdk-ui/fraksharing/present/) implies it. |
# Builder
class Builder(callback: [FrakSharing.ResultCallback](/developers/references/android/id-frak-sdk-ui/fraksharing/resultcallback/))
Builds a [FrakSharing](/developers/references/android/id-frak-sdk-ui/fraksharing/) against a hosting Activity.
## Constructors
| | |
|---|---|
| [Builder](/developers/references/android/id-frak-sdk-ui/fraksharing/builder/builder/) | constructor(callback: [FrakSharing.ResultCallback](/developers/references/android/id-frak-sdk-ui/fraksharing/resultcallback/)) |
## Functions
| Name | Summary |
|---|---|
| [build](/developers/references/android/id-frak-sdk-ui/fraksharing/builder/build/) | fun [build](/developers/references/android/id-frak-sdk-ui/fraksharing/builder/build/)(): [FrakSharing](/developers/references/android/id-frak-sdk-ui/fraksharing/) The Compose build site; resolves the hosting Activity from `LocalContext` and warms on composition-enter, so [warm](/developers/references/android/id-frak-sdk-ui/fraksharing/warm/) never has to be called by hand. fun [build](/developers/references/android/id-frak-sdk-ui/fraksharing/builder/build/)(activity: ERROR CLASS: Symbol not found for ComponentActivity): [FrakSharing](/developers/references/android/id-frak-sdk-ui/fraksharing/) The Activity that will host the sheet's window. Call from `onCreate` (after `super.onCreate`), never from a property initialiser, where there is no `ViewModelStore` yet to hold the retained sheet state. |
| [heightFraction](/developers/references/android/id-frak-sdk-ui/fraksharing/builder/heightfraction/) | fun [heightFraction](/developers/references/android/id-frak-sdk-ui/fraksharing/builder/heightfraction/)(fraction: [Float](https://kotlinlang.org/api/core/kotlin-stdlib/kotlin/-float/index.html)): FrakSharing.Builder Share of the screen height the sheet occupies. Values outside `0.3..1.0`, and non-finite ones, are clamped and logged rather than thrown: a layout number must not crash the merchant's app, and iOS clamps the same input. |
| [language](/developers/references/android/id-frak-sdk-ui/fraksharing/builder/language/) | fun [language](/developers/references/android/id-frak-sdk-ui/fraksharing/builder/language/)(languageTag: [String](https://kotlinlang.org/api/core/kotlin-stdlib/kotlin/-string/index.html)?): FrakSharing.Builder Language of the sheet's contents as a BCP-47 tag (`"en"`, `"fr-CA"`), defaulting to the device locale. Selects among what the page ships; it falls back to its own default for a tag it has no translation for. Part of the pre-warmed URL, so set it once per instance. |
# build
fun build(activity: ERROR CLASS: Symbol not found for ComponentActivity): [FrakSharing](/developers/references/android/id-frak-sdk-ui/fraksharing/)
The Activity that will host the sheet's window. Call from `onCreate` (after `super.onCreate`), never from a property initialiser, where there is no `ViewModelStore` yet to hold the retained sheet state.
#### Throws
| | |
|---|---|
| [IllegalStateException](https://docs.oracle.com/en/java/javase/17/docs/api/java.base/java/lang/IllegalStateException.html) | if called before the Activity reaches `onCreate`. |
fun build(): [FrakSharing](/developers/references/android/id-frak-sdk-ui/fraksharing/)
The Compose build site; resolves the hosting Activity from `LocalContext` and warms on composition-enter, so [warm](/developers/references/android/id-frak-sdk-ui/fraksharing/warm/) never has to be called by hand.
# Builder
constructor(callback: [FrakSharing.ResultCallback](/developers/references/android/id-frak-sdk-ui/fraksharing/resultcallback/))
# heightFraction
fun heightFraction(fraction: [Float](https://kotlinlang.org/api/core/kotlin-stdlib/kotlin/-float/index.html)): [FrakSharing.Builder](/developers/references/android/id-frak-sdk-ui/fraksharing/builder/)
Share of the screen height the sheet occupies. Values outside `0.3..1.0`, and non-finite ones, are clamped and logged rather than thrown: a layout number must not crash the merchant's app, and iOS clamps the same input.
# language
fun language(languageTag: [String](https://kotlinlang.org/api/core/kotlin-stdlib/kotlin/-string/index.html)?): [FrakSharing.Builder](/developers/references/android/id-frak-sdk-ui/fraksharing/builder/)
Language of the sheet's contents as a BCP-47 tag (`"en"`, `"fr-CA"`), defaulting to the device locale. Selects among what the page ships; it falls back to its own default for a tag it has no translation for. Part of the pre-warmed URL, so set it once per instance.
# present
fun present(request: [SharingRequest](/developers/references/android/id-frak-sdk-sharing/sharingrequest/))
Opens the sheet. No-op if the hosting Activity is finishing, destroyed, or not at least `STARTED`.
# ResultCallback
fun interface ResultCallback
How a sharing session ended. Always invoked on the main thread, and it can arrive after the hosting Activity is destroyed, so write it defensively. Should be a stable reference.
## Functions
| Name | Summary |
|---|---|
| [onResult](/developers/references/android/id-frak-sdk-ui/fraksharing/resultcallback/onresult/) | abstract fun [onResult](/developers/references/android/id-frak-sdk-ui/fraksharing/resultcallback/onresult/)(result: [SharingResult](/developers/references/android/id-frak-sdk-ui/sharingresult/)) |
# onResult
abstract fun onResult(result: [SharingResult](/developers/references/android/id-frak-sdk-ui/sharingresult/))
# warm
fun warm()
Starts warming the pooled web view and the identity/config reads. Call when a share affordance becomes visible; cheap to call repeatedly, and [present](/developers/references/android/id-frak-sdk-ui/fraksharing/present/) implies it.
# FrakSharingDefaults
object FrakSharingDefaults
Tunable defaults for [FrakSharing](/developers/references/android/id-frak-sdk-ui/fraksharing/).
## Properties
| Name | Summary |
|---|---|
| [HEIGHT_FRACTION](/developers/references/android/id-frak-sdk-ui/fraksharingdefaults/height_fraction/) | val [HEIGHT_FRACTION](/developers/references/android/id-frak-sdk-ui/fraksharingdefaults/height_fraction/): [Float](https://kotlinlang.org/api/core/kotlin-stdlib/kotlin/-float/index.html) = 0.85f Default fraction of the screen the sharing sheet takes. Not `const`: a `const val` would be inlined into the merchant's bytecode and frozen at their compile time. Mirrored on the other platform; keep both in step. |
# HEIGHT_FRACTION
val HEIGHT_FRACTION: [Float](https://kotlinlang.org/api/core/kotlin-stdlib/kotlin/-float/index.html) = 0.85f
Default fraction of the screen the sharing sheet takes. Not `const`: a `const val` would be inlined into the merchant's bytecode and frozen at their compile time. Mirrored on the other platform; keep both in step.
# SharingResult
sealed interface SharingResult
How a sharing session ended. A session can produce several; the callback reports only the most significant: walletOpened > install > shared/copied > dismissed.
#### Inheritors
| |
|---|
| [Shared](/developers/references/android/id-frak-sdk-ui/sharingresult/shared/) |
| [Copied](/developers/references/android/id-frak-sdk-ui/sharingresult/copied/) |
| [InstallStarted](/developers/references/android/id-frak-sdk-ui/sharingresult/installstarted/) |
| [WalletOpened](/developers/references/android/id-frak-sdk-ui/sharingresult/walletopened/) |
| [Dismissed](/developers/references/android/id-frak-sdk-ui/sharingresult/dismissed/) |
| [Failed](/developers/references/android/id-frak-sdk-ui/sharingresult/failed/) |
## Types
| Name | Summary |
|---|---|
| [Copied](/developers/references/android/id-frak-sdk-ui/sharingresult/copied/) | class [Copied](/developers/references/android/id-frak-sdk-ui/sharingresult/copied/)(val link: [String](https://kotlinlang.org/api/core/kotlin-stdlib/kotlin/-string/index.html)) : SharingResult |
| [Dismissed](/developers/references/android/id-frak-sdk-ui/sharingresult/dismissed/) | object [Dismissed](/developers/references/android/id-frak-sdk-ui/sharingresult/dismissed/) : SharingResult |
| [Failed](/developers/references/android/id-frak-sdk-ui/sharingresult/failed/) | class [Failed](/developers/references/android/id-frak-sdk-ui/sharingresult/failed/)(val error: [FrakError](/developers/references/android/id-frak-sdk-core/frakerror/)) : SharingResult |
| [InstallStarted](/developers/references/android/id-frak-sdk-ui/sharingresult/installstarted/) | object [InstallStarted](/developers/references/android/id-frak-sdk-ui/sharingresult/installstarted/) : SharingResult The user asked to install; the sheet took them to the wallet's install page, or to the store with no identity to hand it. Informational only — do not call [id.frak.sdk.AppLinkApi.openFrakApp](/developers/references/android/id-frak-sdk/applinkapi/openfrakapp/) again in response, and it doesn't mean anything was installed. |
| [Kind](/developers/references/android/id-frak-sdk-ui/sharingresult/kind/) | enum [Kind](/developers/references/android/id-frak-sdk-ui/sharingresult/kind/) : [Enum](https://kotlinlang.org/api/core/kotlin-stdlib/kotlin/-enum/index.html)<[SharingResult.Kind](/developers/references/android/id-frak-sdk-ui/sharingresult/kind/)> |
| [Shared](/developers/references/android/id-frak-sdk-ui/sharingresult/shared/) | class [Shared](/developers/references/android/id-frak-sdk-ui/sharingresult/shared/)(val link: [String](https://kotlinlang.org/api/core/kotlin-stdlib/kotlin/-string/index.html)) : SharingResult |
| [WalletOpened](/developers/references/android/id-frak-sdk-ui/sharingresult/walletopened/) | object [WalletOpened](/developers/references/android/id-frak-sdk-ui/sharingresult/walletopened/) : SharingResult The wallet was already installed and [id.frak.sdk.AppLinkApi.openFrakApp](/developers/references/android/id-frak-sdk/applinkapi/openfrakapp/) opened it. |
## Properties
| Name | Summary |
|---|---|
| [kind](/developers/references/android/id-frak-sdk-ui/sharingresult/kind-prop/) | abstract val [kind](/developers/references/android/id-frak-sdk-ui/sharingresult/kind-prop/): [SharingResult.Kind](/developers/references/android/id-frak-sdk-ui/sharingresult/kind/) Stable discriminator, one per arm. A `when` over [Kind](/developers/references/android/id-frak-sdk-ui/sharingresult/kind/) with an `else` survives a new arm; a `when` over the hierarchy does not. [Kind.wireValue](/developers/references/android/id-frak-sdk-ui/sharingresult/kind/wirevalue/) is spelled identically on iOS. |
# Copied
class Copied(val link: [String](https://kotlinlang.org/api/core/kotlin-stdlib/kotlin/-string/index.html)) : [SharingResult](/developers/references/android/id-frak-sdk-ui/sharingresult/)
## Constructors
| | |
|---|---|
| [Copied](/developers/references/android/id-frak-sdk-ui/sharingresult/copied/copied/) | constructor(link: [String](https://kotlinlang.org/api/core/kotlin-stdlib/kotlin/-string/index.html)) |
## Properties
| Name | Summary |
|---|---|
| [kind](/developers/references/android/id-frak-sdk-ui/sharingresult/copied/kind/) | open override val [kind](/developers/references/android/id-frak-sdk-ui/sharingresult/copied/kind/): [SharingResult.Kind](/developers/references/android/id-frak-sdk-ui/sharingresult/kind/) Stable discriminator, one per arm. A `when` over [Kind](/developers/references/android/id-frak-sdk-ui/sharingresult/kind/) with an `else` survives a new arm; a `when` over the hierarchy does not. [Kind.wireValue](/developers/references/android/id-frak-sdk-ui/sharingresult/kind/wirevalue/) is spelled identically on iOS. |
| [link](/developers/references/android/id-frak-sdk-ui/sharingresult/copied/link/) | val [link](/developers/references/android/id-frak-sdk-ui/sharingresult/copied/link/): [String](https://kotlinlang.org/api/core/kotlin-stdlib/kotlin/-string/index.html) |
# Copied
constructor(link: [String](https://kotlinlang.org/api/core/kotlin-stdlib/kotlin/-string/index.html))
# kind
open override val kind: [SharingResult.Kind](/developers/references/android/id-frak-sdk-ui/sharingresult/kind/)
Stable discriminator, one per arm. A `when` over [Kind](/developers/references/android/id-frak-sdk-ui/sharingresult/kind/) with an `else` survives a new arm; a `when` over the hierarchy does not. [Kind.wireValue](/developers/references/android/id-frak-sdk-ui/sharingresult/kind/wirevalue/) is spelled identically on iOS.
# link
val link: [String](https://kotlinlang.org/api/core/kotlin-stdlib/kotlin/-string/index.html)
# Dismissed
object Dismissed : [SharingResult](/developers/references/android/id-frak-sdk-ui/sharingresult/)
## Properties
| Name | Summary |
|---|---|
| [kind](/developers/references/android/id-frak-sdk-ui/sharingresult/dismissed/kind/) | open override val [kind](/developers/references/android/id-frak-sdk-ui/sharingresult/dismissed/kind/): [SharingResult.Kind](/developers/references/android/id-frak-sdk-ui/sharingresult/kind/) Stable discriminator, one per arm. A `when` over [Kind](/developers/references/android/id-frak-sdk-ui/sharingresult/kind/) with an `else` survives a new arm; a `when` over the hierarchy does not. [Kind.wireValue](/developers/references/android/id-frak-sdk-ui/sharingresult/kind/wirevalue/) is spelled identically on iOS. |
# kind
open override val kind: [SharingResult.Kind](/developers/references/android/id-frak-sdk-ui/sharingresult/kind/)
Stable discriminator, one per arm. A `when` over [Kind](/developers/references/android/id-frak-sdk-ui/sharingresult/kind/) with an `else` survives a new arm; a `when` over the hierarchy does not. [Kind.wireValue](/developers/references/android/id-frak-sdk-ui/sharingresult/kind/wirevalue/) is spelled identically on iOS.
# Failed
class Failed(val error: [FrakError](/developers/references/android/id-frak-sdk-core/frakerror/)) : [SharingResult](/developers/references/android/id-frak-sdk-ui/sharingresult/)
## Constructors
| | |
|---|---|
| [Failed](/developers/references/android/id-frak-sdk-ui/sharingresult/failed/failed/) | constructor(error: [FrakError](/developers/references/android/id-frak-sdk-core/frakerror/)) |
## Properties
| Name | Summary |
|---|---|
| [error](/developers/references/android/id-frak-sdk-ui/sharingresult/failed/error/) | val [error](/developers/references/android/id-frak-sdk-ui/sharingresult/failed/error/): [FrakError](/developers/references/android/id-frak-sdk-core/frakerror/) |
| [kind](/developers/references/android/id-frak-sdk-ui/sharingresult/failed/kind/) | open override val [kind](/developers/references/android/id-frak-sdk-ui/sharingresult/failed/kind/): [SharingResult.Kind](/developers/references/android/id-frak-sdk-ui/sharingresult/kind/) Stable discriminator, one per arm. A `when` over [Kind](/developers/references/android/id-frak-sdk-ui/sharingresult/kind/) with an `else` survives a new arm; a `when` over the hierarchy does not. [Kind.wireValue](/developers/references/android/id-frak-sdk-ui/sharingresult/kind/wirevalue/) is spelled identically on iOS. |
# error
val error: [FrakError](/developers/references/android/id-frak-sdk-core/frakerror/)
# Failed
constructor(error: [FrakError](/developers/references/android/id-frak-sdk-core/frakerror/))
# kind
open override val kind: [SharingResult.Kind](/developers/references/android/id-frak-sdk-ui/sharingresult/kind/)
Stable discriminator, one per arm. A `when` over [Kind](/developers/references/android/id-frak-sdk-ui/sharingresult/kind/) with an `else` survives a new arm; a `when` over the hierarchy does not. [Kind.wireValue](/developers/references/android/id-frak-sdk-ui/sharingresult/kind/wirevalue/) is spelled identically on iOS.
# InstallStarted
object InstallStarted : [SharingResult](/developers/references/android/id-frak-sdk-ui/sharingresult/)
The user asked to install; the sheet took them to the wallet's install page, or to the store with no identity to hand it. Informational only — do not call [id.frak.sdk.AppLinkApi.openFrakApp](/developers/references/android/id-frak-sdk/applinkapi/openfrakapp/) again in response, and it doesn't mean anything was installed.
## Properties
| Name | Summary |
|---|---|
| [kind](/developers/references/android/id-frak-sdk-ui/sharingresult/installstarted/kind/) | open override val [kind](/developers/references/android/id-frak-sdk-ui/sharingresult/installstarted/kind/): [SharingResult.Kind](/developers/references/android/id-frak-sdk-ui/sharingresult/kind/) Stable discriminator, one per arm. A `when` over [Kind](/developers/references/android/id-frak-sdk-ui/sharingresult/kind/) with an `else` survives a new arm; a `when` over the hierarchy does not. [Kind.wireValue](/developers/references/android/id-frak-sdk-ui/sharingresult/kind/wirevalue/) is spelled identically on iOS. |
# kind
open override val kind: [SharingResult.Kind](/developers/references/android/id-frak-sdk-ui/sharingresult/kind/)
Stable discriminator, one per arm. A `when` over [Kind](/developers/references/android/id-frak-sdk-ui/sharingresult/kind/) with an `else` survives a new arm; a `when` over the hierarchy does not. [Kind.wireValue](/developers/references/android/id-frak-sdk-ui/sharingresult/kind/wirevalue/) is spelled identically on iOS.
# Kind
enum Kind : [Enum](https://kotlinlang.org/api/core/kotlin-stdlib/kotlin/-enum/index.html)<SharingResult.Kind>
## Entries
| | |
|---|---|
| [SHARED](/developers/references/android/id-frak-sdk-ui/sharingresult/kind/shared/) | [SHARED](/developers/references/android/id-frak-sdk-ui/sharingresult/kind/shared/) |
| [COPIED](/developers/references/android/id-frak-sdk-ui/sharingresult/kind/copied/) | [COPIED](/developers/references/android/id-frak-sdk-ui/sharingresult/kind/copied/) |
| [INSTALL_STARTED](/developers/references/android/id-frak-sdk-ui/sharingresult/kind/install_started/) | [INSTALL_STARTED](/developers/references/android/id-frak-sdk-ui/sharingresult/kind/install_started/) |
| [WALLET_OPENED](/developers/references/android/id-frak-sdk-ui/sharingresult/kind/wallet_opened/) | [WALLET_OPENED](/developers/references/android/id-frak-sdk-ui/sharingresult/kind/wallet_opened/) |
| [DISMISSED](/developers/references/android/id-frak-sdk-ui/sharingresult/kind/dismissed/) | [DISMISSED](/developers/references/android/id-frak-sdk-ui/sharingresult/kind/dismissed/) |
| [FAILED](/developers/references/android/id-frak-sdk-ui/sharingresult/kind/failed/) | [FAILED](/developers/references/android/id-frak-sdk-ui/sharingresult/kind/failed/) |
## Properties
| Name | Summary |
|---|---|
| [wireValue](/developers/references/android/id-frak-sdk-ui/sharingresult/kind/wirevalue/) | val [wireValue](/developers/references/android/id-frak-sdk-ui/sharingresult/kind/wirevalue/): [String](https://kotlinlang.org/api/core/kotlin-stdlib/kotlin/-string/index.html) |
## Functions
| Name | Summary |
|---|---|
| [valueOf](/developers/references/android/id-frak-sdk-ui/sharingresult/kind/valueof/) | fun [valueOf](/developers/references/android/id-frak-sdk-ui/sharingresult/kind/valueof/)(value: [String](https://kotlinlang.org/api/core/kotlin-stdlib/kotlin/-string/index.html)): SharingResult.Kind Returns the enum constant of this type with the specified name. The string must match exactly an identifier used to declare an enum constant in this type. (Extraneous whitespace characters are not permitted.) |
| [values](/developers/references/android/id-frak-sdk-ui/sharingresult/kind/values/) | fun [values](/developers/references/android/id-frak-sdk-ui/sharingresult/kind/values/)(): [Array](https://kotlinlang.org/api/core/kotlin-stdlib/kotlin/-array/index.html)<SharingResult.Kind> Returns an array containing the constants of this enum type, in the order they're declared. |
# kind
abstract val kind: [SharingResult.Kind](/developers/references/android/id-frak-sdk-ui/sharingresult/kind/)
Stable discriminator, one per arm. A `when` over [Kind](/developers/references/android/id-frak-sdk-ui/sharingresult/kind/) with an `else` survives a new arm; a `when` over the hierarchy does not. [Kind.wireValue](/developers/references/android/id-frak-sdk-ui/sharingresult/kind/wirevalue/) is spelled identically on iOS.
# COPIED
COPIED
# DISMISSED
DISMISSED
# FAILED
FAILED
# INSTALL_STARTED
INSTALL_STARTED
# SHARED
SHARED
# valueOf
fun valueOf(value: [String](https://kotlinlang.org/api/core/kotlin-stdlib/kotlin/-string/index.html)): [SharingResult.Kind](/developers/references/android/id-frak-sdk-ui/sharingresult/kind/)
Returns the enum constant of this type with the specified name. The string must match exactly an identifier used to declare an enum constant in this type. (Extraneous whitespace characters are not permitted.)
#### Throws
| | |
|---|---|
| kotlin.IllegalArgumentException | if this enum type has no constant with the specified name |
# values
fun values(): [Array](https://kotlinlang.org/api/core/kotlin-stdlib/kotlin/-array/index.html)<[SharingResult.Kind](/developers/references/android/id-frak-sdk-ui/sharingresult/kind/)>
Returns an array containing the constants of this enum type, in the order they're declared.
This method may be used to iterate over the constants.
# WALLET_OPENED
WALLET_OPENED
# wireValue
val wireValue: [String](https://kotlinlang.org/api/core/kotlin-stdlib/kotlin/-string/index.html)
# Shared
class Shared(val link: [String](https://kotlinlang.org/api/core/kotlin-stdlib/kotlin/-string/index.html)) : [SharingResult](/developers/references/android/id-frak-sdk-ui/sharingresult/)
## Constructors
| | |
|---|---|
| [Shared](/developers/references/android/id-frak-sdk-ui/sharingresult/shared/shared/) | constructor(link: [String](https://kotlinlang.org/api/core/kotlin-stdlib/kotlin/-string/index.html)) |
## Properties
| Name | Summary |
|---|---|
| [kind](/developers/references/android/id-frak-sdk-ui/sharingresult/shared/kind/) | open override val [kind](/developers/references/android/id-frak-sdk-ui/sharingresult/shared/kind/): [SharingResult.Kind](/developers/references/android/id-frak-sdk-ui/sharingresult/kind/) Stable discriminator, one per arm. A `when` over [Kind](/developers/references/android/id-frak-sdk-ui/sharingresult/kind/) with an `else` survives a new arm; a `when` over the hierarchy does not. [Kind.wireValue](/developers/references/android/id-frak-sdk-ui/sharingresult/kind/wirevalue/) is spelled identically on iOS. |
| [link](/developers/references/android/id-frak-sdk-ui/sharingresult/shared/link/) | val [link](/developers/references/android/id-frak-sdk-ui/sharingresult/shared/link/): [String](https://kotlinlang.org/api/core/kotlin-stdlib/kotlin/-string/index.html) |
# kind
open override val kind: [SharingResult.Kind](/developers/references/android/id-frak-sdk-ui/sharingresult/kind/)
Stable discriminator, one per arm. A `when` over [Kind](/developers/references/android/id-frak-sdk-ui/sharingresult/kind/) with an `else` survives a new arm; a `when` over the hierarchy does not. [Kind.wireValue](/developers/references/android/id-frak-sdk-ui/sharingresult/kind/wirevalue/) is spelled identically on iOS.
# link
val link: [String](https://kotlinlang.org/api/core/kotlin-stdlib/kotlin/-string/index.html)
# Shared
constructor(link: [String](https://kotlinlang.org/api/core/kotlin-stdlib/kotlin/-string/index.html))
# WalletOpened
object WalletOpened : [SharingResult](/developers/references/android/id-frak-sdk-ui/sharingresult/)
The wallet was already installed and [id.frak.sdk.AppLinkApi.openFrakApp](/developers/references/android/id-frak-sdk/applinkapi/openfrakapp/) opened it.
## Properties
| Name | Summary |
|---|---|
| [kind](/developers/references/android/id-frak-sdk-ui/sharingresult/walletopened/kind/) | open override val [kind](/developers/references/android/id-frak-sdk-ui/sharingresult/walletopened/kind/): [SharingResult.Kind](/developers/references/android/id-frak-sdk-ui/sharingresult/kind/) Stable discriminator, one per arm. A `when` over [Kind](/developers/references/android/id-frak-sdk-ui/sharingresult/kind/) with an `else` survives a new arm; a `when` over the hierarchy does not. [Kind.wireValue](/developers/references/android/id-frak-sdk-ui/sharingresult/kind/wirevalue/) is spelled identically on iOS. |
# kind
open override val kind: [SharingResult.Kind](/developers/references/android/id-frak-sdk-ui/sharingresult/kind/)
Stable discriminator, one per arm. A `when` over [Kind](/developers/references/android/id-frak-sdk-ui/sharingresult/kind/) with an `else` survives a new arm; a `when` over the hierarchy does not. [Kind.wireValue](/developers/references/android/id-frak-sdk-ui/sharingresult/kind/wirevalue/) is spelled identically on iOS.
# AppLinkApi
class AppLinkApi
Inbound referral links and the wallet app handoff. Obtained from [FrakClient.appLink](/developers/references/android/id-frak-sdk/frakclient/applink/).
## Functions
| Name | Summary |
|---|---|
| [handleReferral](/developers/references/android/id-frak-sdk/applinkapi/handlereferral/) | suspend fun [handleReferral](/developers/references/android/id-frak-sdk/applinkapi/handlereferral/)(url: [String](https://kotlinlang.org/api/core/kotlin-stdlib/kotlin/-string/index.html)): [Boolean](https://kotlinlang.org/api/core/kotlin-stdlib/kotlin/-boolean/index.html) Decodes referral context, guards self-referral, tracks arrival. Not a "stop routing" signal. |
| [handleReferralAsync](/developers/references/android/id-frak-sdk/applinkapi/handlereferralasync/) | fun [handleReferralAsync](/developers/references/android/id-frak-sdk/applinkapi/handlereferralasync/)(url: [String](https://kotlinlang.org/api/core/kotlin-stdlib/kotlin/-string/index.html)): [CompletableFuture](https://docs.oracle.com/en/java/javase/17/docs/api/java.base/java/util/concurrent/CompletableFuture.html)<[Boolean](https://kotlinlang.org/api/core/kotlin-stdlib/kotlin/-boolean/index.html)> [handleReferral](/developers/references/android/id-frak-sdk/applinkapi/handlereferral/) for Java. |
| [installPageUrl](/developers/references/android/id-frak-sdk/applinkapi/installpageurl/) | suspend fun [installPageUrl](/developers/references/android/id-frak-sdk/applinkapi/installpageurl/)(returnScheme: [String](https://kotlinlang.org/api/core/kotlin-stdlib/kotlin/-string/index.html), sessionId: [String](https://kotlinlang.org/api/core/kotlin-stdlib/kotlin/-string/index.html)): [String](https://kotlinlang.org/api/core/kotlin-stdlib/kotlin/-string/index.html) Wallet's hosted install page, carrying a fresh proof. Not the store listing — [openFrakApp](/developers/references/android/id-frak-sdk/applinkapi/openfrakapp/) handles that handoff itself. |
| [installPageUrlAsync](/developers/references/android/id-frak-sdk/applinkapi/installpageurlasync/) | fun [installPageUrlAsync](/developers/references/android/id-frak-sdk/applinkapi/installpageurlasync/)(returnScheme: [String](https://kotlinlang.org/api/core/kotlin-stdlib/kotlin/-string/index.html), sessionId: [String](https://kotlinlang.org/api/core/kotlin-stdlib/kotlin/-string/index.html)): [CompletableFuture](https://docs.oracle.com/en/java/javase/17/docs/api/java.base/java/util/concurrent/CompletableFuture.html)<[String](https://kotlinlang.org/api/core/kotlin-stdlib/kotlin/-string/index.html)> [installPageUrl](/developers/references/android/id-frak-sdk/applinkapi/installpageurl/) for Java. Completes exceptionally with a [FrakError](/developers/references/android/id-frak-sdk-core/frakerror/) wrapped in a `CompletionException`. |
| [isFrakAppInstalled](/developers/references/android/id-frak-sdk/applinkapi/isfrakappinstalled/) | fun [isFrakAppInstalled](/developers/references/android/id-frak-sdk/applinkapi/isfrakappinstalled/)(): [Boolean](https://kotlinlang.org/api/core/kotlin-stdlib/kotlin/-boolean/index.html) |
| [openFrakApp](/developers/references/android/id-frak-sdk/applinkapi/openfrakapp/) | suspend fun [openFrakApp](/developers/references/android/id-frak-sdk/applinkapi/openfrakapp/)(): [OpenAppResult](/developers/references/android/id-frak-sdk/openappresult/) Opens the wallet app if installed, else the Play Store listing with an install referrer. |
| [openFrakAppAsync](/developers/references/android/id-frak-sdk/applinkapi/openfrakappasync/) | fun [openFrakAppAsync](/developers/references/android/id-frak-sdk/applinkapi/openfrakappasync/)(): [CompletableFuture](https://docs.oracle.com/en/java/javase/17/docs/api/java.base/java/util/concurrent/CompletableFuture.html)<[OpenAppResult](/developers/references/android/id-frak-sdk/openappresult/)> [openFrakApp](/developers/references/android/id-frak-sdk/applinkapi/openfrakapp/) for Java. |
# handleReferral
suspend fun handleReferral(url: [String](https://kotlinlang.org/api/core/kotlin-stdlib/kotlin/-string/index.html)): [Boolean](https://kotlinlang.org/api/core/kotlin-stdlib/kotlin/-boolean/index.html)
Decodes referral context, guards self-referral, tracks arrival. Not a "stop routing" signal.
# handleReferralAsync
fun handleReferralAsync(url: [String](https://kotlinlang.org/api/core/kotlin-stdlib/kotlin/-string/index.html)): [CompletableFuture](https://docs.oracle.com/en/java/javase/17/docs/api/java.base/java/util/concurrent/CompletableFuture.html)<[Boolean](https://kotlinlang.org/api/core/kotlin-stdlib/kotlin/-boolean/index.html)>
[handleReferral](/developers/references/android/id-frak-sdk/applinkapi/handlereferral/) for Java.
# installPageUrl
suspend fun installPageUrl(returnScheme: [String](https://kotlinlang.org/api/core/kotlin-stdlib/kotlin/-string/index.html), sessionId: [String](https://kotlinlang.org/api/core/kotlin-stdlib/kotlin/-string/index.html)): [String](https://kotlinlang.org/api/core/kotlin-stdlib/kotlin/-string/index.html)
Wallet's hosted install page, carrying a fresh proof. Not the store listing — [openFrakApp](/developers/references/android/id-frak-sdk/applinkapi/openfrakapp/) handles that handoff itself.
#### Throws
| | |
|---|---|
| [FrakError](/developers/references/android/id-frak-sdk-core/frakerror/) | when the page cannot be minted: tracking is disabled, the device refused key material, or no merchant could be resolved. |
# installPageUrlAsync
fun installPageUrlAsync(returnScheme: [String](https://kotlinlang.org/api/core/kotlin-stdlib/kotlin/-string/index.html), sessionId: [String](https://kotlinlang.org/api/core/kotlin-stdlib/kotlin/-string/index.html)): [CompletableFuture](https://docs.oracle.com/en/java/javase/17/docs/api/java.base/java/util/concurrent/CompletableFuture.html)<[String](https://kotlinlang.org/api/core/kotlin-stdlib/kotlin/-string/index.html)>
[installPageUrl](/developers/references/android/id-frak-sdk/applinkapi/installpageurl/) for Java. Completes exceptionally with a [FrakError](/developers/references/android/id-frak-sdk-core/frakerror/) wrapped in a `CompletionException`.
# isFrakAppInstalled
fun isFrakAppInstalled(): [Boolean](https://kotlinlang.org/api/core/kotlin-stdlib/kotlin/-boolean/index.html)
# openFrakApp
suspend fun openFrakApp(): [OpenAppResult](/developers/references/android/id-frak-sdk/openappresult/)
Opens the wallet app if installed, else the Play Store listing with an install referrer.
# openFrakAppAsync
fun openFrakAppAsync(): [CompletableFuture](https://docs.oracle.com/en/java/javase/17/docs/api/java.base/java/util/concurrent/CompletableFuture.html)<[OpenAppResult](/developers/references/android/id-frak-sdk/openappresult/)>
[openFrakApp](/developers/references/android/id-frak-sdk/applinkapi/openfrakapp/) for Java.
# ConfigApi
class ConfigApi
Config resolution. Obtained from [FrakClient.config](/developers/references/android/id-frak-sdk/frakclient/config/).
Every suspending member has a `*Async` twin returning a [CompletableFuture](https://docs.oracle.com/en/java/javase/17/docs/api/java.base/java/util/concurrent/CompletableFuture.html) for Java callers; a [FrakError](/developers/references/android/id-frak-sdk-core/frakerror/) surfaces there wrapped in a `CompletionException`.
## Functions
| Name | Summary |
|---|---|
| [resolve](/developers/references/android/id-frak-sdk/configapi/resolve/) | suspend fun [resolve](/developers/references/android/id-frak-sdk/configapi/resolve/)(): [FrakResolvedConfig](/developers/references/android/id-frak-sdk-config/frakresolvedconfig/) Stale-while-revalidate; only call that reliably 404s on a bad merchant id. suspend fun [resolve](/developers/references/android/id-frak-sdk/configapi/resolve/)(forceRefresh: [Boolean](https://kotlinlang.org/api/core/kotlin-stdlib/kotlin/-boolean/index.html)): [FrakResolvedConfig](/developers/references/android/id-frak-sdk-config/frakresolvedconfig/) |
| [resolveAsync](/developers/references/android/id-frak-sdk/configapi/resolveasync/) | fun [resolveAsync](/developers/references/android/id-frak-sdk/configapi/resolveasync/)(): [CompletableFuture](https://docs.oracle.com/en/java/javase/17/docs/api/java.base/java/util/concurrent/CompletableFuture.html)<[FrakResolvedConfig](/developers/references/android/id-frak-sdk-config/frakresolvedconfig/)> [resolve](/developers/references/android/id-frak-sdk/configapi/resolve/) for Java. Completes on the main thread; blocking it from there throws. fun [resolveAsync](/developers/references/android/id-frak-sdk/configapi/resolveasync/)(forceRefresh: [Boolean](https://kotlinlang.org/api/core/kotlin-stdlib/kotlin/-boolean/index.html)): [CompletableFuture](https://docs.oracle.com/en/java/javase/17/docs/api/java.base/java/util/concurrent/CompletableFuture.html)<[FrakResolvedConfig](/developers/references/android/id-frak-sdk-config/frakresolvedconfig/)> [resolve](/developers/references/android/id-frak-sdk/configapi/resolve/) for Java. |
# resolve
suspend fun resolve(): [FrakResolvedConfig](/developers/references/android/id-frak-sdk-config/frakresolvedconfig/)
Stale-while-revalidate; only call that reliably 404s on a bad merchant id.
suspend fun resolve(forceRefresh: [Boolean](https://kotlinlang.org/api/core/kotlin-stdlib/kotlin/-boolean/index.html)): [FrakResolvedConfig](/developers/references/android/id-frak-sdk-config/frakresolvedconfig/)
#### Parameters
android
| | |
|---|---|
| forceRefresh | skips the cache-freshness check and the backoff. |
# resolveAsync
fun resolveAsync(): [CompletableFuture](https://docs.oracle.com/en/java/javase/17/docs/api/java.base/java/util/concurrent/CompletableFuture.html)<[FrakResolvedConfig](/developers/references/android/id-frak-sdk-config/frakresolvedconfig/)>
[resolve](/developers/references/android/id-frak-sdk/configapi/resolve/) for Java. Completes on the main thread; blocking it from there throws.
fun resolveAsync(forceRefresh: [Boolean](https://kotlinlang.org/api/core/kotlin-stdlib/kotlin/-boolean/index.html)): [CompletableFuture](https://docs.oracle.com/en/java/javase/17/docs/api/java.base/java/util/concurrent/CompletableFuture.html)<[FrakResolvedConfig](/developers/references/android/id-frak-sdk-config/frakresolvedconfig/)>
[resolve](/developers/references/android/id-frak-sdk/configapi/resolve/) for Java.
# Frak
object Frak
Entry point. Call [initialize](/developers/references/android/id-frak-sdk/frak/initialize/) once from `Application.onCreate`, then use [client](/developers/references/android/id-frak-sdk/frak/client/).
Java callers use `Frak.getClient()` and the `*Async` twin of every suspending member.
## Properties
| Name | Summary |
|---|---|
| [client](/developers/references/android/id-frak-sdk/frak/client/) | val [client](/developers/references/android/id-frak-sdk/frak/client/): [FrakClient](/developers/references/android/id-frak-sdk/frakclient/) |
| [clientOrNull](/developers/references/android/id-frak-sdk/frak/clientornull/) | val [clientOrNull](/developers/references/android/id-frak-sdk/frak/clientornull/): [FrakClient](/developers/references/android/id-frak-sdk/frakclient/)? Same as [client](/developers/references/android/id-frak-sdk/frak/client/), but null instead of throwing. |
| [isInitialized](/developers/references/android/id-frak-sdk/frak/isinitialized/) | val [isInitialized](/developers/references/android/id-frak-sdk/frak/isinitialized/): [Boolean](https://kotlinlang.org/api/core/kotlin-stdlib/kotlin/-boolean/index.html) Whether [initialize](/developers/references/android/id-frak-sdk/frak/initialize/) has run. For merchants guarding optional integrations. |
## Functions
| Name | Summary |
|---|---|
| [initialize](/developers/references/android/id-frak-sdk/frak/initialize/) | fun [initialize](/developers/references/android/id-frak-sdk/frak/initialize/)(context: Context, config: [FrakConfig](/developers/references/android/id-frak-sdk-core/frakconfig/)) Non-blocking, does no I/O, never throws. Second call is a no-op; first config wins. |
| [parseReferralLink](/developers/references/android/id-frak-sdk/frak/parsereferrallink/) | fun [parseReferralLink](/developers/references/android/id-frak-sdk/frak/parsereferrallink/)(url: [String](https://kotlinlang.org/api/core/kotlin-stdlib/kotlin/-string/index.html)): [FrakContext](/developers/references/android/id-frak-sdk-sharing/frakcontext/)? Pure and static; callable before [initialize](/developers/references/android/id-frak-sdk/frak/initialize/). Only decodes — does not track arrival. |
| [shutdown](/developers/references/android/id-frak-sdk/frak/shutdown/) | suspend fun [shutdown](/developers/references/android/id-frak-sdk/frak/shutdown/)() Tears the SDK down: cancels background coroutines, unregisters the deep-link observer, and drops the client so [initialize](/developers/references/android/id-frak-sdk/frak/initialize/) can run again. Not a privacy control — use [FrakClient.setTrackingEnabled](/developers/references/android/id-frak-sdk/frakclient/settrackingenabled/) for that. Idempotent; Java uses [shutdownAsync](/developers/references/android/id-frak-sdk/frak/shutdownasync/). |
| [shutdownAsync](/developers/references/android/id-frak-sdk/frak/shutdownasync/) | fun [shutdownAsync](/developers/references/android/id-frak-sdk/frak/shutdownasync/)(): [CompletableFuture](https://docs.oracle.com/en/java/javase/17/docs/api/java.base/java/util/concurrent/CompletableFuture.html)<[Void](https://docs.oracle.com/en/java/javase/17/docs/api/java.base/java/lang/Void.html)?> [shutdown](/developers/references/android/id-frak-sdk/frak/shutdown/) for Java. Runs on its own scope, not the client's, which `shutdown()` cancels. Blocking it from the main thread throws rather than deadlocking; sequence a following [initialize](/developers/references/android/id-frak-sdk/frak/initialize/) off the future (`thenRun`) rather than beside it, or the new client races the old one's teardown. |
# client
val client: [FrakClient](/developers/references/android/id-frak-sdk/frakclient/)
#### Throws
| | |
|---|---|
| [FrakError.NotInitialized](/developers/references/android/id-frak-sdk-core/frakerror/notinitialized/) | when [initialize](/developers/references/android/id-frak-sdk/frak/initialize/) has not run. |
# clientOrNull
val clientOrNull: [FrakClient](/developers/references/android/id-frak-sdk/frakclient/)?
Same as [client](/developers/references/android/id-frak-sdk/frak/client/), but null instead of throwing.
# initialize
fun initialize(context: Context, config: [FrakConfig](/developers/references/android/id-frak-sdk-core/frakconfig/))
Non-blocking, does no I/O, never throws. Second call is a no-op; first config wins.
# isInitialized
val isInitialized: [Boolean](https://kotlinlang.org/api/core/kotlin-stdlib/kotlin/-boolean/index.html)
Whether [initialize](/developers/references/android/id-frak-sdk/frak/initialize/) has run. For merchants guarding optional integrations.
# parseReferralLink
fun parseReferralLink(url: [String](https://kotlinlang.org/api/core/kotlin-stdlib/kotlin/-string/index.html)): [FrakContext](/developers/references/android/id-frak-sdk-sharing/frakcontext/)?
Pure and static; callable before [initialize](/developers/references/android/id-frak-sdk/frak/initialize/). Only decodes — does not track arrival.
# shutdown
suspend fun shutdown()
Tears the SDK down: cancels background coroutines, unregisters the deep-link observer, and drops the client so [initialize](/developers/references/android/id-frak-sdk/frak/initialize/) can run again. Not a privacy control — use [FrakClient.setTrackingEnabled](/developers/references/android/id-frak-sdk/frakclient/settrackingenabled/) for that. Idempotent; Java uses [shutdownAsync](/developers/references/android/id-frak-sdk/frak/shutdownasync/).
# shutdownAsync
fun shutdownAsync(): [CompletableFuture](https://docs.oracle.com/en/java/javase/17/docs/api/java.base/java/util/concurrent/CompletableFuture.html)<[Void](https://docs.oracle.com/en/java/javase/17/docs/api/java.base/java/lang/Void.html)?>
[shutdown](/developers/references/android/id-frak-sdk/frak/shutdown/) for Java. Runs on its own scope, not the client's, which `shutdown()` cancels. Blocking it from the main thread throws rather than deadlocking; sequence a following [initialize](/developers/references/android/id-frak-sdk/frak/initialize/) off the future (`thenRun`) rather than beside it, or the new client races the old one's teardown.
# FrakClient
class FrakClient
Everything the SDK can do. Obtained from [Frak.client](/developers/references/android/id-frak-sdk/frak/client/). Every suspending member has a `*Async` twin returning a [CompletableFuture](https://docs.oracle.com/en/java/javase/17/docs/api/java.base/java/util/concurrent/CompletableFuture.html), since a Java caller cannot name a `Continuation`.
How failure is signalled, one tier per kind of answer:
-
`T?` means **absence** — nothing was there, and that is a normal answer ([anonymousId](/developers/references/android/id-frak-sdk/frakclient/anonymousid/), [RewardsApi.best](/developers/references/android/id-frak-sdk/rewardsapi/best/), [SharingApi.buildLink](/developers/references/android/id-frak-sdk/sharingapi/buildlink/)'s null arm).
-
A sealed or enum type means **outcome** — several ends are all valid ([OpenAppResult](/developers/references/android/id-frak-sdk/openappresult/)).
-
`Boolean` means **predicate** ([AppLinkApi.isFrakAppInstalled](/developers/references/android/id-frak-sdk/applinkapi/isfrakappinstalled/)).
-
A thrown [id.frak.sdk.core.FrakError](/developers/references/android/id-frak-sdk-core/frakerror/) means **failure** — the call could have worked and did not ([ConfigApi.resolve](/developers/references/android/id-frak-sdk/configapi/resolve/), [RewardsApi.campaigns](/developers/references/android/id-frak-sdk/rewardsapi/campaigns/), [SharingApi.buildLink](/developers/references/android/id-frak-sdk/sharingapi/buildlink/), [AppLinkApi.installPageUrl](/developers/references/android/id-frak-sdk/applinkapi/installpageurl/)). Through an `*Async` twin this arrives as a `CompletionException` whose `cause` is the [id.frak.sdk.core.FrakError](/developers/references/android/id-frak-sdk-core/frakerror/).
[TrackingApi](/developers/references/android/id-frak-sdk/trackingapi/) is the one deliberate exception: it returns [id.frak.sdk.core.FrakResult](/developers/references/android/id-frak-sdk-core/frakresult/) and never throws, because it is called from hot paths where a disabled-tracking refusal is expected rather than exceptional. A tier change is invisible to the ABI dump, so it needs a `!` commit.
## Properties
| Name | Summary |
|---|---|
| [appLink](/developers/references/android/id-frak-sdk/frakclient/applink/) | val [appLink](/developers/references/android/id-frak-sdk/frakclient/applink/): [AppLinkApi](/developers/references/android/id-frak-sdk/applinkapi/) Inbound referral links and the wallet app handoff. |
| [config](/developers/references/android/id-frak-sdk/frakclient/config/) | val [config](/developers/references/android/id-frak-sdk/frakclient/config/): [ConfigApi](/developers/references/android/id-frak-sdk/configapi/) Config resolution and its live stream. |
| [environment](/developers/references/android/id-frak-sdk/frakclient/environment/) | val [environment](/developers/references/android/id-frak-sdk/frakclient/environment/): [FrakEnvironment](/developers/references/android/id-frak-sdk-core/frakenvironment/) The stage this client talks to. Merchants never set it directly, see [id.frak.sdk.core.FrakConfig.env](/developers/references/android/id-frak-sdk-core/frakconfig/env/). |
| [metadataLang](/developers/references/android/id-frak-sdk/frakclient/metadatalang/) | val [metadataLang](/developers/references/android/id-frak-sdk/frakclient/metadatalang/): [FrakLanguage](/developers/references/android/id-frak-sdk-core/fraklanguage/)? The merchant-supplied build-time language, for the same tier-3 copy. See [metadataName](/developers/references/android/id-frak-sdk/frakclient/metadataname/). |
| [metadataName](/developers/references/android/id-frak-sdk/frakclient/metadataname/) | val [metadataName](/developers/references/android/id-frak-sdk/frakclient/metadataname/): [String](https://kotlinlang.org/api/core/kotlin-stdlib/kotlin/-string/index.html)? The merchant-supplied build-time name. `public` only so `:frak-sdk-ui` can read it across the module boundary. |
| [rewards](/developers/references/android/id-frak-sdk/frakclient/rewards/) | val [rewards](/developers/references/android/id-frak-sdk/frakclient/rewards/): [RewardsApi](/developers/references/android/id-frak-sdk/rewardsapi/) Campaigns and the single best reward to advertise. |
| [sharing](/developers/references/android/id-frak-sdk/frakclient/sharing/) | val [sharing](/developers/references/android/id-frak-sdk/frakclient/sharing/): [SharingApi](/developers/references/android/id-frak-sdk/sharingapi/) Share link construction. |
| [tracking](/developers/references/android/id-frak-sdk/frakclient/tracking/) | val [tracking](/developers/references/android/id-frak-sdk/frakclient/tracking/): [TrackingApi](/developers/references/android/id-frak-sdk/trackingapi/) Interaction and purchase tracking. |
## Functions
| Name | Summary |
|---|---|
| [anonymousId](/developers/references/android/id-frak-sdk/frakclient/anonymousid/) | suspend fun [anonymousId](/developers/references/android/id-frak-sdk/frakclient/anonymousid/)(): [String](https://kotlinlang.org/api/core/kotlin-stdlib/kotlin/-string/index.html)? Anonymous id, or null when tracking is disabled or the device refused key material. |
| [anonymousIdAsync](/developers/references/android/id-frak-sdk/frakclient/anonymousidasync/) | fun [anonymousIdAsync](/developers/references/android/id-frak-sdk/frakclient/anonymousidasync/)(): [CompletableFuture](https://docs.oracle.com/en/java/javase/17/docs/api/java.base/java/util/concurrent/CompletableFuture.html)<[String](https://kotlinlang.org/api/core/kotlin-stdlib/kotlin/-string/index.html)?> [anonymousId](/developers/references/android/id-frak-sdk/frakclient/anonymousid/) for Java. |
| [isTrackingEnabled](/developers/references/android/id-frak-sdk/frakclient/istrackingenabled/) | suspend fun [isTrackingEnabled](/developers/references/android/id-frak-sdk/frakclient/istrackingenabled/)(): [Boolean](https://kotlinlang.org/api/core/kotlin-stdlib/kotlin/-boolean/index.html) Whether tracking is currently allowed: `FrakConfig.trackingEnabled` AND the persisted runtime decision. |
| [isTrackingEnabledAsync](/developers/references/android/id-frak-sdk/frakclient/istrackingenabledasync/) | fun [isTrackingEnabledAsync](/developers/references/android/id-frak-sdk/frakclient/istrackingenabledasync/)(): [CompletableFuture](https://docs.oracle.com/en/java/javase/17/docs/api/java.base/java/util/concurrent/CompletableFuture.html)<[Boolean](https://kotlinlang.org/api/core/kotlin-stdlib/kotlin/-boolean/index.html)> [isTrackingEnabled](/developers/references/android/id-frak-sdk/frakclient/istrackingenabled/) for Java. |
| [resetAnonymousId](/developers/references/android/id-frak-sdk/frakclient/resetanonymousid/) | suspend fun [resetAnonymousId](/developers/references/android/id-frak-sdk/frakclient/resetanonymousid/)(): [Boolean](https://kotlinlang.org/api/core/kotlin-stdlib/kotlin/-boolean/index.html) Destroys the keypair so the next [anonymousId](/developers/references/android/id-frak-sdk/frakclient/anonymousid/) mints a new identity. |
| [resetAnonymousIdAsync](/developers/references/android/id-frak-sdk/frakclient/resetanonymousidasync/) | fun [resetAnonymousIdAsync](/developers/references/android/id-frak-sdk/frakclient/resetanonymousidasync/)(): [CompletableFuture](https://docs.oracle.com/en/java/javase/17/docs/api/java.base/java/util/concurrent/CompletableFuture.html)<[Boolean](https://kotlinlang.org/api/core/kotlin-stdlib/kotlin/-boolean/index.html)> [resetAnonymousId](/developers/references/android/id-frak-sdk/frakclient/resetanonymousid/) for Java. |
| [setTrackingEnabled](/developers/references/android/id-frak-sdk/frakclient/settrackingenabled/) | suspend fun [setTrackingEnabled](/developers/references/android/id-frak-sdk/frakclient/settrackingenabled/)(enabled: [Boolean](https://kotlinlang.org/api/core/kotlin-stdlib/kotlin/-boolean/index.html)) Turns tracking on or off at runtime and persists the decision for this install. `false` purges anything still queued, which can discard purchase events not yet sent; `true` cannot lift a build shipping `trackingEnabled(false)`. Identity survives — see [resetAnonymousId](/developers/references/android/id-frak-sdk/frakclient/resetanonymousid/). |
| [setTrackingEnabledAsync](/developers/references/android/id-frak-sdk/frakclient/settrackingenabledasync/) | fun [setTrackingEnabledAsync](/developers/references/android/id-frak-sdk/frakclient/settrackingenabledasync/)(enabled: [Boolean](https://kotlinlang.org/api/core/kotlin-stdlib/kotlin/-boolean/index.html)): [CompletableFuture](https://docs.oracle.com/en/java/javase/17/docs/api/java.base/java/util/concurrent/CompletableFuture.html)<[Void](https://docs.oracle.com/en/java/javase/17/docs/api/java.base/java/lang/Void.html)?> [setTrackingEnabled](/developers/references/android/id-frak-sdk/frakclient/settrackingenabled/) for Java. |
# anonymousId
suspend fun anonymousId(): [String](https://kotlinlang.org/api/core/kotlin-stdlib/kotlin/-string/index.html)?
Anonymous id, or null when tracking is disabled or the device refused key material.
# anonymousIdAsync
fun anonymousIdAsync(): [CompletableFuture](https://docs.oracle.com/en/java/javase/17/docs/api/java.base/java/util/concurrent/CompletableFuture.html)<[String](https://kotlinlang.org/api/core/kotlin-stdlib/kotlin/-string/index.html)?>
[anonymousId](/developers/references/android/id-frak-sdk/frakclient/anonymousid/) for Java.
# appLink
val appLink: [AppLinkApi](/developers/references/android/id-frak-sdk/applinkapi/)
Inbound referral links and the wallet app handoff.
# config
val config: [ConfigApi](/developers/references/android/id-frak-sdk/configapi/)
Config resolution and its live stream.
# environment
val environment: [FrakEnvironment](/developers/references/android/id-frak-sdk-core/frakenvironment/)
The stage this client talks to. Merchants never set it directly, see [id.frak.sdk.core.FrakConfig.env](/developers/references/android/id-frak-sdk-core/frakconfig/env/).
# isTrackingEnabled
suspend fun isTrackingEnabled(): [Boolean](https://kotlinlang.org/api/core/kotlin-stdlib/kotlin/-boolean/index.html)
Whether tracking is currently allowed: `FrakConfig.trackingEnabled` AND the persisted runtime decision.
# isTrackingEnabledAsync
fun isTrackingEnabledAsync(): [CompletableFuture](https://docs.oracle.com/en/java/javase/17/docs/api/java.base/java/util/concurrent/CompletableFuture.html)<[Boolean](https://kotlinlang.org/api/core/kotlin-stdlib/kotlin/-boolean/index.html)>
[isTrackingEnabled](/developers/references/android/id-frak-sdk/frakclient/istrackingenabled/) for Java.
# metadataLang
val metadataLang: [FrakLanguage](/developers/references/android/id-frak-sdk-core/fraklanguage/)?
The merchant-supplied build-time language, for the same tier-3 copy. See [metadataName](/developers/references/android/id-frak-sdk/frakclient/metadataname/).
# metadataName
val metadataName: [String](https://kotlinlang.org/api/core/kotlin-stdlib/kotlin/-string/index.html)?
The merchant-supplied build-time name. `public` only so `:frak-sdk-ui` can read it across the module boundary.
# resetAnonymousId
suspend fun resetAnonymousId(): [Boolean](https://kotlinlang.org/api/core/kotlin-stdlib/kotlin/-boolean/index.html)
Destroys the keypair so the next [anonymousId](/developers/references/android/id-frak-sdk/frakclient/anonymousid/) mints a new identity.
This is a local identity rotation, not an Art. 17 erasure: events already sent stay attributed to the old id on Frak's side. Route an actual erasure request to https://frak.id/account-deletion.
#### Return
false when the platform keystore refused to erase the key; the identity did not rotate.
# resetAnonymousIdAsync
fun resetAnonymousIdAsync(): [CompletableFuture](https://docs.oracle.com/en/java/javase/17/docs/api/java.base/java/util/concurrent/CompletableFuture.html)<[Boolean](https://kotlinlang.org/api/core/kotlin-stdlib/kotlin/-boolean/index.html)>
[resetAnonymousId](/developers/references/android/id-frak-sdk/frakclient/resetanonymousid/) for Java.
# rewards
val rewards: [RewardsApi](/developers/references/android/id-frak-sdk/rewardsapi/)
Campaigns and the single best reward to advertise.
# setTrackingEnabled
suspend fun setTrackingEnabled(enabled: [Boolean](https://kotlinlang.org/api/core/kotlin-stdlib/kotlin/-boolean/index.html))
Turns tracking on or off at runtime and persists the decision for this install. `false` purges anything still queued, which can discard purchase events not yet sent; `true` cannot lift a build shipping `trackingEnabled(false)`. Identity survives — see [resetAnonymousId](/developers/references/android/id-frak-sdk/frakclient/resetanonymousid/).
# setTrackingEnabledAsync
fun setTrackingEnabledAsync(enabled: [Boolean](https://kotlinlang.org/api/core/kotlin-stdlib/kotlin/-boolean/index.html)): [CompletableFuture](https://docs.oracle.com/en/java/javase/17/docs/api/java.base/java/util/concurrent/CompletableFuture.html)<[Void](https://docs.oracle.com/en/java/javase/17/docs/api/java.base/java/lang/Void.html)?>
[setTrackingEnabled](/developers/references/android/id-frak-sdk/frakclient/settrackingenabled/) for Java.
# sharing
val sharing: [SharingApi](/developers/references/android/id-frak-sdk/sharingapi/)
Share link construction.
# tracking
val tracking: [TrackingApi](/developers/references/android/id-frak-sdk/trackingapi/)
Interaction and purchase tracking.
# FrakSdkVersion
object FrakSdkVersion
Version of this SDK build, sent on every request. `@JvmStatic val` rather than `const val`: a `const` is inlined into the merchant's bytecode and would report their compile-time version.
## Properties
| Name | Summary |
|---|---|
| [CURRENT](/developers/references/android/id-frak-sdk/fraksdkversion/current/) | val [CURRENT](/developers/references/android/id-frak-sdk/fraksdkversion/current/): [String](https://kotlinlang.org/api/core/kotlin-stdlib/kotlin/-string/index.html) Keep in step with `frak.sdk.version` in `gradle.properties`; the build checks it. |
| [HEADER_NAME](/developers/references/android/id-frak-sdk/fraksdkversion/header_name/) | val [HEADER_NAME](/developers/references/android/id-frak-sdk/fraksdkversion/header_name/): [String](https://kotlinlang.org/api/core/kotlin-stdlib/kotlin/-string/index.html) Wire plumbing for `HttpClient`; not merchant API. |
| [HEADER_VALUE](/developers/references/android/id-frak-sdk/fraksdkversion/header_value/) | val [HEADER_VALUE](/developers/references/android/id-frak-sdk/fraksdkversion/header_value/): [String](https://kotlinlang.org/api/core/kotlin-stdlib/kotlin/-string/index.html) What [HEADER_NAME](/developers/references/android/id-frak-sdk/fraksdkversion/header_name/) carries. Platform-prefixed: the version alone is identical on both SDKs, so a fleet of frozen binaries is otherwise indistinguishable on the wire. |
| [QUERY_PARAMETER_NAME](/developers/references/android/id-frak-sdk/fraksdkversion/query_parameter_name/) | val [QUERY_PARAMETER_NAME](/developers/references/android/id-frak-sdk/fraksdkversion/query_parameter_name/): [String](https://kotlinlang.org/api/core/kotlin-stdlib/kotlin/-string/index.html) Wire plumbing for `:frak-sdk-ui`'s page URLs; not merchant API. |
# CURRENT
val CURRENT: [String](https://kotlinlang.org/api/core/kotlin-stdlib/kotlin/-string/index.html)
Keep in step with `frak.sdk.version` in `gradle.properties`; the build checks it.
# HEADER_NAME
val HEADER_NAME: [String](https://kotlinlang.org/api/core/kotlin-stdlib/kotlin/-string/index.html)
Wire plumbing for `HttpClient`; not merchant API.
# HEADER_VALUE
val HEADER_VALUE: [String](https://kotlinlang.org/api/core/kotlin-stdlib/kotlin/-string/index.html)
What [HEADER_NAME](/developers/references/android/id-frak-sdk/fraksdkversion/header_name/) carries. Platform-prefixed: the version alone is identical on both SDKs, so a fleet of frozen binaries is otherwise indistinguishable on the wire.
# QUERY_PARAMETER_NAME
val QUERY_PARAMETER_NAME: [String](https://kotlinlang.org/api/core/kotlin-stdlib/kotlin/-string/index.html)
Wire plumbing for `:frak-sdk-ui`'s page URLs; not merchant API.
# InternalFrakApi
@[Target](https://kotlinlang.org/api/core/kotlin-stdlib/kotlin.annotation/-target/index.html)(allowedTargets = [[AnnotationTarget.CLASS](https://kotlinlang.org/api/core/kotlin-stdlib/kotlin.annotation/-annotation-target/-c-l-a-s-s/index.html), [AnnotationTarget.PROPERTY](https://kotlinlang.org/api/core/kotlin-stdlib/kotlin.annotation/-annotation-target/-p-r-o-p-e-r-t-y/index.html), [AnnotationTarget.FUNCTION](https://kotlinlang.org/api/core/kotlin-stdlib/kotlin.annotation/-annotation-target/-f-u-n-c-t-i-o-n/index.html), [AnnotationTarget.CONSTRUCTOR](https://kotlinlang.org/api/core/kotlin-stdlib/kotlin.annotation/-annotation-target/-c-o-n-s-t-r-u-c-t-o-r/index.html)])
annotation class InternalFrakApi
Marks a declaration that is `public` only so the sibling `:frak-sdk-ui` module can see it, with no compatibility guarantee. Wired into binary-compatibility-validator's `nonPublicMarkers`, so marked types stay out of the committed `.api` dump.
# OpenAppResult
enum OpenAppResult : [Enum](https://kotlinlang.org/api/core/kotlin-stdlib/kotlin/-enum/index.html)<OpenAppResult>
## Entries
| | |
|---|---|
| [OpenedApp](/developers/references/android/id-frak-sdk/openappresult/openedapp/) | [OpenedApp](/developers/references/android/id-frak-sdk/openappresult/openedapp/) |
| [OpenedStore](/developers/references/android/id-frak-sdk/openappresult/openedstore/) | [OpenedStore](/developers/references/android/id-frak-sdk/openappresult/openedstore/) |
| [Failed](/developers/references/android/id-frak-sdk/openappresult/failed/) | [Failed](/developers/references/android/id-frak-sdk/openappresult/failed/) |
## Functions
| Name | Summary |
|---|---|
| [valueOf](/developers/references/android/id-frak-sdk/openappresult/valueof/) | fun [valueOf](/developers/references/android/id-frak-sdk/openappresult/valueof/)(value: [String](https://kotlinlang.org/api/core/kotlin-stdlib/kotlin/-string/index.html)): OpenAppResult Returns the enum constant of this type with the specified name. The string must match exactly an identifier used to declare an enum constant in this type. (Extraneous whitespace characters are not permitted.) |
| [values](/developers/references/android/id-frak-sdk/openappresult/values/) | fun [values](/developers/references/android/id-frak-sdk/openappresult/values/)(): [Array](https://kotlinlang.org/api/core/kotlin-stdlib/kotlin/-array/index.html)<OpenAppResult> Returns an array containing the constants of this enum type, in the order they're declared. |
# Failed
Failed
# OpenedApp
OpenedApp
# OpenedStore
OpenedStore
# valueOf
fun valueOf(value: [String](https://kotlinlang.org/api/core/kotlin-stdlib/kotlin/-string/index.html)): [OpenAppResult](/developers/references/android/id-frak-sdk/openappresult/)
Returns the enum constant of this type with the specified name. The string must match exactly an identifier used to declare an enum constant in this type. (Extraneous whitespace characters are not permitted.)
#### Throws
| | |
|---|---|
| kotlin.IllegalArgumentException | if this enum type has no constant with the specified name |
# values
fun values(): [Array](https://kotlinlang.org/api/core/kotlin-stdlib/kotlin/-array/index.html)<[OpenAppResult](/developers/references/android/id-frak-sdk/openappresult/)>
Returns an array containing the constants of this enum type, in the order they're declared.
This method may be used to iterate over the constants.
# RewardsApi
class RewardsApi
Campaigns and reward selection. Obtained from [FrakClient.rewards](/developers/references/android/id-frak-sdk/frakclient/rewards/).
## Functions
| Name | Summary |
|---|---|
| [best](/developers/references/android/id-frak-sdk/rewardsapi/best/) | suspend fun [best](/developers/references/android/id-frak-sdk/rewardsapi/best/)(request: [RewardRequest](/developers/references/android/id-frak-sdk-rewards/rewardrequest/)): [BestReward](/developers/references/android/id-frak-sdk-rewards/bestreward/)? Reward worth advertising, formatted server-side; null when nothing matches. suspend fun [best](/developers/references/android/id-frak-sdk/rewardsapi/best/)(request: [RewardRequest](/developers/references/android/id-frak-sdk-rewards/rewardrequest/), forceRefresh: [Boolean](https://kotlinlang.org/api/core/kotlin-stdlib/kotlin/-boolean/index.html)): [BestReward](/developers/references/android/id-frak-sdk-rewards/bestreward/)? |
| [bestAsync](/developers/references/android/id-frak-sdk/rewardsapi/bestasync/) | fun [bestAsync](/developers/references/android/id-frak-sdk/rewardsapi/bestasync/)(request: [RewardRequest](/developers/references/android/id-frak-sdk-rewards/rewardrequest/)): [CompletableFuture](https://docs.oracle.com/en/java/javase/17/docs/api/java.base/java/util/concurrent/CompletableFuture.html)<[BestReward](/developers/references/android/id-frak-sdk-rewards/bestreward/)?> fun [bestAsync](/developers/references/android/id-frak-sdk/rewardsapi/bestasync/)(request: [RewardRequest](/developers/references/android/id-frak-sdk-rewards/rewardrequest/), forceRefresh: [Boolean](https://kotlinlang.org/api/core/kotlin-stdlib/kotlin/-boolean/index.html)): [CompletableFuture](https://docs.oracle.com/en/java/javase/17/docs/api/java.base/java/util/concurrent/CompletableFuture.html)<[BestReward](/developers/references/android/id-frak-sdk-rewards/bestreward/)?> [best](/developers/references/android/id-frak-sdk/rewardsapi/best/) for Java. |
| [campaigns](/developers/references/android/id-frak-sdk/rewardsapi/campaigns/) | suspend fun [campaigns](/developers/references/android/id-frak-sdk/rewardsapi/campaigns/)(): [List](https://kotlinlang.org/api/core/kotlin-stdlib/kotlin.collections/-list/index.html)<[Campaign](/developers/references/android/id-frak-sdk-rewards/campaign/)> Active campaigns for this merchant, highest priority first. suspend fun [campaigns](/developers/references/android/id-frak-sdk/rewardsapi/campaigns/)(forceRefresh: [Boolean](https://kotlinlang.org/api/core/kotlin-stdlib/kotlin/-boolean/index.html)): [List](https://kotlinlang.org/api/core/kotlin-stdlib/kotlin.collections/-list/index.html)<[Campaign](/developers/references/android/id-frak-sdk-rewards/campaign/)> |
| [campaignsAsync](/developers/references/android/id-frak-sdk/rewardsapi/campaignsasync/) | fun [campaignsAsync](/developers/references/android/id-frak-sdk/rewardsapi/campaignsasync/)(): [CompletableFuture](https://docs.oracle.com/en/java/javase/17/docs/api/java.base/java/util/concurrent/CompletableFuture.html)<[List](https://kotlinlang.org/api/core/kotlin-stdlib/kotlin.collections/-list/index.html)<[Campaign](/developers/references/android/id-frak-sdk-rewards/campaign/)>> fun [campaignsAsync](/developers/references/android/id-frak-sdk/rewardsapi/campaignsasync/)(forceRefresh: [Boolean](https://kotlinlang.org/api/core/kotlin-stdlib/kotlin/-boolean/index.html)): [CompletableFuture](https://docs.oracle.com/en/java/javase/17/docs/api/java.base/java/util/concurrent/CompletableFuture.html)<[List](https://kotlinlang.org/api/core/kotlin-stdlib/kotlin.collections/-list/index.html)<[Campaign](/developers/references/android/id-frak-sdk-rewards/campaign/)>> [campaigns](/developers/references/android/id-frak-sdk/rewardsapi/campaigns/) for Java. |
# best
suspend fun best(request: [RewardRequest](/developers/references/android/id-frak-sdk-rewards/rewardrequest/)): [BestReward](/developers/references/android/id-frak-sdk-rewards/bestreward/)?
Reward worth advertising, formatted server-side; null when nothing matches.
Call once per screen for the whole visible product set, not once per row: the cache is keyed on the encoded product list, so per-row calls multiply cache keys and requests.
suspend fun best(request: [RewardRequest](/developers/references/android/id-frak-sdk-rewards/rewardrequest/), forceRefresh: [Boolean](https://kotlinlang.org/api/core/kotlin-stdlib/kotlin/-boolean/index.html)): [BestReward](/developers/references/android/id-frak-sdk-rewards/bestreward/)?
#### Parameters
android
| | |
|---|---|
| forceRefresh | skips the cache and the backoff. |
# bestAsync
fun bestAsync(request: [RewardRequest](/developers/references/android/id-frak-sdk-rewards/rewardrequest/)): [CompletableFuture](https://docs.oracle.com/en/java/javase/17/docs/api/java.base/java/util/concurrent/CompletableFuture.html)<[BestReward](/developers/references/android/id-frak-sdk-rewards/bestreward/)?>
fun bestAsync(request: [RewardRequest](/developers/references/android/id-frak-sdk-rewards/rewardrequest/), forceRefresh: [Boolean](https://kotlinlang.org/api/core/kotlin-stdlib/kotlin/-boolean/index.html)): [CompletableFuture](https://docs.oracle.com/en/java/javase/17/docs/api/java.base/java/util/concurrent/CompletableFuture.html)<[BestReward](/developers/references/android/id-frak-sdk-rewards/bestreward/)?>
[best](/developers/references/android/id-frak-sdk/rewardsapi/best/) for Java.
# campaigns
suspend fun campaigns(): [List](https://kotlinlang.org/api/core/kotlin-stdlib/kotlin.collections/-list/index.html)<[Campaign](/developers/references/android/id-frak-sdk-rewards/campaign/)>
Active campaigns for this merchant, highest priority first.
suspend fun campaigns(forceRefresh: [Boolean](https://kotlinlang.org/api/core/kotlin-stdlib/kotlin/-boolean/index.html)): [List](https://kotlinlang.org/api/core/kotlin-stdlib/kotlin.collections/-list/index.html)<[Campaign](/developers/references/android/id-frak-sdk-rewards/campaign/)>
#### Parameters
android
| | |
|---|---|
| forceRefresh | skips the cache and the backoff. |
# campaignsAsync
fun campaignsAsync(): [CompletableFuture](https://docs.oracle.com/en/java/javase/17/docs/api/java.base/java/util/concurrent/CompletableFuture.html)<[List](https://kotlinlang.org/api/core/kotlin-stdlib/kotlin.collections/-list/index.html)<[Campaign](/developers/references/android/id-frak-sdk-rewards/campaign/)>>
fun campaignsAsync(forceRefresh: [Boolean](https://kotlinlang.org/api/core/kotlin-stdlib/kotlin/-boolean/index.html)): [CompletableFuture](https://docs.oracle.com/en/java/javase/17/docs/api/java.base/java/util/concurrent/CompletableFuture.html)<[List](https://kotlinlang.org/api/core/kotlin-stdlib/kotlin.collections/-list/index.html)<[Campaign](/developers/references/android/id-frak-sdk-rewards/campaign/)>>
[campaigns](/developers/references/android/id-frak-sdk/rewardsapi/campaigns/) for Java.
# SharingApi
class SharingApi
Share link construction. Obtained from [FrakClient.sharing](/developers/references/android/id-frak-sdk/frakclient/sharing/).
## Functions
| Name | Summary |
|---|---|
| [buildLink](/developers/references/android/id-frak-sdk/sharingapi/buildlink/) | suspend fun [buildLink](/developers/references/android/id-frak-sdk/sharingapi/buildlink/)(request: [SharingRequest](/developers/references/android/id-frak-sdk-sharing/sharingrequest/)): [String](https://kotlinlang.org/api/core/kotlin-stdlib/kotlin/-string/index.html)? Builds a share link for [request](/developers/references/android/id-frak-sdk/sharingapi/buildlink/). |
| [buildLinkAsync](/developers/references/android/id-frak-sdk/sharingapi/buildlinkasync/) | fun [buildLinkAsync](/developers/references/android/id-frak-sdk/sharingapi/buildlinkasync/)(request: [SharingRequest](/developers/references/android/id-frak-sdk-sharing/sharingrequest/)): [CompletableFuture](https://docs.oracle.com/en/java/javase/17/docs/api/java.base/java/util/concurrent/CompletableFuture.html)<[String](https://kotlinlang.org/api/core/kotlin-stdlib/kotlin/-string/index.html)?> [buildLink](/developers/references/android/id-frak-sdk/sharingapi/buildlink/) for Java. Completes with null on the same "nothing to link to" path, and completes exceptionally with a [FrakError](/developers/references/android/id-frak-sdk-core/frakerror/) wrapped in a `CompletionException` otherwise. |
# buildLink
suspend fun buildLink(request: [SharingRequest](/developers/references/android/id-frak-sdk-sharing/sharingrequest/)): [String](https://kotlinlang.org/api/core/kotlin-stdlib/kotlin/-string/index.html)?
Builds a share link for request.
#### Return
null only when there is nothing to link to: the request carried no link, none of its products did, and neither the resolved config nor [id.frak.sdk.core.FrakMetadata.homepageLink](/developers/references/android/id-frak-sdk-core/frakmetadata/homepagelink/) supplies one. That is answerable without a network round trip, so it is an absence rather than a failure.
#### Throws
| | |
|---|---|
| [FrakError](/developers/references/android/id-frak-sdk-core/frakerror/) | when a link could have been built but could not be: tracking is disabled, the device refused key material, or no merchant could be resolved. |
# buildLinkAsync
fun buildLinkAsync(request: [SharingRequest](/developers/references/android/id-frak-sdk-sharing/sharingrequest/)): [CompletableFuture](https://docs.oracle.com/en/java/javase/17/docs/api/java.base/java/util/concurrent/CompletableFuture.html)<[String](https://kotlinlang.org/api/core/kotlin-stdlib/kotlin/-string/index.html)?>
[buildLink](/developers/references/android/id-frak-sdk/sharingapi/buildlink/) for Java. Completes with null on the same "nothing to link to" path, and completes exceptionally with a [FrakError](/developers/references/android/id-frak-sdk-core/frakerror/) wrapped in a `CompletionException` otherwise.
# TrackingApi
class TrackingApi
Interaction and purchase tracking. Obtained from [FrakClient.tracking](/developers/references/android/id-frak-sdk/frakclient/tracking/).
## Functions
| Name | Summary |
|---|---|
| [purchase](/developers/references/android/id-frak-sdk/trackingapi/purchase/) | suspend fun [purchase](/developers/references/android/id-frak-sdk/trackingapi/purchase/)(customerId: [String](https://kotlinlang.org/api/core/kotlin-stdlib/kotlin/-string/index.html), orderId: [String](https://kotlinlang.org/api/core/kotlin-stdlib/kotlin/-string/index.html), token: [String](https://kotlinlang.org/api/core/kotlin-stdlib/kotlin/-string/index.html)): [FrakResult](/developers/references/android/id-frak-sdk-core/frakresult/)<[Unit](https://kotlinlang.org/api/core/kotlin-stdlib/kotlin/-unit/index.html)> Records a purchase; same enqueue-then-send contract as [track](/developers/references/android/id-frak-sdk/trackingapi/track/). |
| [purchaseAsync](/developers/references/android/id-frak-sdk/trackingapi/purchaseasync/) | fun [purchaseAsync](/developers/references/android/id-frak-sdk/trackingapi/purchaseasync/)(customerId: [String](https://kotlinlang.org/api/core/kotlin-stdlib/kotlin/-string/index.html), orderId: [String](https://kotlinlang.org/api/core/kotlin-stdlib/kotlin/-string/index.html), token: [String](https://kotlinlang.org/api/core/kotlin-stdlib/kotlin/-string/index.html)): [CompletableFuture](https://docs.oracle.com/en/java/javase/17/docs/api/java.base/java/util/concurrent/CompletableFuture.html)<[FrakResult](/developers/references/android/id-frak-sdk-core/frakresult/)<[Unit](https://kotlinlang.org/api/core/kotlin-stdlib/kotlin/-unit/index.html)>> [purchase](/developers/references/android/id-frak-sdk/trackingapi/purchase/) for Java. |
| [track](/developers/references/android/id-frak-sdk/trackingapi/track/) | suspend fun [track](/developers/references/android/id-frak-sdk/trackingapi/track/)(interaction: [Interaction](/developers/references/android/id-frak-sdk-tracking/interaction/)): [FrakResult](/developers/references/android/id-frak-sdk-core/frakresult/)<[Unit](https://kotlinlang.org/api/core/kotlin-stdlib/kotlin/-unit/index.html)> Records an [Interaction](/developers/references/android/id-frak-sdk-tracking/interaction/); succeeds once durable, not once delivered (queued, oldest-first). |
| [trackAsync](/developers/references/android/id-frak-sdk/trackingapi/trackasync/) | fun [trackAsync](/developers/references/android/id-frak-sdk/trackingapi/trackasync/)(interaction: [Interaction](/developers/references/android/id-frak-sdk-tracking/interaction/)): [CompletableFuture](https://docs.oracle.com/en/java/javase/17/docs/api/java.base/java/util/concurrent/CompletableFuture.html)<[FrakResult](/developers/references/android/id-frak-sdk-core/frakresult/)<[Unit](https://kotlinlang.org/api/core/kotlin-stdlib/kotlin/-unit/index.html)>> [track](/developers/references/android/id-frak-sdk/trackingapi/track/) for Java. |
# purchase
suspend fun purchase(customerId: [String](https://kotlinlang.org/api/core/kotlin-stdlib/kotlin/-string/index.html), orderId: [String](https://kotlinlang.org/api/core/kotlin-stdlib/kotlin/-string/index.html), token: [String](https://kotlinlang.org/api/core/kotlin-stdlib/kotlin/-string/index.html)): [FrakResult](/developers/references/android/id-frak-sdk-core/frakresult/)<[Unit](https://kotlinlang.org/api/core/kotlin-stdlib/kotlin/-unit/index.html)>
Records a purchase; same enqueue-then-send contract as [track](/developers/references/android/id-frak-sdk/trackingapi/track/).
# purchaseAsync
fun purchaseAsync(customerId: [String](https://kotlinlang.org/api/core/kotlin-stdlib/kotlin/-string/index.html), orderId: [String](https://kotlinlang.org/api/core/kotlin-stdlib/kotlin/-string/index.html), token: [String](https://kotlinlang.org/api/core/kotlin-stdlib/kotlin/-string/index.html)): [CompletableFuture](https://docs.oracle.com/en/java/javase/17/docs/api/java.base/java/util/concurrent/CompletableFuture.html)<[FrakResult](/developers/references/android/id-frak-sdk-core/frakresult/)<[Unit](https://kotlinlang.org/api/core/kotlin-stdlib/kotlin/-unit/index.html)>>
[purchase](/developers/references/android/id-frak-sdk/trackingapi/purchase/) for Java.
# track
suspend fun track(interaction: [Interaction](/developers/references/android/id-frak-sdk-tracking/interaction/)): [FrakResult](/developers/references/android/id-frak-sdk-core/frakresult/)<[Unit](https://kotlinlang.org/api/core/kotlin-stdlib/kotlin/-unit/index.html)>
Records an [Interaction](/developers/references/android/id-frak-sdk-tracking/interaction/); succeeds once durable, not once delivered (queued, oldest-first).
# trackAsync
fun trackAsync(interaction: [Interaction](/developers/references/android/id-frak-sdk-tracking/interaction/)): [CompletableFuture](https://docs.oracle.com/en/java/javase/17/docs/api/java.base/java/util/concurrent/CompletableFuture.html)<[FrakResult](/developers/references/android/id-frak-sdk-core/frakresult/)<[Unit](https://kotlinlang.org/api/core/kotlin-stdlib/kotlin/-unit/index.html)>>
[track](/developers/references/android/id-frak-sdk/trackingapi/track/) for Java.
# Banner
> **Banner**(`__namedParameters`): `Element` \| `null`
Defined in: vendor/wallet/sdk/components/src/components/Banner/Banner.tsx:77
Auto-detecting notification banner component.
Renders an inline banner on the merchant page with one of two distinct
visual styles depending on the detected mode:
- **Referral mode** (white): Shown after a successful referral link
processing. Displays a gift icon, reward copy, and a "Got it" CTA.
- **In-app browser mode** (dark transparent): Shown when the page is
opened inside a social media in-app browser (Instagram, Facebook).
Offers an inline link to redirect to the default browser plus a
close button to dismiss.
In-app browser mode takes priority over referral mode.
Uses Light DOM + vanilla-extract styles from `@frak-labs/design-system`.
## Parameters
### \_\_namedParameters
#### allowInappRedirect?
`boolean` \| `"true"` \| `"false"`
When `true` (default `false`), the banner is allowed to switch to
in-app browser mode (Instagram / Facebook WebView) and prompt the
user to escape to the system browser.
Most flows now work inside in-app browsers via the anonymous-id
flow, so the redirect is opt-in. Enable it only on surfaces that
actually drive users into a WebAuthn-bound action (login,
sendTransaction, SIWE authenticate).
Accepts the boolean `true` (TS/JSX) or the string `"true"` (HTML
attribute). Any other value — including `false`, `"false"`, the
empty string, or attribute absence — keeps the redirect disabled.
#### classname?
`string` = `""`
CSS class names passed through to the root element (Light DOM).
#### imageUrl?
`string`
Override the image displayed on the left of the referral banner.
Accepts an image URL. Falls back to the built-in gift icon when omitted.
The image is constrained to the icon slot via `object-fit: contain`,
so any aspect ratio renders correctly.
#### inappCta?
`string`
Override the in-app browser banner CTA button text.
#### inappDescription?
`string`
Override the in-app browser banner description.
#### inappTitle?
`string`
Override the in-app browser banner title.
#### interaction?
`"referral"` \| `"create_referral_link"` \| `"purchase"` \| `` `custom.${string}` ``
Filter rewards by interaction type (e.g. "purchase", "referral").
When omitted, the best reward across all interaction types is shown.
#### placement?
`string`
Placement ID for backend-driven CSS customization.
#### preview?
`string`
When set, forces the banner to render in preview mode (e.g. in Shopify theme editor).
Bypasses normal event/browser detection and shows static content.
#### previewMode?
`"referral"` \| `"inapp"`
Which banner variant to preview: "referral" or "inapp".
Only used when preview is set. Defaults to "referral".
#### products?
`string` \| `ProductDetails`[]
Products currently in view, used to prefer a campaign whose
`productScope` matches one of them when picking the reward to advertise.
Accepts a ProductDetails array (JS property) or a
JSON-stringified array (HTML attribute).
#### referralCta?
`string`
Override the referral banner CTA button text.
#### referralDescription?
`string`
Override the referral banner description.
#### referralTitle?
`string`
Override the referral banner title.
## Returns
`Element` \| `null`
## Examples
Basic usage (auto-detects mode):
```html
```
With a custom class:
```html
```
# ButtonShare
> **ButtonShare**(`args`): `Element` \| `null`
Defined in: vendor/wallet/sdk/components/src/components/ButtonShare/ButtonShare.tsx:71
Button to share the current page
## Parameters
### args
#### classname?
`string` = `""`
Classname to apply to the button
#### clickAction?
`string` & \{ \} \| `"sharing-page"`
Reported on the `share_button_clicked` event.
It no longer selects anything: every click opens the full-page sharing
UI. Retired values (`"share-modal"`, `"embedded-wallet"`) stay accepted
because merchant configs and saved plugin markup still carry them, and
the resolved value is reported as-is so a legacy config stays visible in
analytics.
**Default Value**
`"sharing-page"`
#### noRewardText?
`string`
Fallback text when `text` contains the `{REWARD}` placeholder but no
reward is available.
#### placement?
`string`
#### preview?
`string`
When set, renders the button in preview mode (e.g. Shopify/WP editor).
Skips the client-ready gating so the button is always enabled visually,
and no-ops the click handler so merchants can see the final layout with
their configured copy even when no Frak client is initialized.
#### products?
`string` \| `SharingPageProduct`[]
Products currently in view, used to prefer a campaign whose
`productScope` matches one of them when picking the reward to advertise,
and forwarded to the sharing page so it can render product cards.
Accepts a SharingPageProduct array (JS property) or a
JSON-stringified array (HTML attribute).
#### targetInteraction?
`"referral"` \| `"create_referral_link"` \| `"purchase"` \| `` `custom.${string}` ``
Target interaction behind this sharing action (will be used to get the right reward to display)
#### text?
`string`
Text to display on the button.
Including the placeholder `{REWARD}` (e.g. `Share and earn up to \{REWARD\}!`)
opts the button into the live reward flow: the SDK fetches the
estimated reward and substitutes the placeholder. When no reward is
available, `noRewardText` is used as a fallback (or the placeholder is
stripped if no fallback is provided).
When omitted, a built-in localized default is used based on the
resolved language (`"Share & earn {REWARD}!"` / `"Partagez et gagnez
{REWARD} !"`) — mirroring the dashboard's first wording preset.
## Returns
`Element` \| `null`
The share button with `